VuLink Operation & Installation Guide 860-00198-00 REV A
Digital Ally, Inc. | VuLink Configuration
DVM-800, DVM-250, and DVM-250Plus Device Configuration
From your VuVault or Configuration Manager Settings tab, enable the desired sensor to be
used with VuLink. Using this configuration, the FirstVu HD will be enabled to trigger device
recordings and have a customized trigger name. This customized name will become a
searchable parameter if using VuVault.
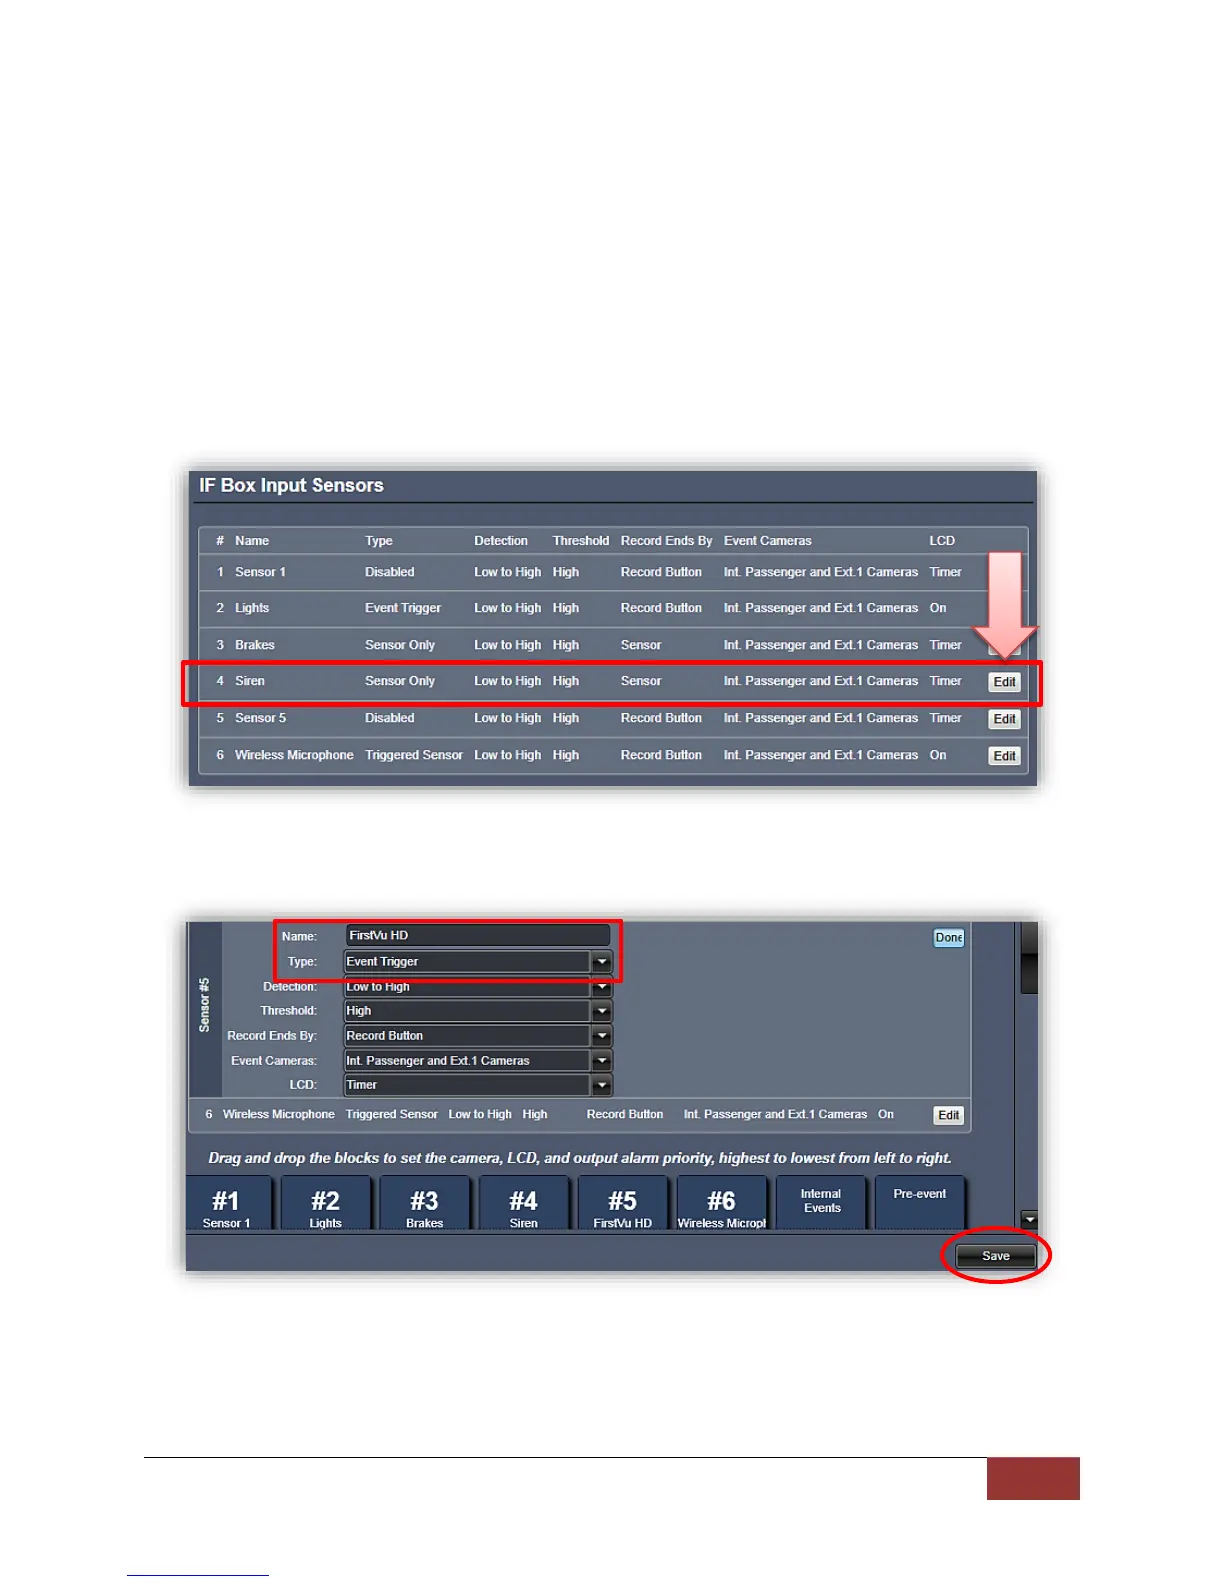
1. Go to the IF Box Input Sensors tab. Select the Sensor 5 row and press Edit.
2. Select a name for the Sensor #5 VuLink trigger. Change Type to Event Trigger. When
done, press Save.
3. You will need to re-activate your DVM with the new device configuration. Consult your
device Operation Guide for instructions.
 Loading...