Dometic Interact Installation
11
EN
3.3 Installing the DB-100
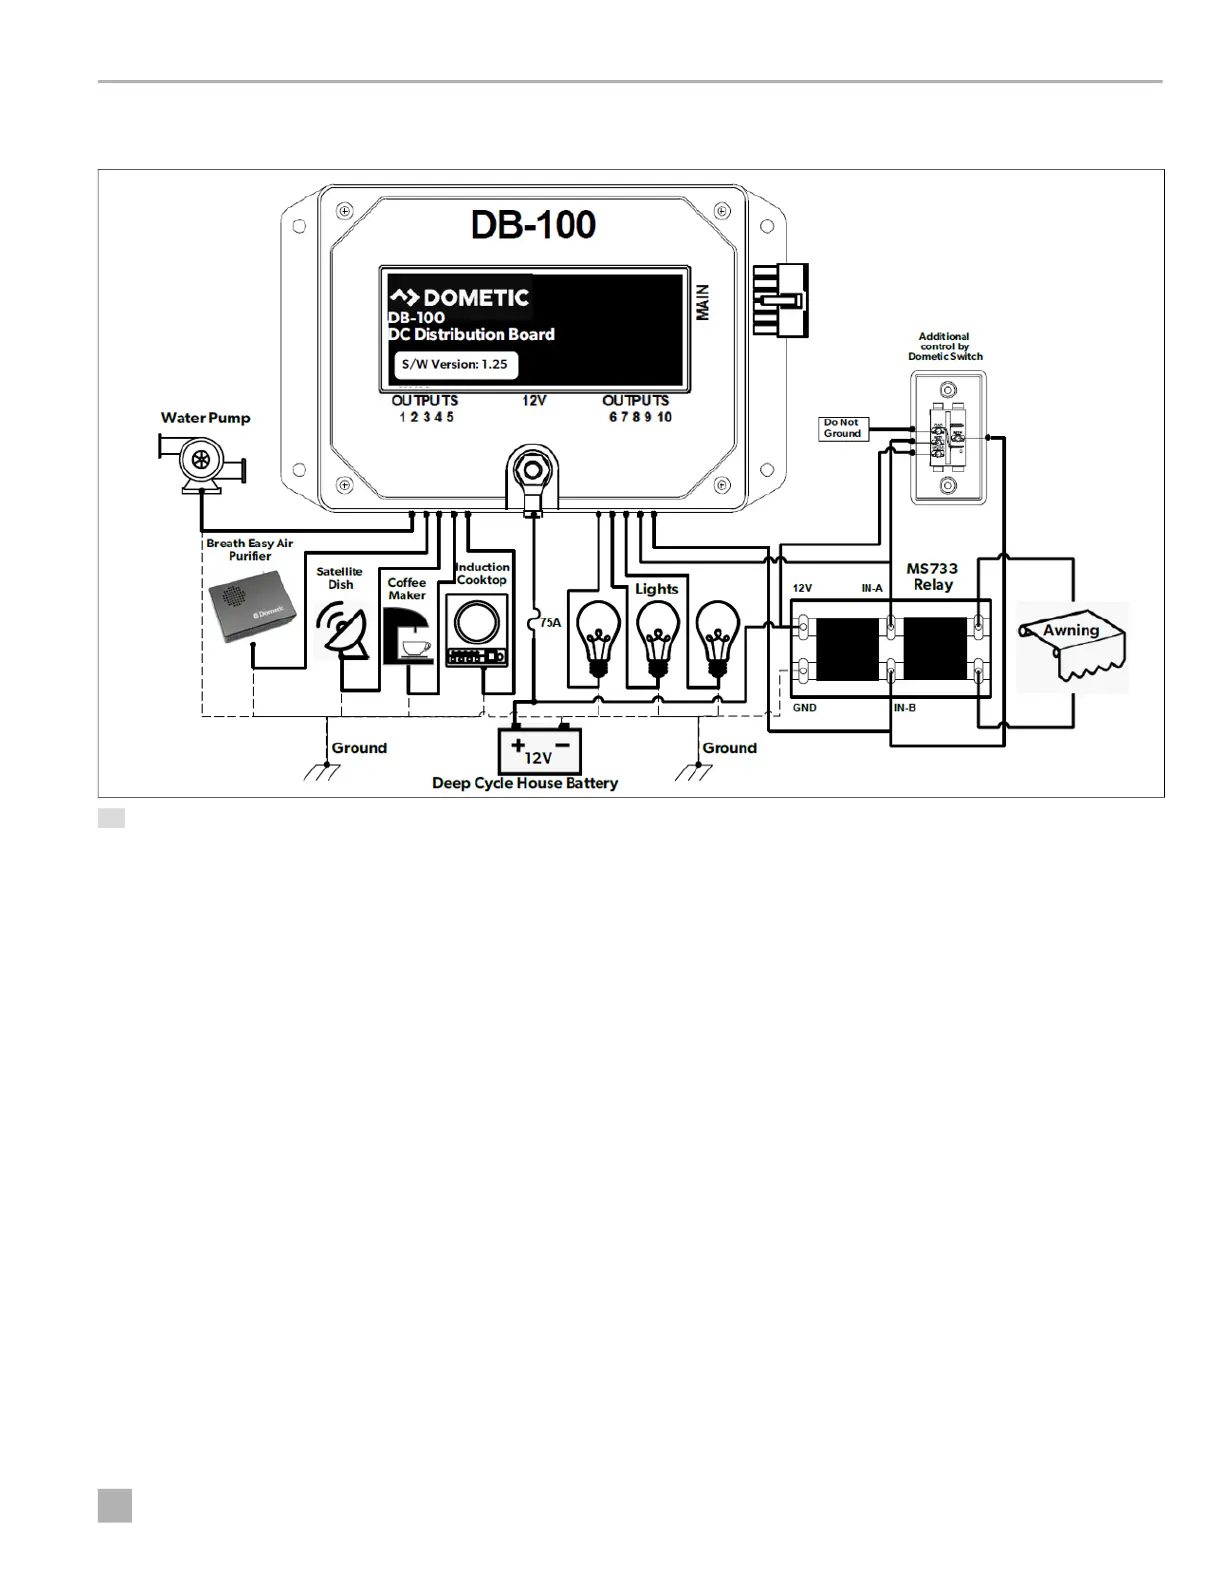
13 DB-100 Installation Example
To install the DB-100 distribution board:
1. Connect the 12 VDC positive wire to the 12V-IN port
on the box using a 75 A fuse.
2. Connect the positive (red/hot) wires for the lights,
water pump, and satellite dish to the appropriate
output pins as shown in your drawings.
3. Connect the negative (black) wires to the ground
terminal.
4. Use an MS-733 relay for the awnings:
a. Connect the 12 VDC and ground wires on the
input side of the relay.
b. Connect the awning extend and retract wires
from the outputs of the load boxes to the middle
pins of the relay, as shown in the drawings.
c. Connect the two wires of the mechanical awning
motor to the output side of the relay.
5. Ensure the DB-100 is compatible with Truma:
a. Confirm the DB-100 software is version 1.27 and
above.
b. Confirm the DB-100 software is version 1.32 and
above to support new features like anti-freeze
(which requires an additional antifreeze strip to
be installed).
6. To control the Truma Water Heater (Comfort Plus
Model) from the DB-100:
c. Wire the Pin-3 on the remote bus connectors to
the Pin-2 on the DB-100 main connector.
d. Wire the Pin-5 on the remote bus connector to
the ground.
 Loading...