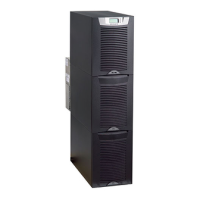
96 Eaton 9355 UPS (10/15 kVA) User’s Guide 164201594—Rev H0
The
OPERATION
Eaton 9355 UPS (10/15 kVA) User's Guide S 164201594 Rev D
89
Internal Bypass Startup
To start the UPS when load is powered by internal bypass:
1. If an optional wall-mounted bypass c abinet is installed, proceed to
Step 2; otherwise, proceed to Step 4.
2. Verify the wa ll mounted bypa ss is transfered to Bypass mode (see
“Using the Wall-Mounted Bypass Cabinet” on page 97.
3. Proceed to Step 4.
4. Verify that the maintenance bypass switch is in the SERVICE
position(seeFigure59onpage95).
5. If an optional isolation transformer is installed, switch the input
circuitbreakertotheONposition(seeFigure12onpage21).
6. Switch on utility power where the UPS is connected.
7. Wait for the front panel LCD to illuminate.
The
indicator flashes.
The UPS starts and transfers to Bypass mode. This may take up to
1 minute.
The
indicator flas hes while transfering to bypass then goes out
with the
illuminating to indicate the UPS is operating in Bypass
mode. The load is now powered by utility power.
The display indicates On Manual/Maintenance Bypass.
8. To switch to Normal mode from internal Bypass mode, transfer the
wall mounted by pass to By pass mode (see “Using the
Wall-Mounted Bypass Cabinet” on page 97 and rotate the internal
maintenance bypass switch to the UPS position.
The
indicator illuminates to indicate the UPS is operating in UPS
mode. The load is now powered by UPS.
indicator illuminates and the
OPERATION
Eaton 9355 UPS (10/15 kVA) User's Guide S 164201594 Rev D
87
Normal Mode Startup
To start up the UPS when the load is de-energized:
1. If an optional wall-mounted bypass c abinet is installed, proceed to
Step 2; otherwise, proceed to Step 4.
2. Verify the wall mounted bypass is transfered to UPS mode (see
“Using the Wall-Mounted Bypass Cabinet” on page 97.
3. Proceed to Step 4.
4. Verify that the internal maintenance bypass switc h is in the UPS
position(seeFigure59onpage95).
5. If an optional isolation transformer is installed, switch the input
circuitbreakertotheONposition(seeFigure12onpage21).
6. Switch on utility power where the UPS is connected.
7. Wait for the front panel LCD to illuminate.
The
indicator flashes.
8. Remove the breaker tie from all battery circuit breakers.
9. Switch all battery circuit breakers to the ON position.
The
indicator stops flashing.
10. Press a ny button on the front panel display to activate the menu
options.
11. Press the
button on the front panel display a nd then press the
button to select the TURN UPS ON/OFF menu.
12. Select the TURN UPS ON option. Press and hold the
button for
three seconds, until the UPS stops beeping.
The
indicator illuminates. The UPS is now powering the load.
If the
indicator is flashing, check the UPS status from the front
panel to view the active alarms. Correct the alarms and restart if
necessary.
indicator extinguishes, indicating the UPS system is
operating in Bypass mode.
2. Switch the bypass breaker (may be designated MBP or CBP) in the wall-mounted bypass cabinet to the
ON position.
3. If present, switch the maintenance isolation breaker (MIS) on the wall-mounted bypass cabinet to the OFF
position; otherwise, switch the UPS breakers (may be designated MOB or UPS) on the wall-mounted
bypass cabinet to the OFF position.
The UPS is now bypassed, with the load powered by utility power.
To transfer the load from maintenance bypass to the UPS mode:
1. If the UPS was powered off, continue to Step 2.
If the UPS is already in Bypass mode, proceed to Step 6.
2. Switch ON the utility power where the UPS is connected.
3. Wait for the front panel LCD to illuminate.
The
OPERATION
Eaton 9355 UPS (10/15 kVA) User's Guide S 164201594 Rev D
87
Normal Mode Startup
To start up the UPS when the load is de-energized:
1. If an optional wall-mounted bypass c abinet is installed, proceed to
Step 2; otherwise, proceed to Step 4.
2. Verify the wall mounted bypass is transfered to UPS mode (see
“Using the Wall-Mounted Bypass Cabinet” on page 97.
3. Proceed to Step 4.
4. Verify that the internal maintenance bypass switc h is in the UPS
position(seeFigure59onpage95).
5. If an optional isolation transformer is installed, switch the input
circuitbreakertotheONposition(seeFigure12onpage21).
6. Switch on utility power where the UPS is connected.
7. Wait for the front panel LCD to illuminate.
The
indicator flashes.
8. Remove the breaker tie from all battery circuit breakers.
9. Switch all battery circuit breakers to the ON position.
The
indicator stops flashing.
10. Press a ny button on the front panel display to activate the menu
options.
11. Press the
button on the front panel display a nd then press the
button to select the TURN UPS ON/OFF menu.
12. Select the TURN UPS ON option. Press and hold the
button for
three seconds, until the UPS stops beeping.
The
indicator illuminates. The UPS is now powering the load.
If the
indicator is flashing, check the UPS status from the front
panel to view the active alarms. Correct the alarms and restart if
necessary.
indicator flashes.
4. Switch all battery circuit breakers to the ON position.
The
OPERATION
Eaton 9355 UPS (10/15 kVA) User's Guide S 164201594 Rev D
87
Normal Mode Startup
To start up the UPS when the load is de-energized:
1. If an optional wall-mounted bypass c abinet is installed, proceed to
Step 2; otherwise, proceed to Step 4.
2. Verify the wall mounted bypass is transfered to UPS mode (see
“Using the Wall-Mounted Bypass Cabinet” on page 97.
3. Proceed to Step 4.
4. Verify that the internal maintenance bypass switc h is in the UPS
position(seeFigure59onpage95).
5. If an optional isolation transformer is installed, switch the input
circuitbreakertotheONposition(seeFigure12onpage21).
6. Switch on utility power where the UPS is connected.
7. Wait for the front panel LCD to illuminate.
The
indicator flashes.
8. Remove the breaker tie from all battery circuit breakers.
9. Switch all battery circuit breakers to the ON position.
The
indicator stops flashing.
10. Press a ny button on the front panel display to activate the menu
options.
11. Press the
button on the front panel display a nd then press the
button to select the TURN UPS ON/OFF menu.
12. Select the TURN UPS ON option. Press and hold the
button for
three seconds, until the UPS stops beeping.
The
indicator illuminates. The UPS is now powering the load.
If the
indicator is flashing, check the UPS status from the front
panel to view the active alarms. Correct the alarms and restart if
necessary.
indicator stops flashing.
The UPS starts and transfers to Bypass mode. This may take up to 1 minute.
The
OPERATION
Eaton 9355 UPS (10/15 kVA) User's Guide S 164201594 Rev D
87
Normal Mode Startup
To start up the UPS when the load is de-energized:
1. If an optional wall-mounted bypass c abinet is installed, proceed to
Step 2; otherwise, proceed to Step 4.
2. Verify the wall mounted bypass is transfered to UPS mode (see
“Using the Wall-Mounted Bypass Cabinet” on page 97.
3. Proceed to Step 4.
4. Verify that the internal maintenance bypass switc h is in the UPS
position(seeFigure59onpage95).
5. If an optional isolation transformer is installed, switch the input
circuitbreakertotheONposition(seeFigure12onpage21).
6. Switch on utility power where the UPS is connected.
7. Wait for the front panel LCD to illuminate.
The
indicator flashes.
8. Remove the breaker tie from all battery circuit breakers.
9. Switch all battery circuit breakers to the ON position.
The
indicator stops flashing.
10. Press a ny button on the front panel display to activate the menu
options.
11. Press the
button on the front panel display a nd then press the
button to select the TURN UPS ON/OFF menu.
12. Select the TURN UPS ON option. Press and hold the
button for
three seconds, until the UPS stops beeping.
The
indicator illuminates. The UPS is now powering the load.
If the
indicator is flashing, check the UPS status from the front
panel to view the active alarms. Correct the alarms and restart if
necessary.
indicator flashes while transferring to bypass then goes out with the
OPERATION
Eaton 9355 UPS (10/15 kVA) User's Guide S 164201594 Rev D
89
Internal Bypass Startup
To start the UPS when load is powered by internal bypass:
1. If an optional wall-mounted bypass c abinet is installed, proceed to
Step 2; otherwise, proceed to Step 4.
2. Verify the wa ll mounted bypa ss is transfered to Bypass mode (see
“Using the Wall-Mounted Bypass Cabinet” on page 97.
3. Proceed to Step 4.
4. Verify that the maintenance bypass switch is in the SERVICE
position(seeFigure59onpage95).
5. If an optional isolation transformer is installed, switch the input
circuitbreakertotheONposition(seeFigure12onpage21).
6. Switch on utility power where the UPS is connected.
7. Wait for the front panel LCD to illuminate.
The
indicator flashes.
The UPS starts and transfers to Bypass mode. This may take up to
1 minute.
The
indicator flas hes while transfering to bypass then goes out
with the
illuminating to indicate the UPS is operating in Bypass
mode. The load is now powered by utility power.
The display indicates On Manual/Maintenance Bypass.
8. To switch to Normal mode from internal Bypass mode, transfer the
wall mounted by pass to By pass mode (see “Using the
Wall-Mounted Bypass Cabinet” on page 97 and rotate the internal
maintenance bypass switch to the UPS position.
The
indicator illuminates to indicate the UPS is operating in UPS
mode. The load is now powered by UPS.
illuminating to indicate
the UPS is operating in Bypass mode.
The display indicates On Manual/Maintenance Bypass.
5. Verify voltage is present on the UPS output by checking that an output voltage reading present on the front
panel LCD display.
The load is now powered by utility power.
6. If present, switch the maintenance isolation breaker (MIS) on the wall-mounted bypass cabinet to the ON
position; otherwise, switch the UPS breakers (may be designated MOB or UPS) on the wall-mounted
bypass cabinet to the ON position.
7. Switch the bypass breaker (may be designated MBP or CBP) in the wall-mounted bypass cabinet to the
OFF position.
The UPS is now powering the load in Bypass mode.
8. Transfer the UPS to Normal mode:
• Press the
CORD KIT INSTRUCTIONS
Eaton BladeUPS Cord Kit Instructions S 164201721 Rev 2 Draft 13-APR-2010
5
Removing the Existing Power Cords
To remove the existing power cords:
1. If the UPS and internal batteries are already installed, continue to
Step 2. If the UPS and internal batteries are not installed, continue
to Step 15.
2. You MUST shut down the UPS before replacing the cord assembly.
Continue to Step 3 to shut down a standalone UPS.
For parallel shutdown procedures, refer to the Eaton BladeUPS
(12 kVA) User's Guide and then continue to Step 11.
3. Switch the load connector circuit breaker to the OFF (O) position
(see Figure 2).
NOTE The load connector breaker controls the load connector only, not the output power.
4. Press any button on the front panel display to activate the menu
options. Select TURN UPS ON/OFF, TURN UPS OFF, and press the
button.
5. Confirm the selection. Press and hold the
button for three
seconds, until the UPS stops beeping.
The output relays open, the UPS transfers to Standby mode, and
the
indicator turns off.
6. Switch the UPS battery circuit breaker to the OFF (O) position.
7. If optional EBMs are installed, switch all EBM battery circuit
breakers to the OFF (O) position.
Disconnect the EBM cable from the UPS extended battery
connector.
8. Switch the UPS input circuit breaker to the OFF (O) position.
9. Switch off utility power where the UPS is connected.
10. Unplug the power cords.
button to select the Go To Normal Mode option.
• Press the
CORD KIT INSTRUCTIONS
Eaton BladeUPS Cord Kit Instructions S 164201721 Rev 2 Draft 13-APR-2010
15
16. Switch the UPS input circuit breaker to the ON ( | ) position.
17. Wait for the UPS front panel display to illuminate.
The
indicator flashes on the UPS.
18. Check the UPS front panel display for active alarms or notices
(other than “Batteries Disconnected”). Resolve any active alarms
before continuing.
19. Switch the UPS battery circuit breaker to the ON (
| ) position.
20. If optional EBMs are installed, connect the EBM cable to the UPS
extended battery connector.
Switch all EBM battery circuit breakers to the ON (
| ) position.
21. Verify that the “Batteries Disconnected” alarm has cleared. Verify
that no other alarms appear on the UPS front panel display.
If the
indicator is flashing, do not proceed until all alarms are
clear. Check the UPS status from the front panel to view the active
alarms. Correct the alarms and restart if necessary.
22. Press any button on the front panel display to activate the menu
options. Select TURN UPS ON/OFF, TURN UPS ON, and press the
button.
23. Confirm the selection. Press and hold the
button for three
seconds, until the UPS stops beeping.
Verify that the
indicator illuminates solid, indicating that the
UPS is operating normally and any loads not connected through the
Load Connector are now energized.
If the
indicator is flashing, do not proceed until all alarms are
clear. Check the UPS status from the front panel to view the active
alarms. Correct the alarms and restart if necessary.
The UPS should be in Normal mode. By default, Normal mode
operates on the High Efficiency setting.
24. To energize a load connected through the Load Connector, switch
the load connector circuit breaker to the ON (
| ) position.
25. Press the
ESC
button until the Eaton logo appears.
button until the Eaton logo appears.
The UPS is now powering the load in Normal mode.
77..66 CCoonnffiigguurriinngg tthhee UUPPSS ffoorr EEBBMMss
To ensure maximum battery runtime, configure the UPS for the correct number of EBMs:
1. Press any button on the front panel display to activate the menu options.
2. Using the
OPERATION
Eaton 9355 UPS (10/15 kVA) User's Guide S 164201594 Rev D
82
The following table shows the indicator status and description.
Indicator Status Description
Green
On The UPS is operating normally.
Flashing S The UPS is starting up or is shut down and waiting for power to return.
S A new information message is active.
S Bypass is not available.
Off The UPS is turned off and will not turn on automatically.
Yellow
On The UPS is in Battery mode.
Yellow
On The UPS is in Bypass mode.
Red
On The UPS has an active alarm.
Flashing There is a new UPS alarm condition. See “Troubleshooting” on page 105 for
additional information.
Changing the Language
Press and hold the first button on the left for a pproximately five s econds
to selec t the language menu. This action is possible from any LCD menu
screen.
Display Functions
As the default or after 15 minutes of inactivity, the LCD displays the
selectable s tartup screen. The default is the Eaton logo and can be
changed to the Mimic sc reen in the User Settings menu.
The bac klit LCD automatically dims after a long period of inac tivity. Press
any button to restore the screen.
Use the two middle buttons (
and ) to scroll through the menu
structure. Press the
button to enter a submenu. Press the button
to select an option. Press the
ESC
button to cancel or return to the
previous menu.
button, scroll to the Settings menu.
UPS Operating Instructions
 Loading...