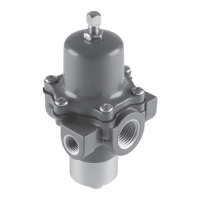
EDR and ETR Valves
Instruction Manual
Form 5050
August 2006
7
2. Lubricate the stud bolts (key 15) before installing
the valve trim into the valve body. (Note: For ease of
installing trim parts, remove all packing parts from
the packing box before installing the trim parts.)
3. When inserting the stack of trim parts into the
valve body, carefully align the parts in the recess of
the valve body.
4. Slide the bottom flange onto the stud bolts
(key 15). Secure the bottom flange (key 31) in place
on the valve body with the hex nuts (key 16). Tighten
the hex nuts to the torque value shown in table 3.
5. Torque the nuts in a criss-cross pattern. Repeat
the pattern until all nuts are torqued to the value
indicated in table 3.
6. Refer to the Packing Maintenance procedures
below.
Packing Maintenance
This procedure covers PTFE V-ring, graphite
ribbon/filament, and PTFE composition packing
rings. Key numbers refer to figure 5 for PTFE V-ring
packing and PTFE/composition packing, unless
otherwise indicated.
Note
If the valve has ENVIRO-SEAL
live-loaded packing installed (figure 9,
10, or 11), see the Fisher instruction
manual entitled ENVIRO-SEAL Packing
System for Sliding-Stem Valves for
packing instructions.
If the valve has HIGH-SEAL
Heavy-Duty live-loaded packing
installed (figure 8), see the Fisher
instruction manual entitled HIGH-SEAL
Live-Loaded Packing System for
packing instructions.
For all except spring-loaded packing, if the
packing is relatively new and tight on the stem, and if
tightening the packing flange nuts does not stop the
leakage, it is possible that the valve stem is worn or
nicked so that a seal cannot be made. If the leakage
comes from the outside diameter of the packing
follower, it is possible that the leakage is caused by
nicks or scratches around the inside of the packing
box wall.
For spring-loaded single PTFE V-ring packing,
the spring (key 8) maintains a sealing force on the
packing. If leakage is noted around the packing
follower (key 13), check to be sure the shoulder on
the packing follower is touching the bonnet. If the
shoulder is not touching the bonnet, tighten the
packing flange nuts (key 5, figure 4) until the
shoulder is against the bonnet. If leakage cannot be
stopped in this manner, proceed to the Removing
Packing and Installing Packing procedures below.
Removing Packing
WARNING
Refer to the WARNING at the
beginning of the Maintenance section
in this instruction manual.
The packing may have been removed in earlier
steps, or during trim maintenance procedures. Use
the following steps, when necessary, to remove
packing and associated assemblies.
Key number locations for packing parts are shown in
figures 5 and 6. For valve parts and the live loaded
packing system, refer to figures 8 through 11 (in the
Parts List section), for key number locations.
1. Isolate the control valve from the line pressure,
release pressure from both sides of the valve body,
and drain the process media from both sides of the
valve. If using a power actuator, also shut off all
pressure lines to the power actuator and release all
pressure from the actuator. Use lock-out procedures
to be sure that the above measures stay in effect
while you work on the equipment.
2. Exhaust all actuator pressure, disconnect the
operating lines from the actuator, and disconnect
any leakoff piping from the actuator. Relieve any
actuator precompression from the stem connector.
(If necessary, refer to the appropriate actuator
instruction manual for warnings, cautions, and
disassembly procedures.)
3. When removing the bottom flange (key 31), be
careful that the cage and other parts are not
damaged by unexpectedly falling out of the valve
body. Remove the nuts (key 16) or cap screws from
the bottom flange.
4. To remove the packing for maintenance,
disconnect the stem connector (see figure 2).
Remove the yoke locknut, and lift the actuator off the
valve.
5. Remove the packing flange nuts (key 5, figure 4),
packing flange (key 15), upper wiper (key 12), and
packing follower (key 13). If maintaining the packing
while the valve stem is in place, ensure that the
valve stem surface is not scratched or marred while
working with the packing.

 Loading...