12
• Never leave the pump unattended while it is being operated
using the pendant “Auto Cycle” mode. The pump will continue
to run until it is stopped by the user, the desired torque
is reached or after 8 cycles if left unattended and not on a
tightening joint. Operation must be monitored continuously.
8.0 AUTO-CYCLE OPERATION
8.1 Pressure Adjustment - Auto-Cycle Mode
WARNING
Failure to observe and comply with the following precautions
could result in death or serious personal injury. Property
damage could also occur.
• Always make pressure adjustments before putting torque
wrench on nut or bolt head.
• Pressure setting must be adjusted to provide the correct
torque and to ensure that excessive torque is not applied.
• Do not adjust pressure settings while pump is in use.
1. Press and hold the red pendant button. Refer to Figure 4.
2. While holding the red pendant button, press and hold the
yellow pendant button. The pendant LED indicator light will
blink red twice and the pendant will vibrate.
Steps 1 and 2 reset the stored pressure to zero (0) psi/
bar if a stored pressure had been previously set.
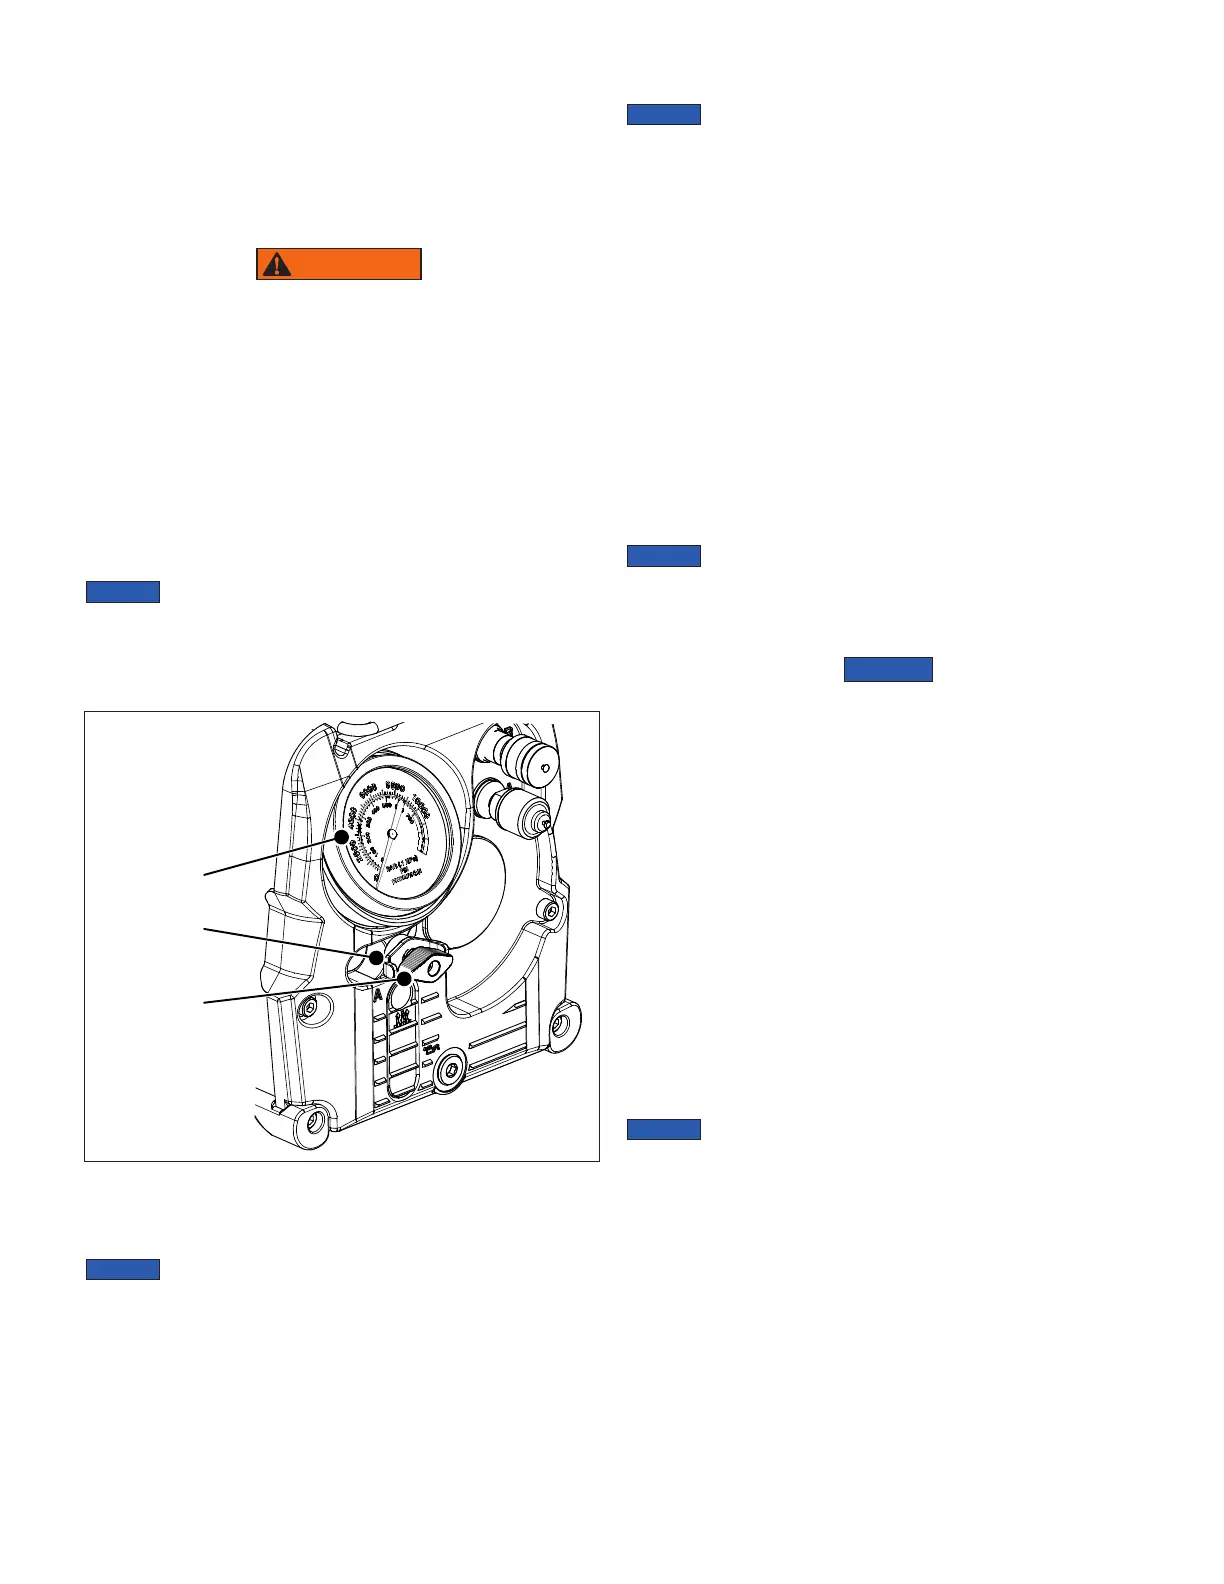
3. Loosen the relief valve locknut and turn the relief valve
adjustment knob counterclockwise until there is a light drag
when turning. Refer to Figure 7.
2
1
3
Figure 7, Relief Valve Adjustment
1. Pressure Gauge
2. Relief Valve
Adjustment Knob
3. Relief Valve
Locknut
4. Press and hold the green pendant button to start pump
motor and advance the valve to the A position.
The green pendant button must be held down during
the entirety of steps 5 through 8. Releasing the green pendant
button will stop pump motor.
5. Turn the relief valve adjustment knob clockwise to increase
pressure to desired value.
To obtain an accurate setting, decrease the pressure
to a point below the final setting and then slowly increase the
pressure until it reaches the final setting.
6. Tighten the relief valve locknut when the pressure gauge
reading is stable and is at the desired pressure.
7. Release the green pendant button.
8. Recheck the final pressure setting by holding the green
pendant button and pressurizing the system.
9. If the final pressure setting is not at the desired setting, then
repeat the procedure described in steps 3 through 8. If the
final pressure setting is at the desired setting, then proceed to
step 10.
10. While holding the green pendant button and when the pump
reaches the previously set pressure, press the yellow pendant
button.
11. Release the yellow and green pendant buttons. The pendant
LED indicator light will blink yellow, the pendant will vibrate
three times when stored pressure is recorded, the valve will
retract and the motor will turn o.
The pump will save the stored pressure (within the
available range of 1000 to 10,000 psi [70 to 700 bar]) even after
long periods of non-use.
8.2 Torquing - Auto-Cycle Mode
• To stop the pump during auto-cycle mode at any point, press
any button on the pendant.
• Variables such as ambient temperature, pump internal
temperature and hydraulic hose length may cause the pressure
gauge to show a slightly lower reading than the relief pressure
setting before the retract cycle is activated. This is normal.
• The internal pressure transducer and pump microprocessor
precisely control the switching between advance and retract
cycles, assuring that the stored pressure has been met.
• Auto cycle mode will only work if a stored pressure is recorded.
To torque in auto-cycle mode, perform the following steps:
1. Place torque wrench on nut or bolt.
2. Press the yellow pendant button for one advance cycle or
three seconds whichever is shorter.
3. The pump and torque wrench will continuously perform
advance and retract cycles. The pendant LED indicator light
will blink yellow during operation and the pendant will vibrate
after each advance cycle is completed.
If the torque wrench stalls prior to fully stroking, then
the target torque has been reached.
4. When desired torque is reached, the pump will do an
additional verification cycle then retract and turn o. The
pendant LED indicator light will blink green and yellow and
the pendant will also vibrate.
 Loading...