Safety and operating instructions
60 © Construction Tools GmbH | 33905146 01 | 2019-09-05
Original Instructions
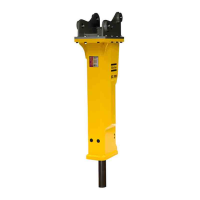
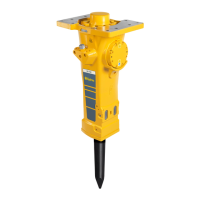
EC 155T EC 165T EC 180T
Connection point Interval Type of spanner Size / Torque
Adapter plate*
(fastening screws)
A daily Allen key 22mm
(0.87in.)
1500Nm
(1106ftlbs)
27mm (1.06in.)
2300Nm (1696ftlbs)
Plate (Allen screws) B as required Allen key 10mm (0.39in.) / 85Nm (63ftlbs)
Tensioning bolts** C monthly torque spanner /
power wrench
65mm (2.56in.) 75mm
(2.95in.)
Cover for control mecha-
nism (Allen screws)
D in case of a repair Allen key 17mm (0.67in.) / 380Nm (280ftlbs)
HP-accumulator
(Fastening screws)
E weekly Allen key 14mm
(0.55in.)
350Nm
(258ftlbs)
30mm (1.18in.)***
Ports »P« and »T« F weekly open-ended
wrench
55mm (2.17in.) / 285Nm (210ftlbs)
Filling valve »G«
(threaded plug)
G in case of a repair socket spanner
Allen key
22mm (0.87in.) / 130Nm (96ftlbs)
5mm (0.20in.) / 20Nm (15ftlbs)
Flanges (Allen screws) H weekly Allen key 10mm (0.39in.) / 80Nm (59ftlbs)
Percussion chamber venti-
lation
I in case of a repair open-ended
wrench
41mm (1.61in.)
200Nm (148ftlbs)
Stroke control
(threaded plug)
J in case of a repair socket spanner 30mm (1.81in.)
300Nm (221ftlbs)
Plate (Allen screws) K after switching Au-
toStop / AutoStart
Allen key 6mm (0.24in.) / 25Nm (18ftlbs)
Swivel joint covers (Screws) L daily Allen key 10mm (0.39in.) / 85Nm (63ftlbs)
Hose connections CL II - weekly Various open-ended spanners with different spanner sizes
* Apply anti-seize compound to the Allen screw threads before inserting them. The contact faces of the screw head
and the lock washers must not be lubricated.
**EC 155T
The tensioning bolt heads can be seen after dismounting the adapter plate and elastic pad.
1. Pre-tighten the tensioning bolts to 500Nm (367ftlbs) crosswise,
2. retighten 120° (2 hexagons) crosswise,
3. retighten 150° (2½ hexagons) crosswise
**EC 165T, EC 180T
The tensioning bolt heads can be seen after dismounting the adapter plate and elastic pad.
1. Pre-tighten the tensioning bolts to 500Nm (367ftlbs) crosswise,
2. retighten 120° (2 hexagons) crosswise,
3. retighten 180° (3 hexagons) crosswise
***
1. Treat the threads of the fastening screws and the threaded inserts with Anti-Seize agent.
2. Treat the surfaces between the fastening screw head, washer, and HP-accumulator upper shell with Anti- Seize
agent.
3. Position on the HP-accumulator, and tighten the fastening screws by hand in a crosswise fashion.
4. Pre-tighten the fastening screws to 80Nm (59ftlbs), proceeding in a crosswise fashion.
5. Tighten each fastening screw through 30° in a crosswise fashion.
6. Finally tighten each fastening screw again through 60° in a crosswise fashion.
 Loading...