18 Setting Up the Projector
Connecting the Cables
You can connect the projector to any type of video equipment, such as a VCR, DVD player,
digital tuner, cable or satellite box, video game console, camcorder, or digital camera. You can
also connect it to a desktop or laptop PC or Apple
®
Macintosh
®
system.
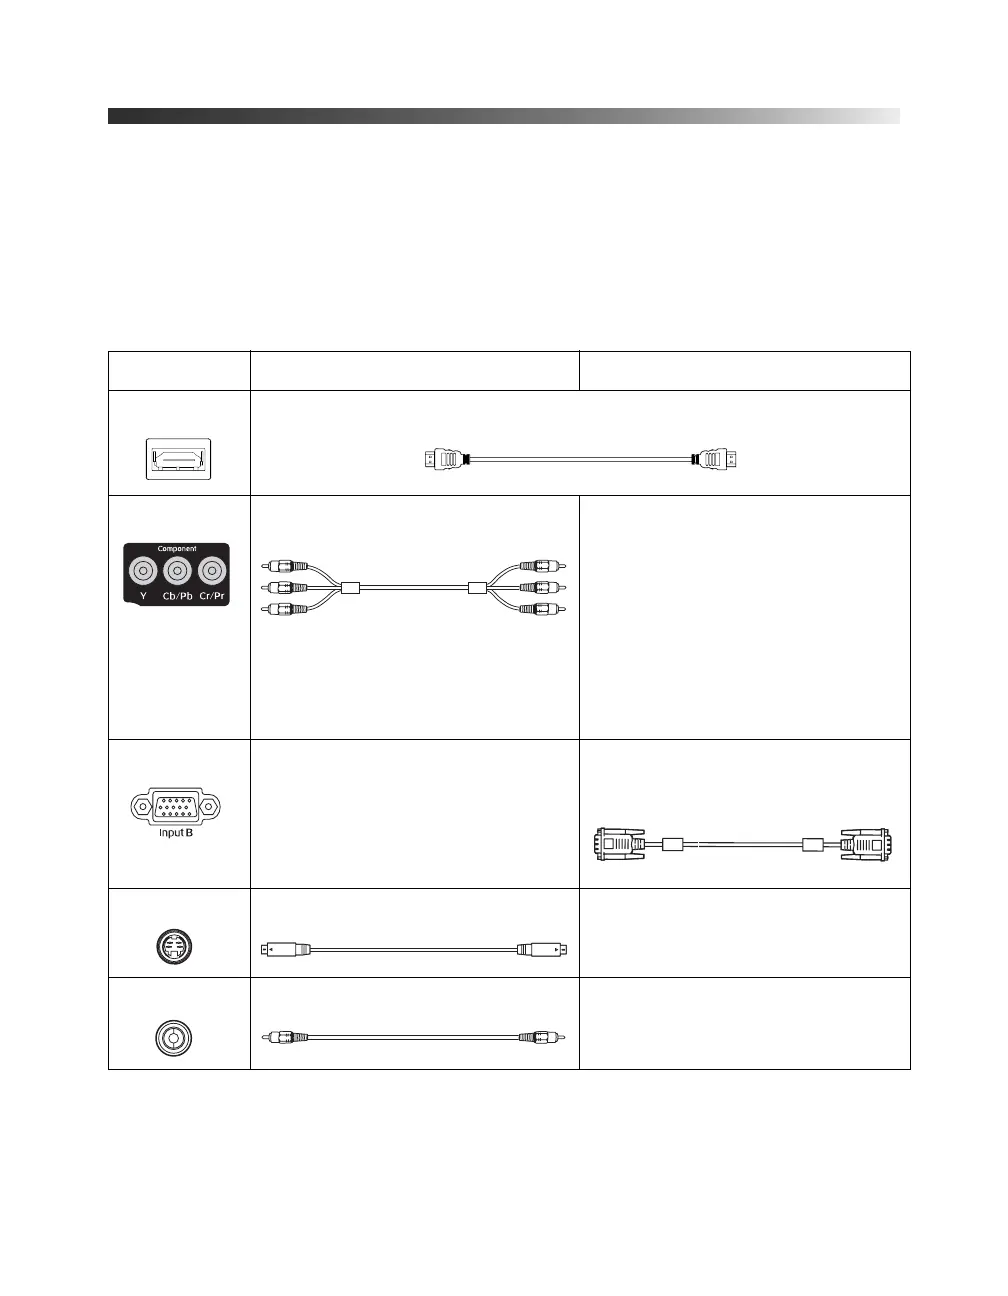
You can connect up to five pieces of video equipment at the same time, using any of the
commercially available cables shown below:
* For details on compatible video formats, see page 63.
Port name Video equipment connection* Computer connection*
HDMI Use an HDMI cable:
Input A Use a component video cable
(with RCA-style connectors):
Connect the cable to the three
component video ports. Match
corresponding colors between the
cable and the ports.
—
Input B — Use a Mini D-sub, 15-pin monitor
cable to connect to a computer
RGB (monitor) port
S-Video Use an S-video cable: —
Video Use an RCA video cable: —
Component
video ports
RGB port
PowerLite Cinema 400.book Page 18 Friday, July 7, 2006 2:24 PM
 Loading...