L365/L366,L360/L362,L310/L312,L220/L222,L130/L132 Series Revision A
Disassembly/Reassembly Detailed Disassembly/Reassembly Procedure for each Part/Unit 45
Confidential
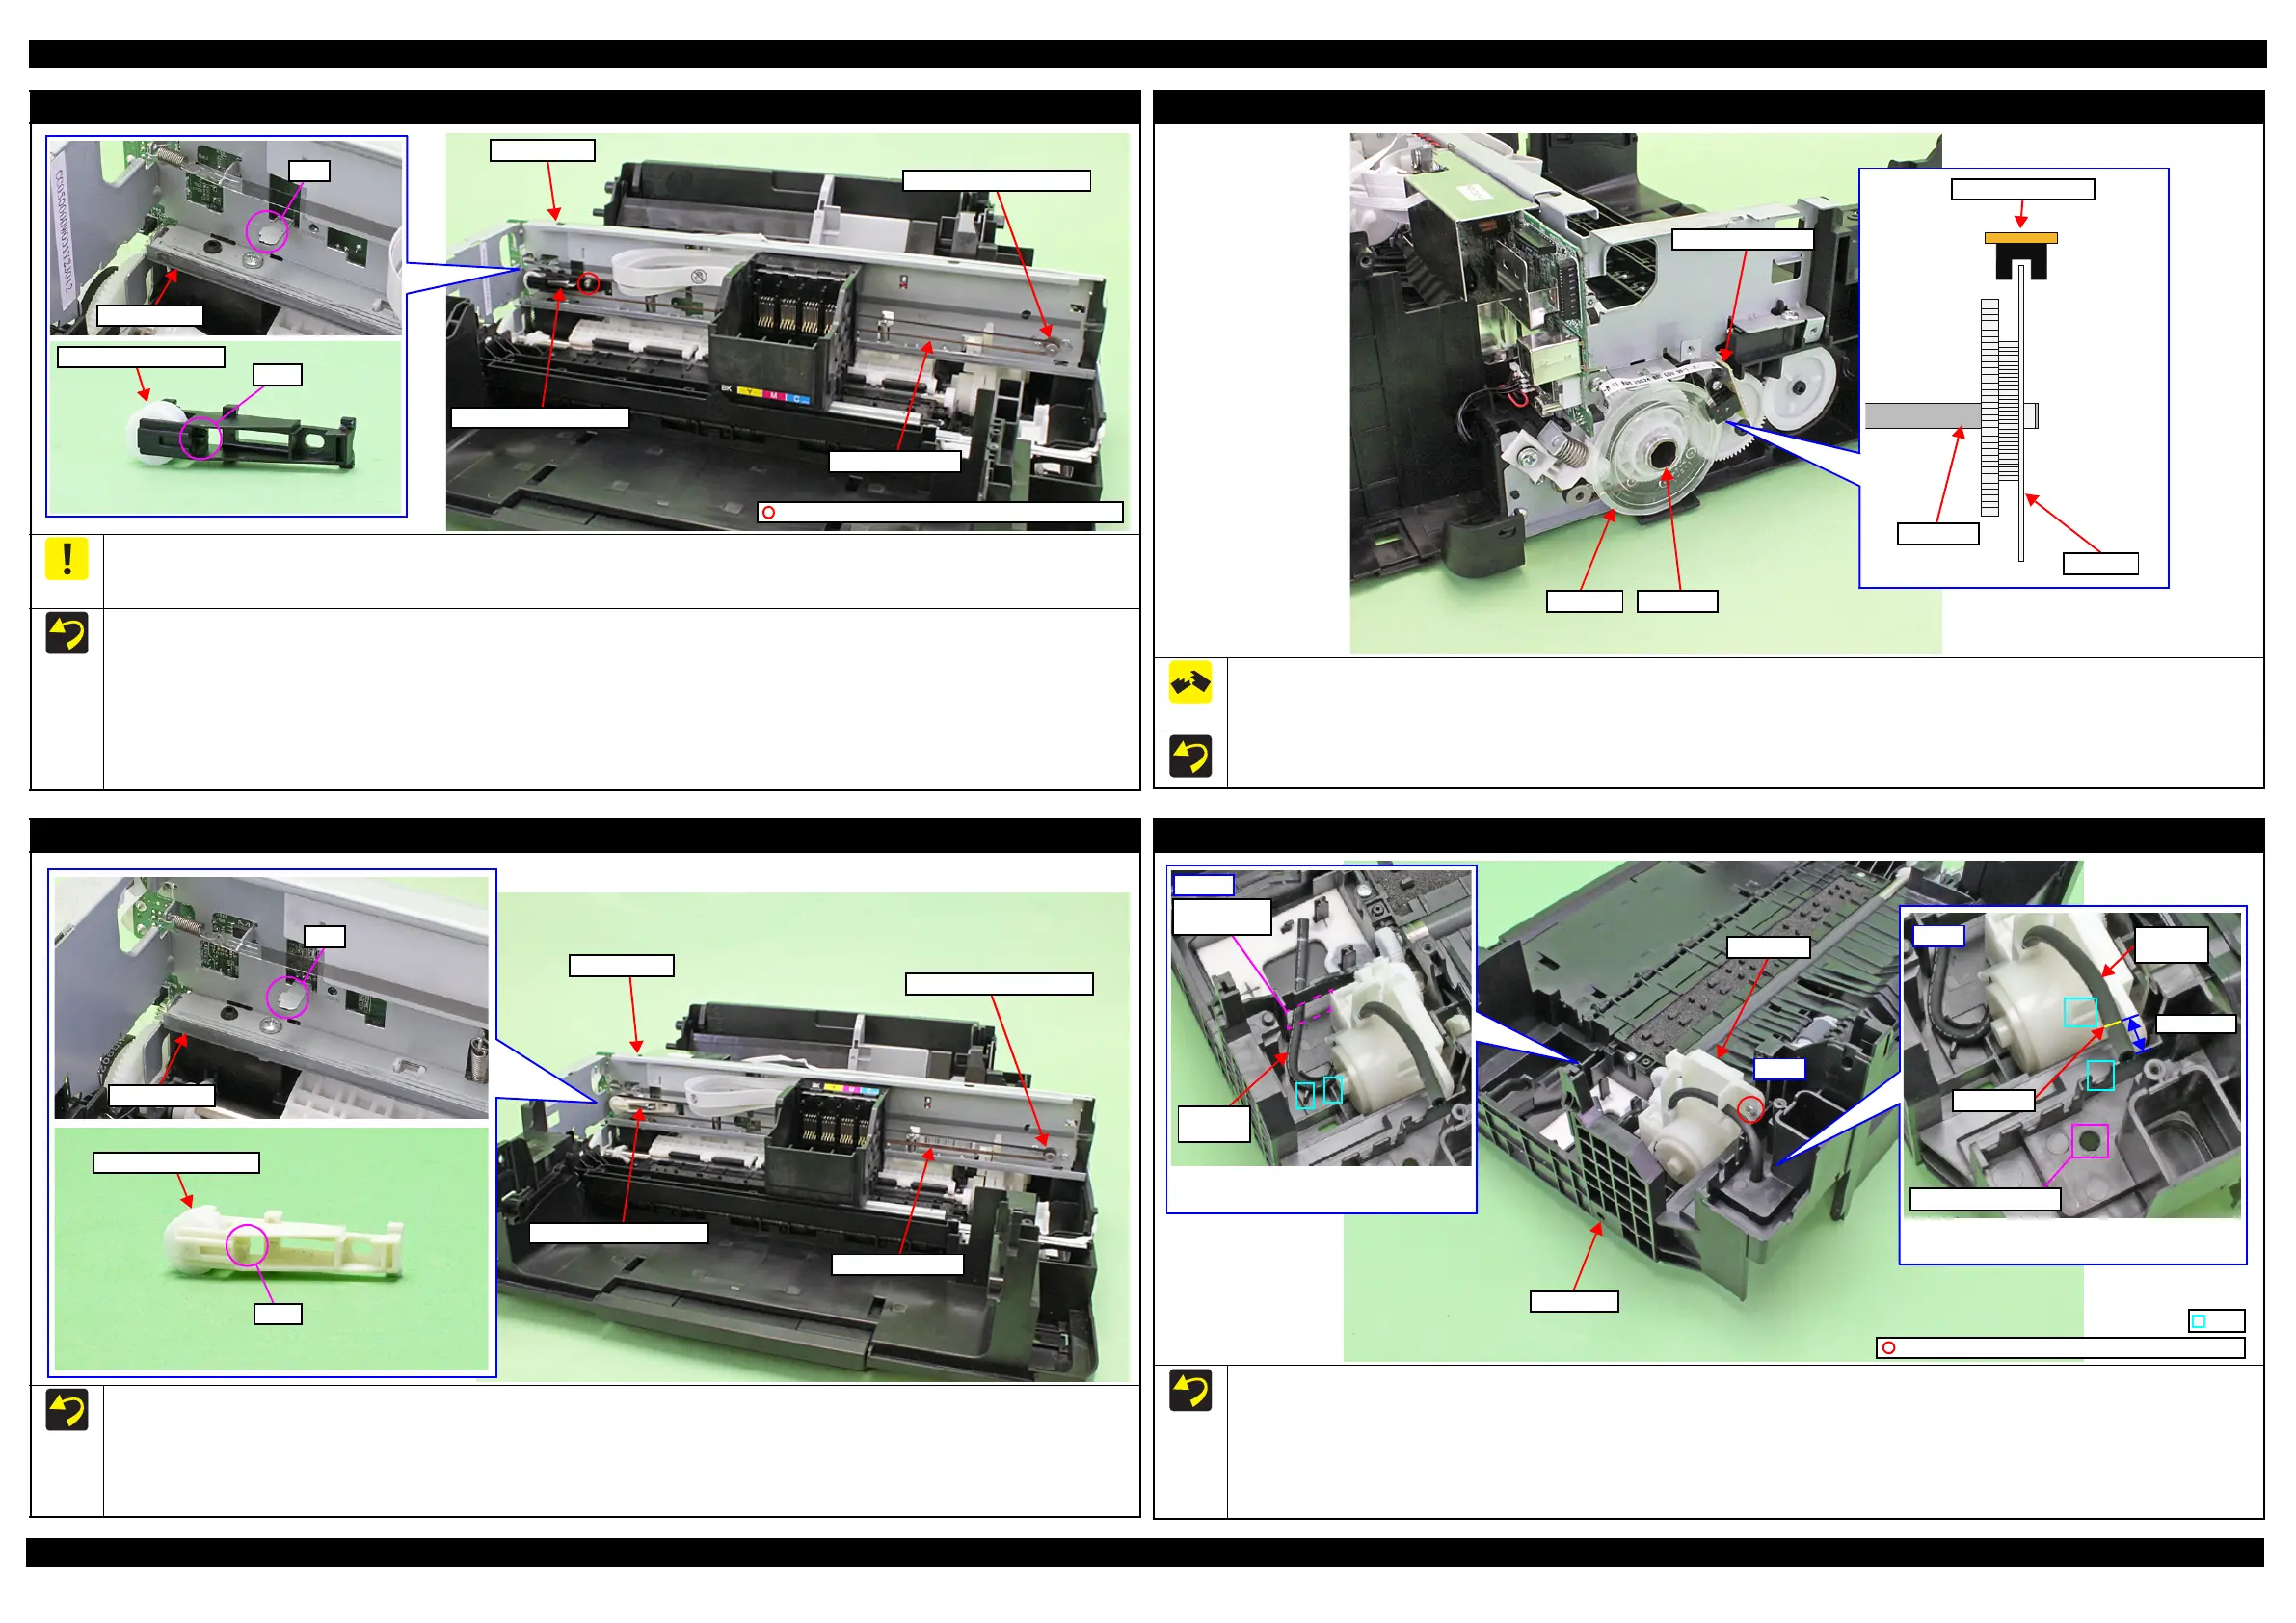
CR Driven Pulley Assy / CR Timing Belt (L210/L222,L130/L132 Series)
If the CR Timing Belt has to be replaced, it is necessary to extend the new CR Timing Belt by the tension of the Compression Spring 13.98 in
advance. If the CR Timing Belt is replaced without doing this extension process, misalignment of the belt or print failure may occur. Therefore, make
sure to follow the assembling procedure when installing the CR Timing Belt.
When installing the CR Driven Pulley Assy and CR Timing Belt, follow the procedure below.
1. Install the CR Driven Pulley Assy to the Main Frame.
2. Attach the Compression Spring 13.98 in the order from the dowel on the CR Driven Pulley Assy to the rib on the Main Frame.
3. Attach the CR Timing Belt to the CR Driven Pulley Assy.
4. Attach the CR Timing Belt on the pinion gear of the CR Motor while pushing the CR Driven Pulley Assy to the 0-digit side.
5. Wait five minutes for CR Timing Belt to be extended by the tension of the Compression Spring 13.98.
6. Secure the CR Driven Pulley Assy wit the screw.
Main Frame
Rib
CR Driven Pulley Assy
Dowel
Compression Spring 13.98
CR Timing Belt
Pinion gear of CR Motor
Main Frame
C.B.S-TITE SCREW 3x6 F/ZN-3C (6 ± 1 kg·fcm)
PF Encoder Sensor / PF Scale
Do not reuse the removed PF Scale and make sure to replace it with a new one when removing it.
When installing the PF Scale, it is pressed into the PF Roller, therefore, the removed one is deformed. If it is re-installed to the printer, it does not
rotate properly and the paper feed accuracy may be reduced.
When installing the PF Scale to the PF Roller, press the PF Scale into the PF Roller vertically.
After installing the PF Encoder Sensor, confirm the PF Scale does not touch the PF Encoder Sensor.
PF Scale
PF Encoder Sensor
PF Roller
PF Encoder Sensor
PF Scale
PF Roller
CR Driven Pulley Assy / CR Timing Belt (L365/L366,L360/L362,L310/L312 Series)
When installing the CR Driven Pulley Assy and CR Timing Belt, follow the procedure below.
1. Install the CR Driven Pulley Assy to the Main Frame.
2. Attach the Compression Spring 20.91 in the order from the dowel on the CR Driven Pulley Assy to the rib on the Main Frame.
3. Attach the CR Timing Belt to the CR Driven Pulley Assy.
4. Attach the CR Timing Belt on the pinion gear of the CR Motor while pushing the CR Driven Pulley Assy to the 0-digit side.
Main Frame
Rib
CR Driven Pulley Assy
Dowel
Compression Spring 20.91
Main Frame
CR Timing Belt
Pinion gear of CR Motor
Pump Unit
When installing the Pump Unit, follow the procedure below in order to prevent ink suction failure.
1. Route the Pump Tube A through the hole of the Frame Base.
2. Install the Pump Unit to the Frame Base, and route the Pump Tube A through the ribs of the Frame Base with their dashed line facing upward.
3. Secure the Pump Unit to the Frame Base with the screw (x1).
4. Route the Pump Tube B through the ribs of the Pump Unit and Frame Base, and insert it to the hole of the Frame Base up to the marking
(8
±
1 mm from tube end).
Step 4 Pump
Tube B
Marking
8 ± 1 mm
Hole of Frame Base
Hole of
Frame Base
Pump
Tube A
Step 1-2
Pump Unit
Route Pump Tube A through ribs of Frame
Base with their dashed line facing upward.
Insert Pump Tube B up to the marking (8 ± 1 mm
from tube end) to the hole of Frame Base.
C.B.P-TITE SCREW 3x10 F/ZN-3C (6 ± 1 kgf·cm)
Step 3
Frame Base
Rib

 Loading...