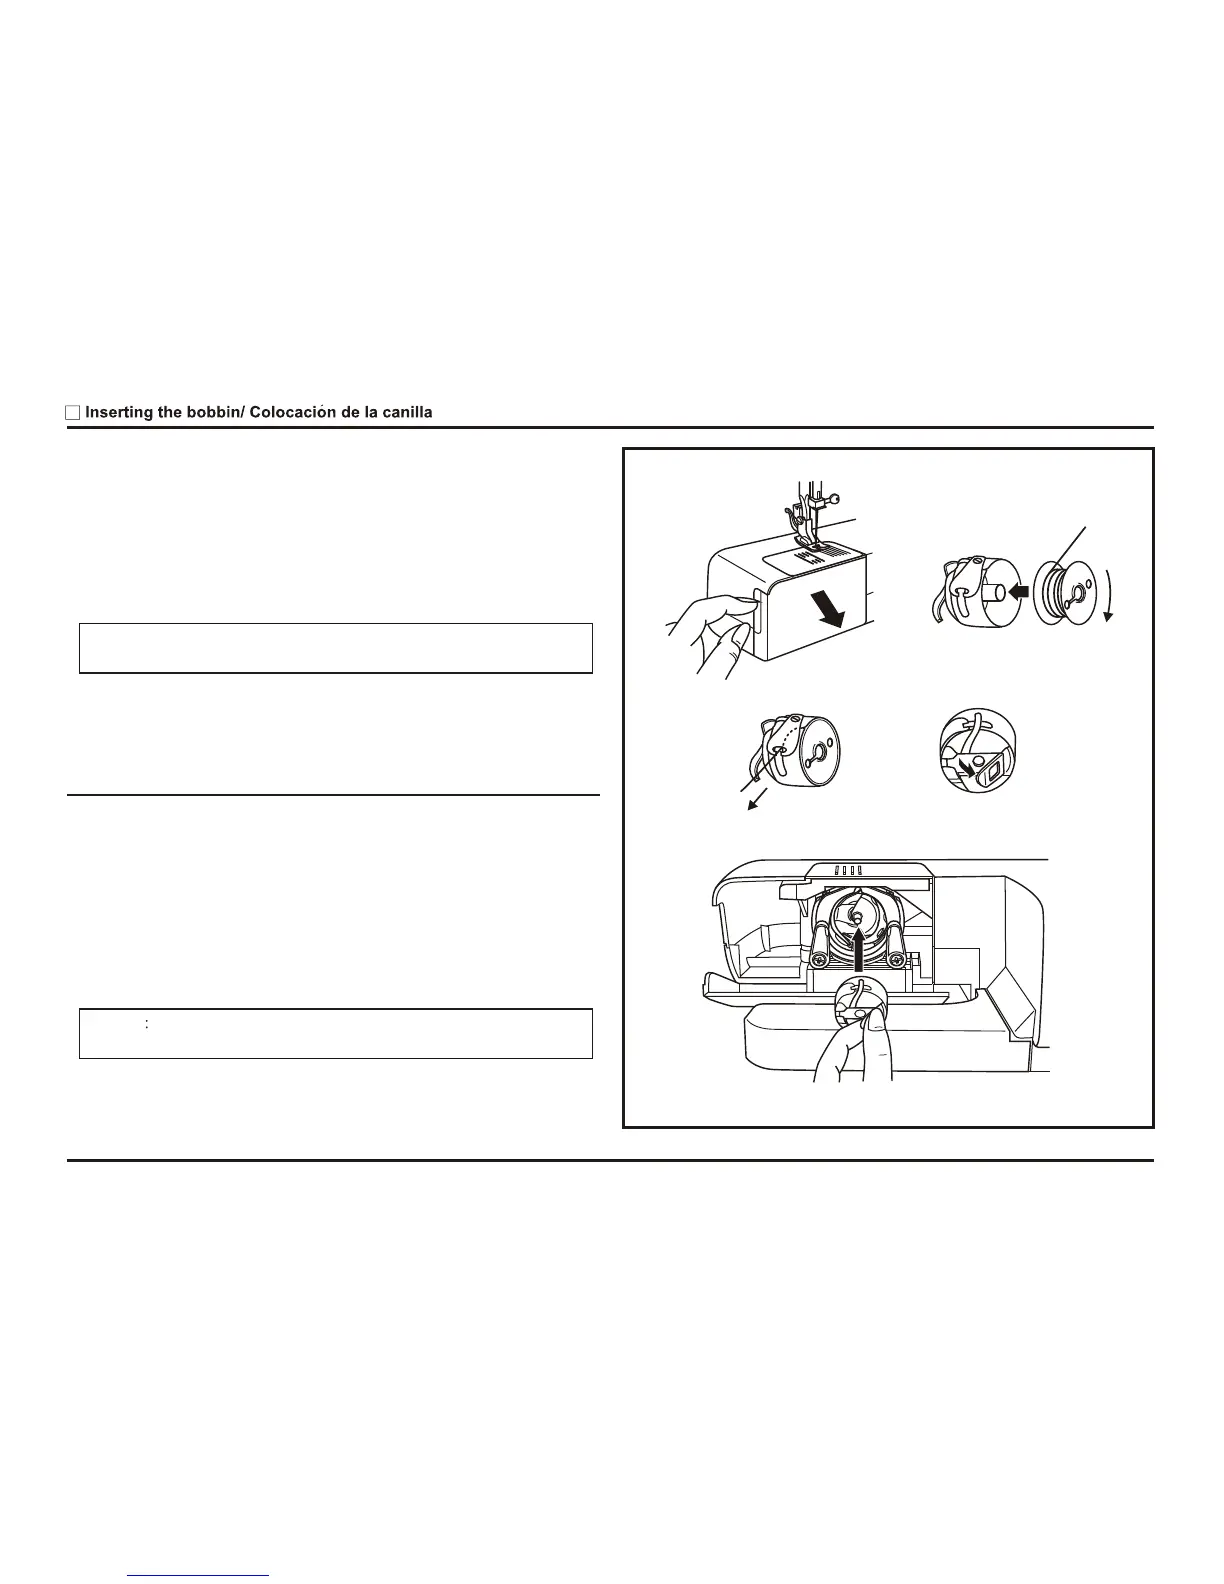
When inserting or removing the bobbin, the needle must be fully raised.
Open the hinged cover. (1)
Hold the bobbin case with one hand. Insert the bobbin so that the
thread runs in a clockwise direction (arrow). (2)
Put the thread under the tension spring. (3)
Hold the bobbin case by the hinged latch. (4)
Insert it into the shuttle. (5)
Attention:
Turn power switch to off ("O").
La aguja tiene que estar siempre arriba del todo al poner y sacar la
canilla.
Abrir la tapa con charnela. (1)
Sujetar el porta-canilla con una mano. Poner la canilla de manera que
el hilo se devane en el sentido de las agujas del reloj (flecha). (2)
Pasar el hilo por la ranura y por debajo del muelle. (3)
Introducir el porta-canilla en el carril de la lanzadera sujetando la
charnela con el pulgar y el indice. (4/5)
Atencio n:
El interruptor principal tiene que estar a ("O").
11
1 2
3
4
5
 Loading...