WARNING
Keep open flames and sparks away from the battery.
• Be careful when handling the battery.
• Avoid spilling electrolyte.
• Keep flames and sparks away from the battery.
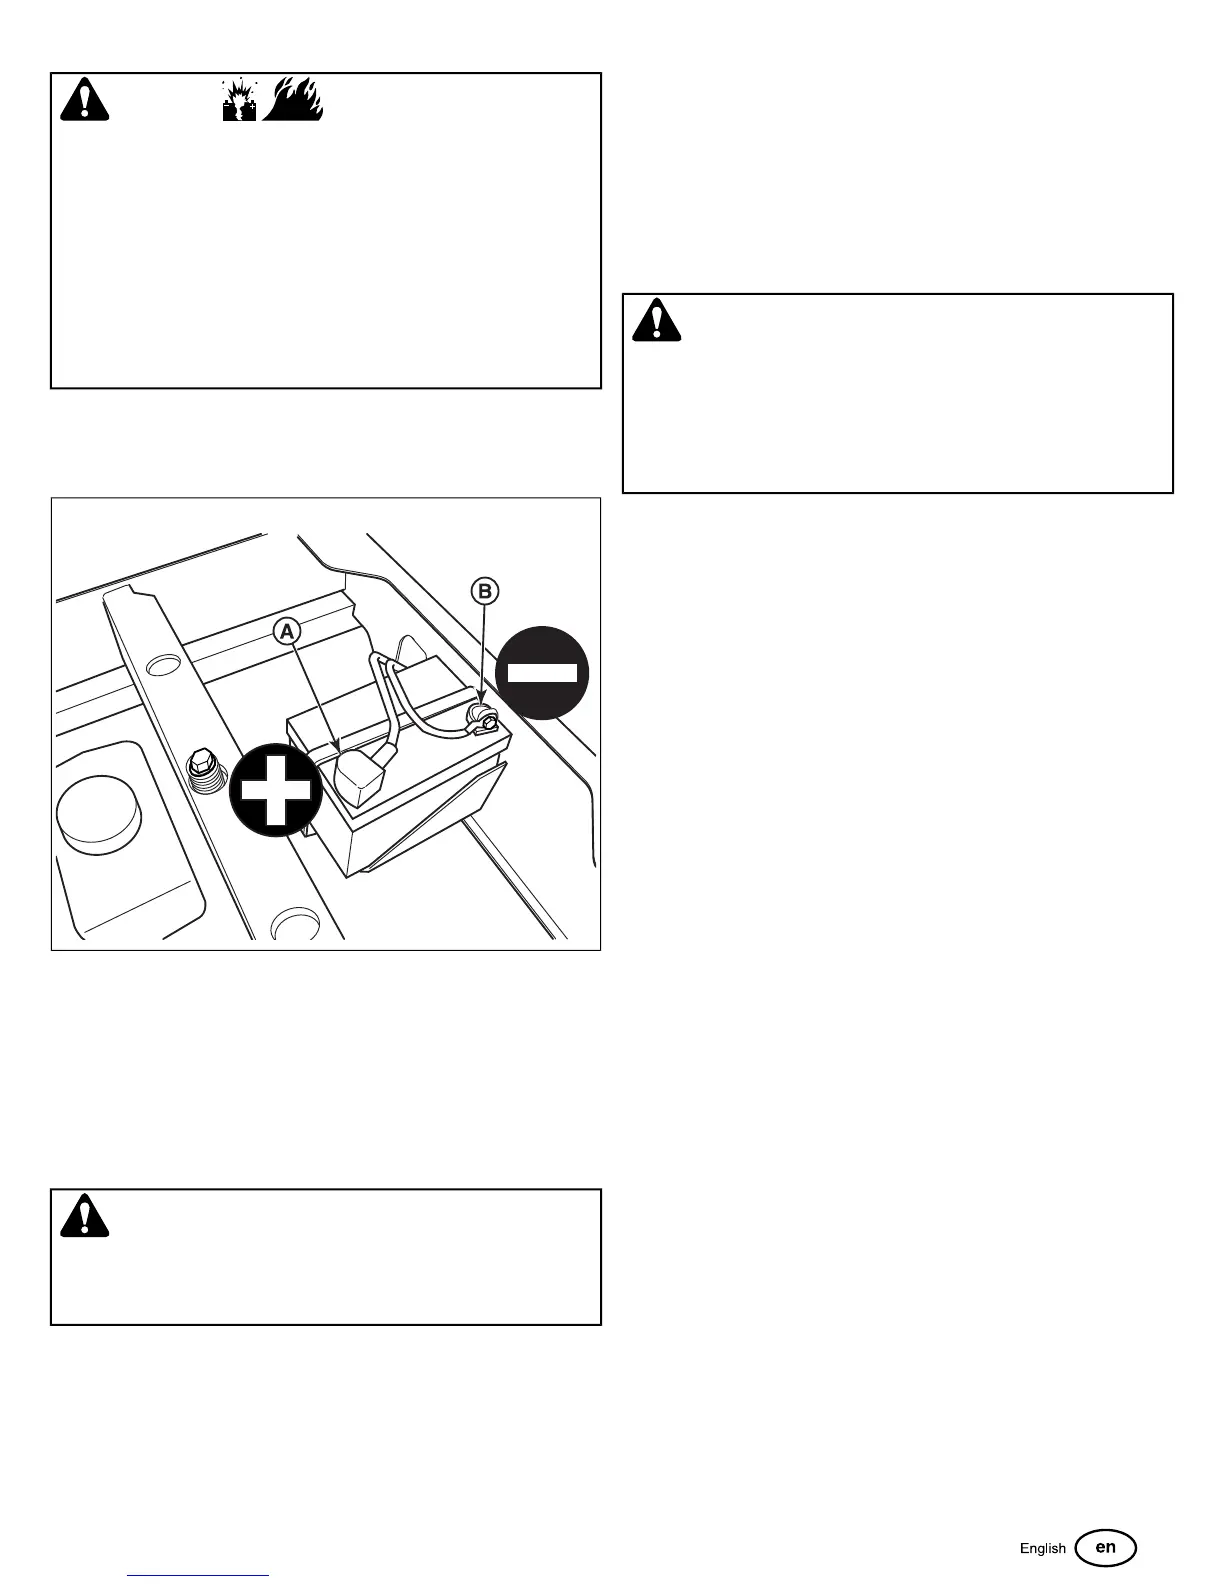
• When removing or installing battery cables, disconnect
the negative cable FIRST and reconnect it LAST. If not
done in this order, the positive terminal can be shorted to
the frame by a tool.
Cleaning the Battery and Cables
1. Disconnect the cables from the battery, negative [-] cable
first (B, Figure 57).
57
2. Clean the battery terminals and cable ends with a wire brush
until shiny.
3. Reinstall the battery and reattach the battery cables, positive
[+] cable first (A).
4. Coat the cable ends and the battery terminals with
petroleum jelly or non-conducting grease.
Battery Service
WARNING
Keep open flames and sparks away from the battery; the
gasses coming from it are highly explosive. Ventilate the
battery well during charging.
Checking Battery Voltage
A voltmeter can be used to determine condition of battery. When
engine is off, the voltmeter shows battery voltage, which should
be 12 volts. When engine is running, the voltmeter shows
voltage of charging circuit which normally is 13 to 14 volts.
A dead battery or one too weak to start the engine may not
mean the battery needs to be replaced. For example, it may
mean that the alternator is not charging the battery properly. If
there is any doubt about the cause of the problem, see your
dealer. If you need to replace the battery, follow the steps under
Cleaning the Battery & Cables in the Regular Maintenance
Section.
Charging a Completely Discharged Battery
WARNING
• Do NOT charge battery with key switch ON.
• Never use a quick battery charger to start engine.
• Always disconnect negative (-) battery cable before
charging battery,
1. Be aware of all the safety precautions you should observe
during the charging operation. If you are unfamiliar with the
use of a battery charger and hydrometer, have the battery
serviced by your dealer.
2. Add distilled water sufficient to cover the plate (fill to the
proper level near the end of the charge). If the battery is
extremely cold, allow it to warm before adding water
because the water level will rise as it warms. Also, an
extremely cold battery will not accept a normal charge until
it becomes warm.
3. Always unplug or turn the charger off before attaching or
removing the clamp connections.
4. Carefully attach the clamps to the battery in proper polarity
(usually red to [+] positive and black to [-] negative).
5. While charging, periodically measure the temperature of
the electrolyte. If the temperature exceeds 125° F (51.6°
C), or if violent gassing or spewing of electrolyte occurs,
the charging rate must be reduced or temporarily halted to
prevent battery damage.
6. Charge the battery until fully charged (until the specific
gravity of the electrolyte is 1.250 or higher and the
electrolyte temperature is at least 60° F). The best method
of making certain a battery is fully charged, but not over
charged, is to measure the specific gravity of a cell once
per hour. The battery is fully charged when the cells are
gassing freely at low charging rate and less than 0.003
change in specific gravity occurs over a three hour period.
Jump Starting With Auxiliary (Booster) Battery
Jump starting is not recommended. However, if it must be done,
follow these directions. Both booster and dis-charged batteries
should be treated carefully when using jumper cables. Follow
the steps below EXACTLY, being careful not to cause sparks.
Refer to Figure 58.
37

 Loading...