Operation
5
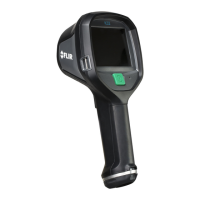
5.1 Powering the K1
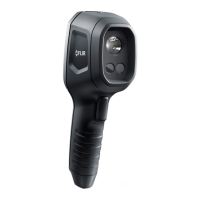
The K1 is powered by a rechargeable lithium battery. Long press the power
button (center) to switch the K1 ON or OFF. If the K1 does not power ON,
charge the battery by connecting the K1 to an AC charger using the supplied
USB-C cable. The USB-C jack is located in the compartment at the top of the
K1. Do not use the K1 while it is charging. The K1 is rated IP67.
The K1 has an Auto Power OFF (APO) utility that switches it OFF automati-
cally after the programmable APO time has elapsed. Go to the menu system
(under Device Settings) To set the APO timer. See Section 6, Programming
Menu System, for more information.
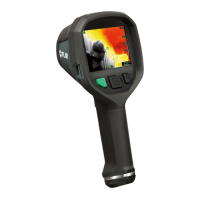
5.2 Thermal Camera
Figure 5.1 Thermal MSX® Camera Image
1. Long press the power button to switch the K1 ON.
2. If not already selected, choose the Thermal plus Visible Image (MSX®)
mode in the menu system (Image Adjustments/Image Mode). Adjust the
MSX® (Multi-Spectral Dynamic Imaging) alignment by first pressing
MENU, with the thermal image showing in the menu, and then using the
arrow buttons to make the adjustment. Adjust until the thermal and visual
images are aligned accurately. See MSX® alignment in the Programming
Menu System.
3. Point the camera toward the test area and scan as desired. View the cam-
era image on the K1 display.
4. Use the ‘center spot’ display icon for targeting. If the center spot is not
shown on the display, enable it in the menu system (under Measurement).
#NAS100007; r. AA/59809/59809; en-US
6
 Loading...