GLOVES
SAFETY
GLASSES
APPLIANCE POWER
CORD KIT
(NOT PROVIDED)
4" DUCT
CLAMPS (2)
OR
4" SPRING
CLAMPS (2)
EXHAUST
HOOD
3/4" STRAIN
RELIEF
UL RECOGNIZED
4" DIA. METAL
ELBOW
DUCT TAPE
UL RATED
120/240V,30A
WITH 3 OR 4 PRONGS.
IDENTIFY THE PLUG
TYPE AS PER THE
HOUSE RECEPTACLE
BEFORE PURCHASING
LINE CORD.
4" DIA. FLEXIBLE METAL (SEMI-RIGID)
UL LISTED TRANSITION DUCT
(IF NEEDED)
KIT WX08X10077 (INCLUDES 2 ELBOWS)
4" DIA. METAL DUCT
(RECOMMENDED)
4" DIA. FLEXIBLE METAL (FOIL TYPE)
UL LISTED TRANSITION DUCT
(IF NEEDED.)
4" COVER PLATE (IF NEEDED)
(KIT WE1M454)
233D1835P002 31-16652-5 12-12 GE
WARNING: RISK OF FIRE
• To reduce the risk of severe injury or death, follow all installation
instructions.
$SSOLDQFHLQVWDOODWLRQPXVWEHSHUIRUPHGE\DTXDOL¿HGLQVWDOOHU
• Install the appliance according to these instructions and in accordance
with local codes.
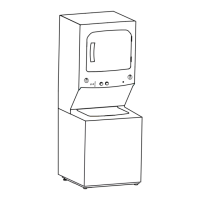
• This appliance must be exhausted to the outdoors.
• Use only 4” rigid metal ducting for exhausting the clothes dryer to the
outdoors.
• DO NOTLQVWDOODFORWKHVGU\HUZLWKÀH[LEOHSODVWLFGXFWLQJPDWHULDOV
,I ÀH[LEOH PHWDO VHPLULJLG RU IRLOW\SH GXFW LV LQVWDOOHG LW PXVW EH
UL listed and installed in accordance with the instructions found
in “Connecting The Dryer To House Vent” on page 8 of this manual.
Flexible venting materials are known to collapse, be easily crushed,
DQGWUDSOLQW7KHVHFRQGLWLRQVZLOOREVWUXFWGU\HUDLUÀRZDQGLQFUHDVH
WKHULVNRI¿UH
• Do not install or store this appliance in any location where it could be
exposed to water and or weather.
6DYHWKHVHLQVWUXFWLRQV,QVWDOOHUV%HVXUHWROHDYHWKHVHLQVWUXFWLRQV
ZLWKWKHFXVWRPHU
NOTE: Installation and service of this appliance requires basic
mechanical and electrical skills. It is your responsibility to
FRQWDFWDTXDOL¿HGLQVWDOOHUWRPDNHWKHHOHFWULFDOFRQQHFWLRQV
Installation
Instructions
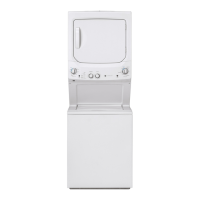
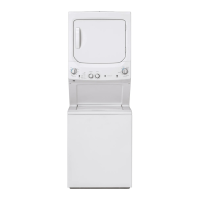
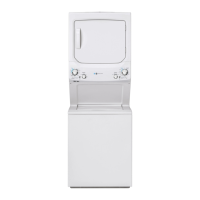
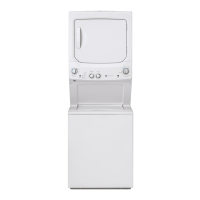
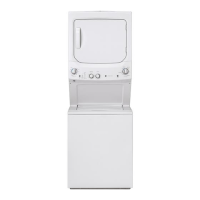
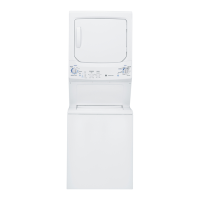
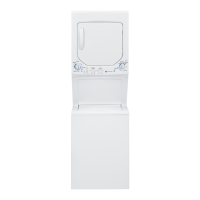
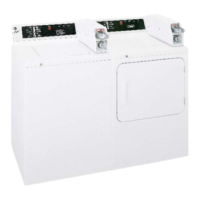
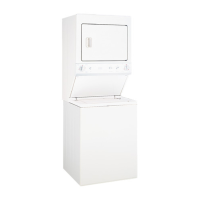
Unitized Electric
Washer/Dryer
Questions on Installation? Call: 1-800-GECARES (US) RU9LVLWRXU:HEVLWHDWwww.GEAppliances.com (US).
In Canada, call 800.561.3344 or visit www.GEAppliances.ca
BEFORE YOU BEGIN
Read these instructions completely and
carefully.
• IMPORTANT- Save these instructions for
local inspector’s use.
• IMPORTANT- Observe all governing codes
and ordinances.
• Note to Installer - %H VXUH WR OHDYH WKHVH
instructions with the customer.
• Note to Customer - Keep these instructions with
your Owner’s Manual for future reference.
%HIRUHWKHDSSOLDQFHLVUHPRYHGIURPVHUYLFHRU
discarded, remove the washer and dryer doors.
• Inspect the dryer exhaust outlet and straighten
the outlet walls if they are bent.
• Service information and the wiring diagram are
located at the access panel.
• Do not allow children on or in the appliance.
Close supervision of children is necessary when
the appliance is used near children.
• Install the appliance where the temperature is
above 50°F for satisfactory operation of the
control system.
• Product failure due to improper installation is not
covered under the Warranty.
TOOLS YOU WILL NEED
Slip Pliers
Phillips Screwdriver
)ODWEODGH6FUHZGULYHU
1/4” Nutdriver
Level
PARTS SUPPLIED
2 Rubber Washers
2 Stainer Screens/
Rubber Washers
ZDVKHUVPD\EHLQZDWHUKRVHV
2 Washer Hoses
1 Cable Tie
Printed in Mexico
MATERIALS YOU WILL NEED