33 / 44
600, 630
Important:
After disassembly, clean all parts
of contamination (do not damage
parts). Check parts for potential
damage, replace if necessary (only
use genuine parts from GEMÜ).
12.2 Removing the diaphragm
Important:
Before removing the diaphragm,
please remove the actuator, see
"Valve disassembly (removing
actuator from body)".
1. Unscrew the diaphragm 2.
2. Clean all parts of the remains of product
and contamination. Do not scratch or
damage parts during cleaning!
3. Check all parts for potential damage.
4. Replace damaged parts (only use
genuine parts from GEMÜ).
12.3 Mounting the diaphragm
12.3.1 General information
Important:
Mount the correct diaphragm
that suits the valve (suitable for
medium, medium concentration,
temperature and pressure). The
diaphragm is a wearing part.
Check the technical condition and
function of the diaphragm valve
before commissioning and during
the whole term of use. Carry out
checks regularly and determine the
check intervals in accordance with
the conditions of use and / or the
regulatory codes and provisions
applicable for this application.
Important:
If the diaphragm is not screwed
into the adapter far enough, the
closing force is transmitted directly
onto the diaphragm pin and not
via the compressor. This will cause
damage and early failure of the
diaphragm and thus leakage of the
valve. If the diaphragm is screwed
in too far no perfect sealing at the
valve seat will be achieved. The
function of the valve is no longer
ensured.
Important:
Incorrectly mounted diaphragm
may cause valve leakage /
emission of medium. In this case
remove the diaphragm, check the
complete valve and diaphragm and
reassemble again proceeding as
described above.
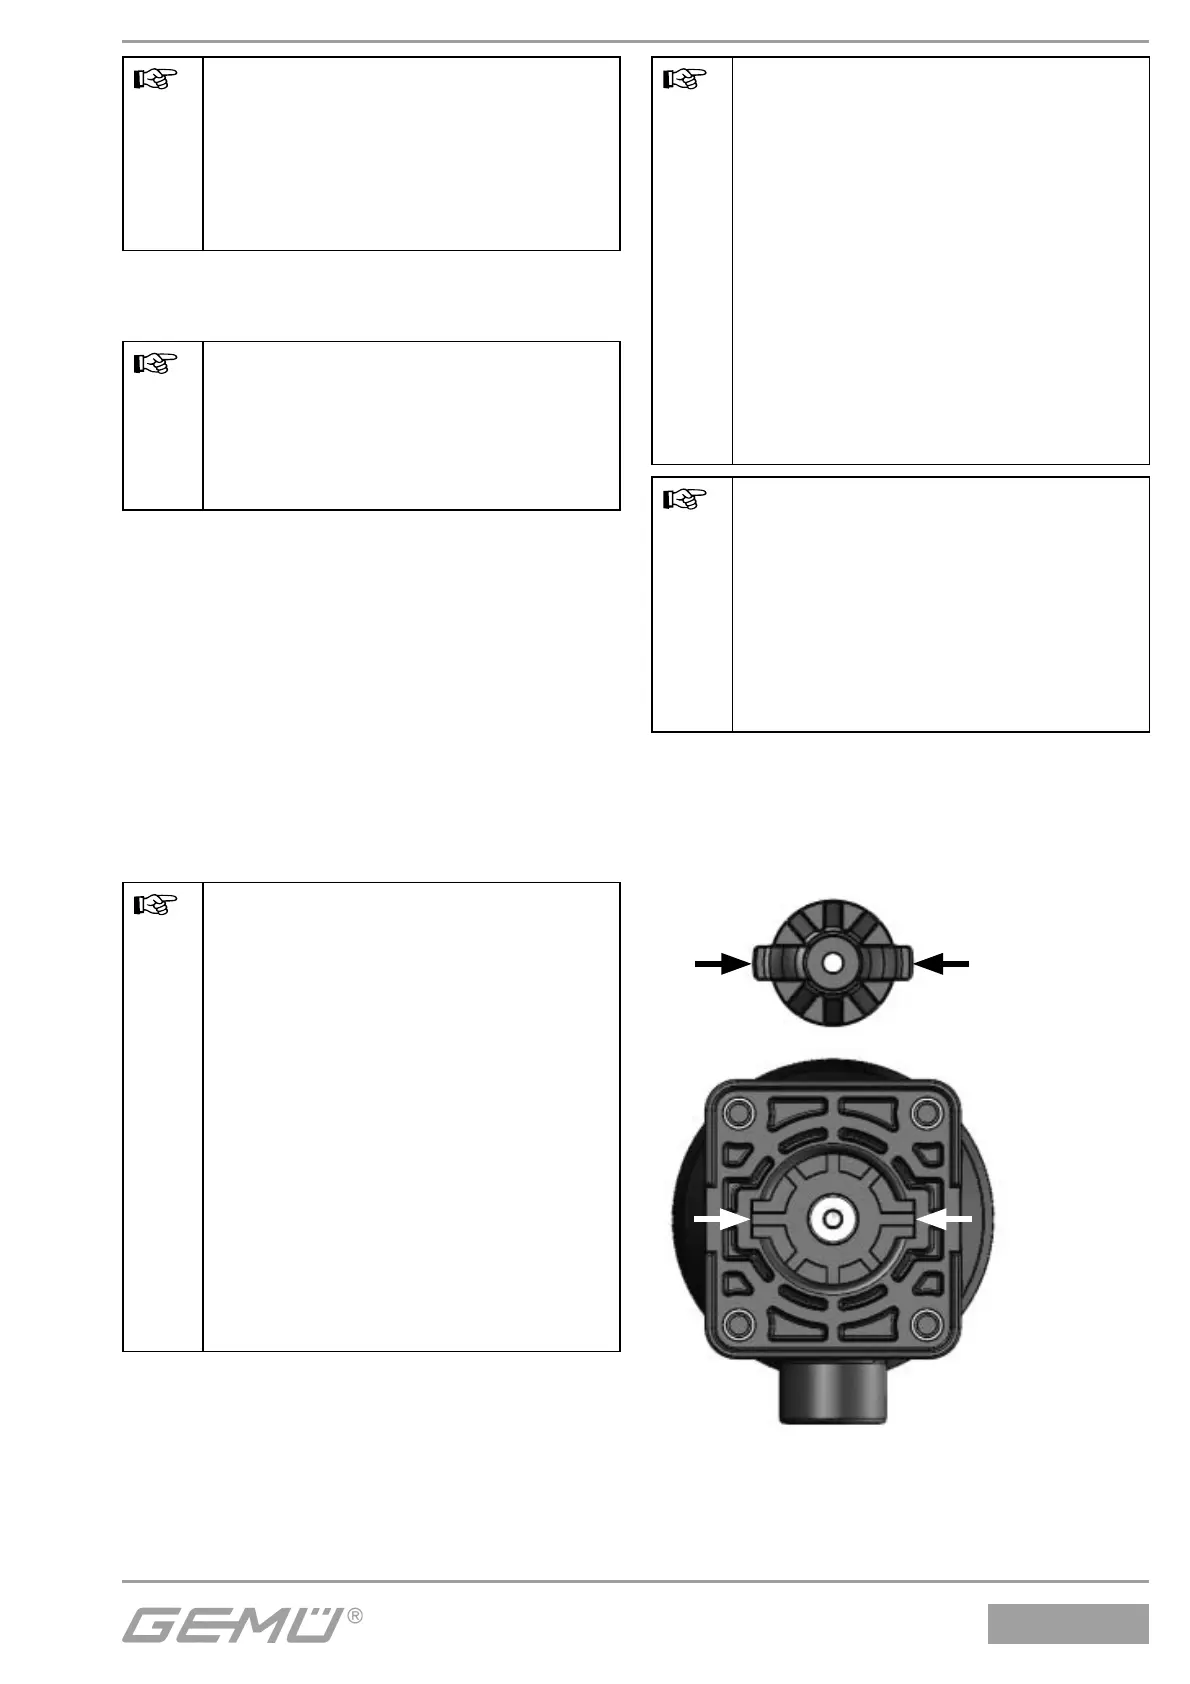
Diaphragm size 10 (only GEMÜ 630):
The compressor is loose. Compressor and
actuator fl ange seen from below:
Compressor -
view from
diaphragm
side
G
Place the compressor loosely on the
actuator spindle, fi t the wings (black
arrows) into the guides (white arrows).

 Loading...