EasyManuals Logo
Home>Gigabyte>Motherboard>GA-EP45-DS3

Gigabyte GA-EP45-DS3 User Manual

Gigabyte GA-EP45-DS3
116 pages
To Next Page IconTo Next Page
To Previous Page IconTo Previous Page
Page #17 background imageLoading...
Page #17 background image
Hardware Installation- 17 -
1-4-2 Installing a Memory
Notch
Before installing a memory module , make sure to turn off the computer and unplug
the power cord from the power outlet to prevent damage to the memory module.
DDR2 DIMMs are not compatible to DDR DIMMs. Be sure to install DDR2 DIMMs on
this motherboard.
DDR2 DIMM
Step 1:
Note the orientation of the memory module. Spread the retaining
clips at both ends of the memory socket. Place the memory
module on the socket. As indicated in the picture on the left,
place your fingers on the top edge of the memory, push down
on the memory and insert it vertically into the memory socket.
Step 2:
The clips at both ends of the socket will snap into place when
the memory module is securely inserted.
A DDR2 memory module has a notch, so it can only fit in one direction. Follow the steps below to
correctly install your memory modules in the memory sockets.

Table of Contents

Questions and Answers:

Question and Answer IconNeed help?

Do you have a question about the Gigabyte GA-EP45-DS3 and is the answer not in the manual?
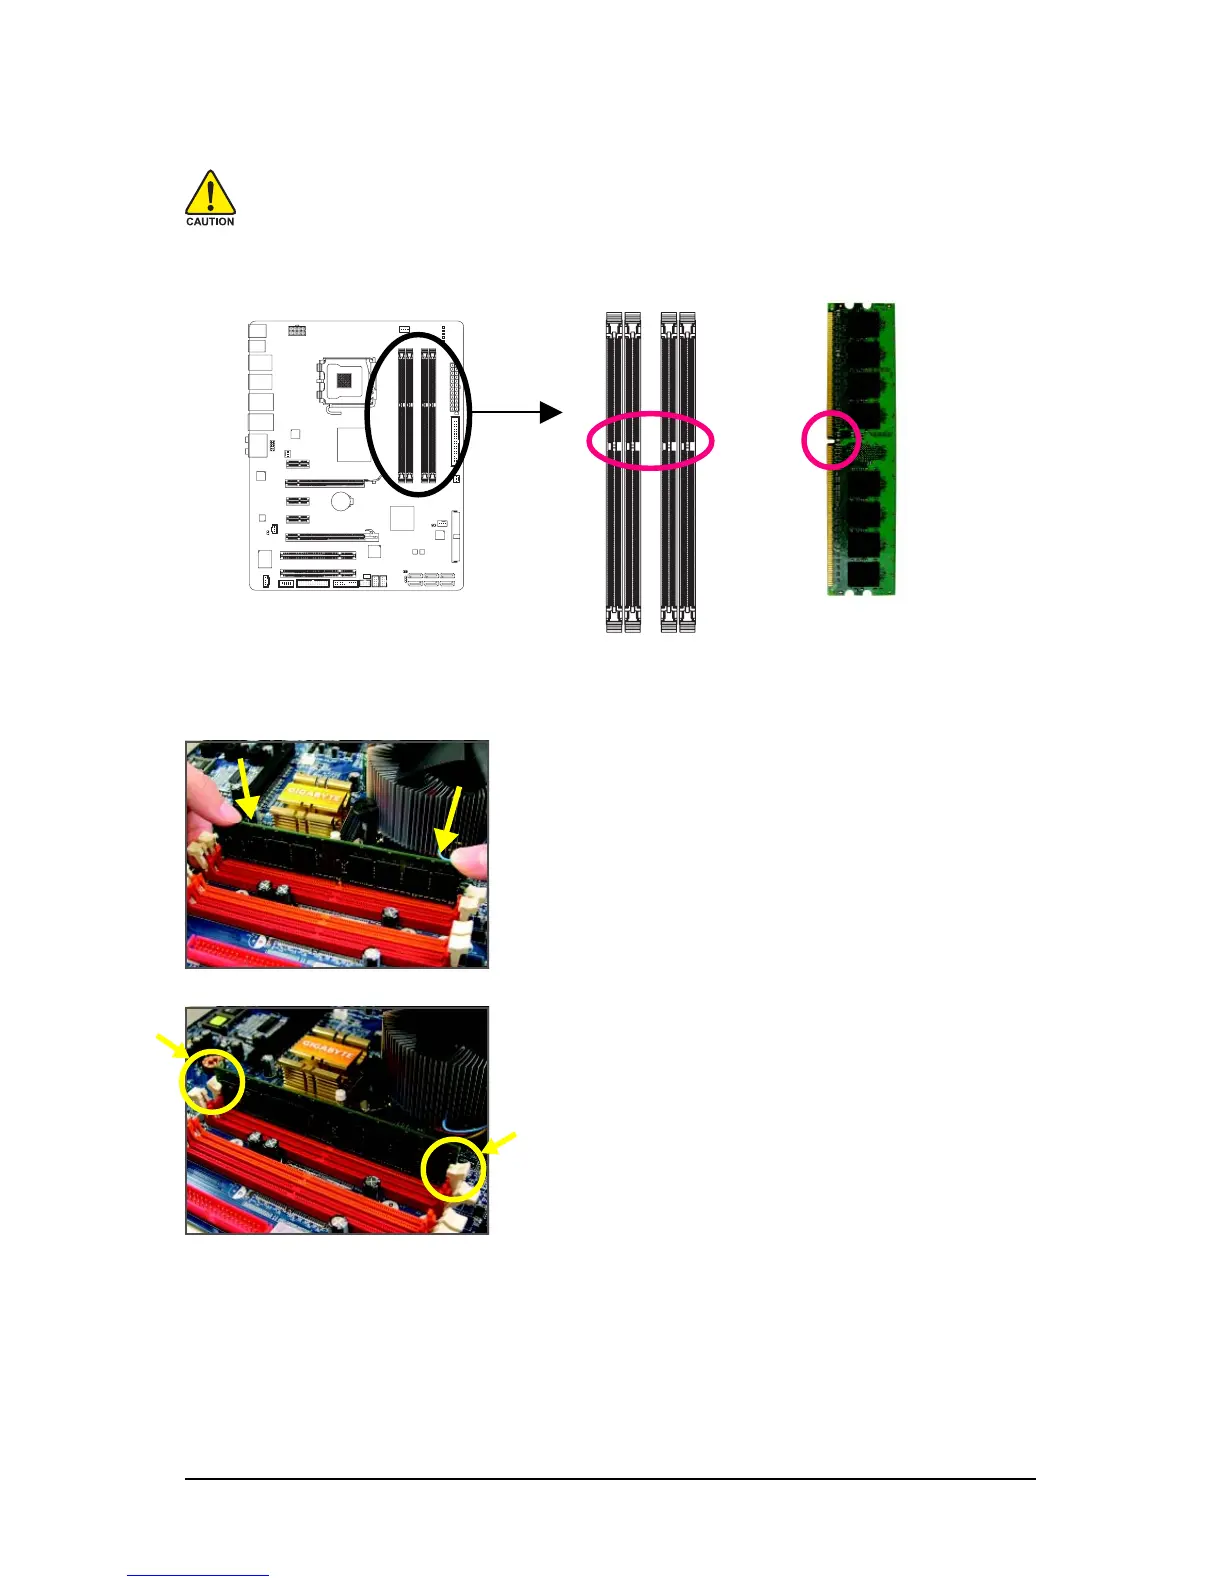
Gigabyte GA-EP45-DS3 Specifications

General IconGeneral
Number of memory slots4
Maximum internal memory16 GB
Processor socketLGA 775 (Socket T)
Processor manufacturerIntel
USB 2.0 connectors2
Power fan connectorYes
Number of SATA connectors6
USB 2.0 ports quantity8
VGA (D-Sub) ports quantity0
BIOS typeAWARD
BIOS memory size64 Mbit
Audio chipRealtek ALC889A
Audio output channels7.1 channels
Motherboard form factorATX
Compatible operating systemsWindows Vista/XP
LAN controllerRealtek RTL8111C
Networking features10/100/1000 Mbit

Related product manuals