 Loading...
Do you have a question about the Gigabyte GA-Z77M-D3H and is the answer not in the manual?
| ECC | No |
|---|---|
| Non-ECC | Yes |
| Memory voltage | 1.5 V |
| Memory channels | Dual-channel |
| Memory slots type | DIMM |
| Number of memory slots | 4 |
| Supported memory types | DDR3-SDRAM |
| Maximum internal memory | 32 GB |
| Supported memory clock speeds | 1066, 1333, 1600 MHz |
| Supported memory module capacities | 16GB, 1GB, 2GB, 4GB, 8GB |
| System bus rate | 5 GT/s |
| Processor socket | LGA 1155 (Socket H2) |
| Processor manufacturer | Intel |
| Compatible processor series | Intel Core i3, Intel Core i5, Intel Core i7 |
| Maximum number of SMP processors | 1 |
| USB 2.0 connectors | 3 |
| Number of Parallel ATA connectors | 0 |
| USB 2.0 ports quantity | USB 2.0 ports have a data transmission speed of 480 Mbps, and are backwards compatible with USB 1.1 ports. You can connect all kinds of peripheral devices to them. |
| Audio chip | VIA VT2021 |
| Cooling type | Passive |
| Component for | PC |
| Power source type | ATX |
| Motherboard chipset | Intel Z77 |
| PC health monitoring | CPU, FAN, Temperature |
| Audio output channels | 7.1 channels |
| Motherboard form factor | micro ATX |
| Compatible operating systems | Windows 7/XP |
| RAID levels | 0, 1, 5, 10 |
| Supported storage drive interfaces | SATA II, SATA III |
| Cables included | SATA |
| PCI Express slots version | 2.0, 3.0 |
| PCI Express configurations | 1x16+1x4 |
| Graphics card | HD Graphics |
| OpenGL version | 3.2 |
| DirectX version | 11 |
| Maximum graphics card memory | 1696 MB |
| Parallel processing technology support | 2-Way CrossFireX |
| LAN controller | - |
| Wi-Fi standards | Not supported |
| Networking features | 10/100/1000 Mbit/sec |
| Ethernet interface type | Gigabit Ethernet |
| BIOS type | EFI AMI |
| ACPI version | 2.0a |
| BIOS memory size | 64 Mbit |
| Depth | 220 mm |
|---|---|
| Width | 244 mm |
Lists the items included in the motherboard package.
Details optional accessories available for purchase.
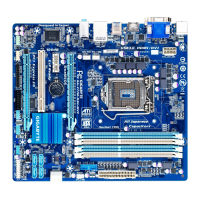
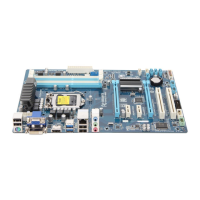
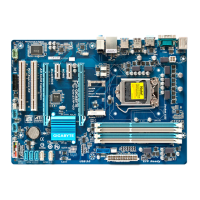
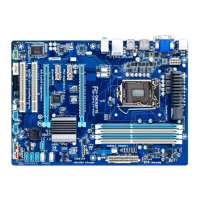
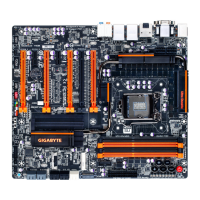
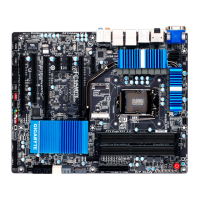
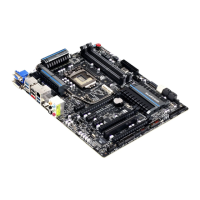
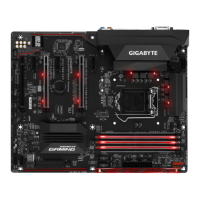
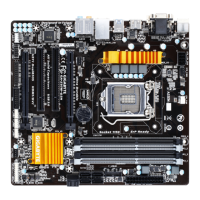
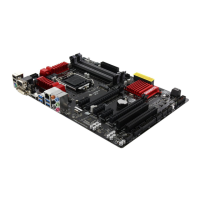
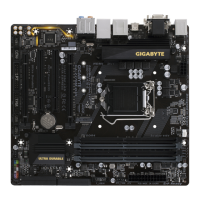
Diagram showing the physical layout of components on the motherboard.
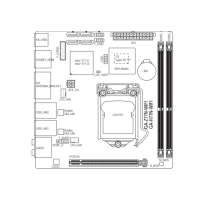
Schematic illustrating the functional connections between motherboard components.
Explains different types of documentation provided with the product.
Guide on how to find the revision number of your motherboard.
Essential safety guidelines for installing hardware to prevent damage.
Detailed technical specifications of the motherboard components and features.
Step-by-step guide for installing the CPU and CPU cooler on the motherboard.
Instructions for installing DDR3 memory modules into the motherboard sockets.
Steps for installing expansion cards like graphics cards into PCIe or PCI slots.
Description of the various ports and connectors available on the motherboard's back panel.
Overview of internal headers and connectors on the motherboard for system components.
Details about the initial logo screen displayed during computer boot-up.
Introduction to the main BIOS setup interface, including navigation and function keys.
Menu for advanced system tuning, clock, frequency, and voltage configuration.
Configuration of system language, date, time, and access level settings.
Settings related to boot order, NumLock state, and CPU features.
Configuration options for onboard devices like LAN, SATA controllers, and USB.
Settings for managing system power states, wake-up events, and energy saving.
Options for saving BIOS settings, loading defaults, and exiting the setup utility.
Procedure for installing essential chipset drivers from the motherboard driver disk.
Information and installation of GIGABYTE utilities and free software.
Provides content descriptions for the drivers included on the disk.
Contact information for GIGABYTE headquarters and branch offices.
Displays basic system information such as CPU, memory, and BIOS version.
Links to GIGABYTE's website for downloading the latest BIOS, drivers, and applications.
Quick links to install GIGABYTE's latest developed utilities.
Utility for quick system data backup and restoration.
Tools for updating the system BIOS, including Q-Flash and @BIOS.
Step-by-step guide for updating the BIOS using the Q-Flash utility.
Instructions for updating the BIOS via the @BIOS utility in a Windows environment.
Software for fine-tuning system settings, overclocking, and monitoring hardware.
A tool for easy data sharing between computers on the same network.
Utility for quickly configuring RAID-ready systems and RAID 0 arrays.
Tool to enable system power savings via a Bluetooth cell phone proximity.
Technology for faster system resume from sleep states using an SSD.
Allows automatic program updates while the system is in sleep mode.
Technology that uses an SSD as a cache for a conventional hard disk.
Guide to configuring SATA hard drives and setting up RAID arrays.
Steps to configure SATA controller mode and create RAID volumes in BIOS.
Procedure for installing SATA RAID/AHCI drivers and operating system.
Guide to configuring the motherboard's audio jacks for input and output.
Instructions for configuring the S/PDIF Out jack for digital audio transmission.
Steps for setting up and configuring the microphone for sound recording.
Guide on how to use the Sound Recorder application for audio recording and playback.
Frequently asked questions and troubleshooting procedures for common issues.
A flowchart to diagnose and solve system startup problems step-by-step.
Statements regarding RoHS, WEEE, and other environmental and safety compliance.
Information on accessing GIGABYTE's global service system for technical support.