EasyManua.ls Logo

Gravely Compact Pro 34 User Manual

Gravely Compact Pro 34
42 pages
To Next Page IconTo Next Page
To Previous Page IconTo Previous Page
Page #29 background imageLoading...
Page #29 background image
EN - 27
4. Disconnect clutch wire.
5. Remove hardware securing clutch stop
bracket to frame and remove bracket.
See Figure 36.
NOTICE: DO NOT cut cable tie.
See Figure 37.
6. Remove transaxle drive belt from drive
system in the following order:
a. From right transaxle sheave.
b. From left transaxle sheave.
c. From clutch sheave.
Install Transaxle Drive Belt
See Figure 38.
1. Install transaxle drive belt to drive system
in the following order:
a. Around clutch sheave.
b. Around left transaxle sheave.
c. Around right transaxle sheave.
2. Align belt with idler pulley.
3. Reinstall idler spring hook onto anchor
bolt. Make sure belt has tension and is
aligned in all pulleys.
IMPORTANT: Make sure belt has tension and
is aligned in all pulleys. See Figure 38.
Figure 36
Left
Transaxle
Right
Transaxle
Figure 37
Figure 38
1. Engine Sheave
2. Idler Pulley
3. Left Transaxle
4. Right Transaxle
1
2
3
4
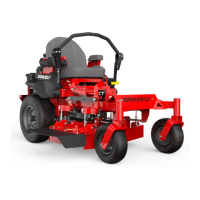
Table of Contents

Questions and Answers:

Gravely Compact Pro 34 Specifications

General IconGeneral
Engine ManufacturerKawasaki
Cutting Width34 inches
Cutting Height1.5 - 4.5 inches
TransmissionHydrostatic
Blade Tip Speed18, 000 fpm
Deck TypeFabricated
Deck MaterialSteel
Warranty3 years

Summary

Welcome

Register Your Product!

Instructions on how to register the product for warranty activation.

Safety

Safety Decals

Safety Decal Locations

Illustrates the locations of various safety decals on the unit.

Safety Decal Descriptions

Details the meaning and importance of each safety decal.

Safety Rules

Training

Operator responsibilities for reading and understanding manuals and controls.

Before Operation

Pre-operation checks and preparations for safe use.

Operation

General operating procedures and safety precautions.

Slope Operation

Detailed safety instructions for operating on slopes.

Fuel

Safe handling and storage procedures for fuel.

Controls and Features

Power-Take-Off (PTO) Knob

Instructions on using the PTO knob to control mower blades.

Rollover Protection Structure (ROPS)

Information regarding the optional ROPS availability and use.

Parking Brake Lever

Controls the parking brake; essential for starting the engine.

Safety Interlock System

Monitors unit features to ensure operator safety.

Steering Levers

Control direction and speed; returning to neutral stops the unit.

Operation

Emergency Stopping

Steps to take for an immediate and safe shutdown of the unit.

Before Operating Unit

Essential checks and preparations before starting the engine and mowing.

Start the Engine

Step-by-step procedure for safely starting the engine.

Operate Unit

Instructions for mowing, including lever control and best practices.

Stop the Engine

Procedure for safely stopping the engine and securing the unit.

Maintenance

Service Position

Instructions for placing the unit in a stable position for maintenance.

Maintenance Schedule

Recommended service intervals for various checks and tasks.

Hour / Maintenance Meter

Explanation of the meter functions for service alerts and runtime.

Check Safety Interlock System

Procedure to test the safety interlock system's functionality.

Service & Adjustments

Remove and Install Mower Deck

Detailed steps for removing and reinstalling the mower deck.

Level and Pitch Mower Deck

Guide to leveling the deck and checking blade pitch.

Troubleshooting

Engine Does Not Start

Identifies probable causes and corrections for engine starting issues.

Unit Does Not Drive

Diagnoses and corrects issues preventing the unit from driving.

Unit Does Not Drive Straight

Solutions for the unit not tracking straight.

Storage

Related product manuals