STEP 4-INSTALLING THE CEILING ASSEMBLY
Make sure that you have properly matched the roof top air conditioner and interior ceiling assembly.
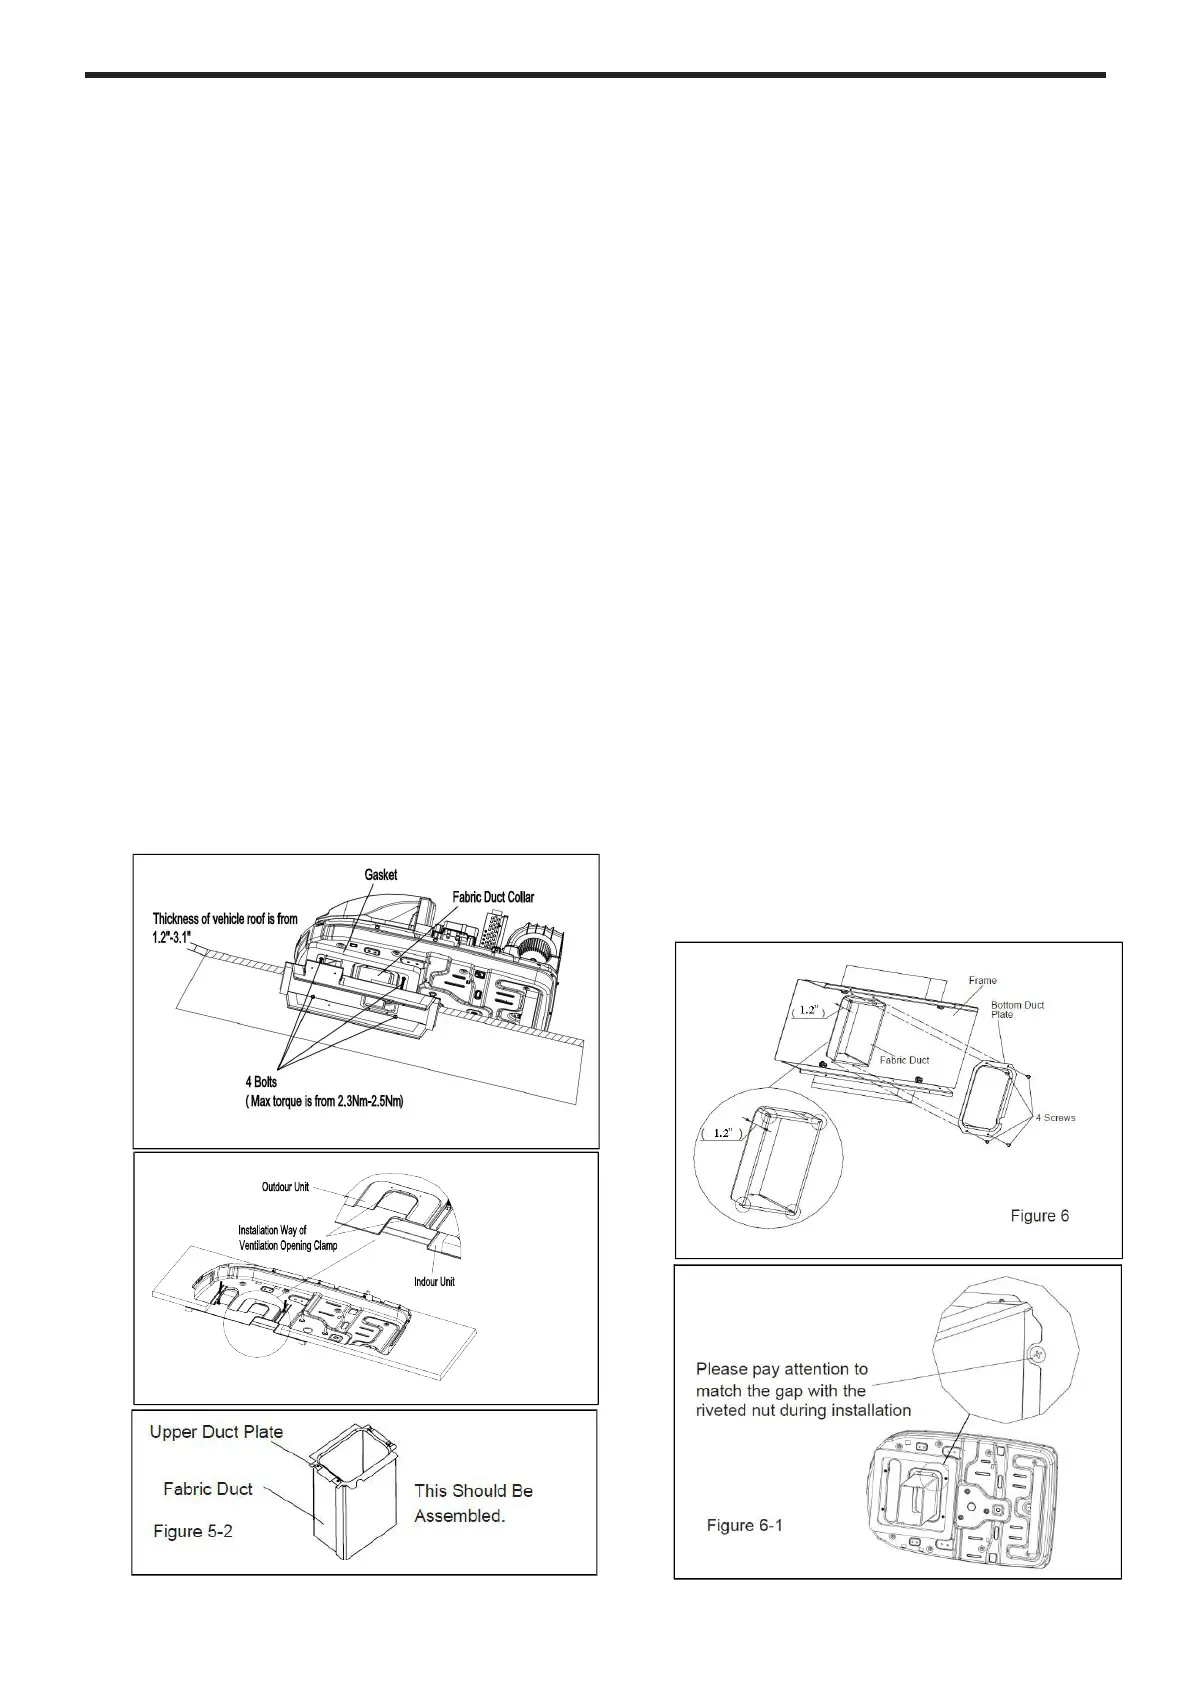
Caution before tightening bolts:
1. The applicable thickness of vehicle roof ranges from 1.2”~3.1”.
2. Before tightening bolts, screw in the four bolts manually and prohibit screwing forcibly.
3. When screwing bolts, you can use automatic tool. Do not tighten one bolt completely and then
tighten other bolts, in order to prevent sticking of screw thread.
4. The max torque for tightening ranges from 2.3Nm~2.5Nm.
The following step by step instructions must be performed in the following sequence to ensure proper
installation.
1.
Carefully take the ceiling assembly out of
the carton(The remote control packed with
the ceiling assembly).
2.
Remove the ceiling grille from the ceiling
assembly.
Before the ceiling assembly can be
mounted to the roof top air conditioner, the
fabric duct collar must be fastened to the
basepan of the roof top air conditioner with
4 screws by upper duct plate (see Figure 5-
2、Figure 6-1、Figure 5、Figure 5-1).
Before lifting the ceiling assembly, pull the
4.
fabric duct collar so it hangs out of the way
and does not get caught under the ceiling
assembly frame.
Secure the ceiling assembly frame to the roof
top air conditioner with the mounting bolts
(see Figure 5).You must start (thread) the
mounting bolts by hand to avoid cross-
threading. DO NOT START THE MOUNTING
BOLTS WITH AN AIR GUN.The mounting
bolts should be tightened, process is
completed when the basepan gasket has
been evenly compressed.
Set the fabric air duct into the duct opening
of installation plate sub-assy and cut off four
corner of fabric air duct. Because the
thickness of vehicle top is different, the
distance between the opening and the
installation plate sub-assy is shown in figure
6.
Fasten each side of the fabric duct with fitting
the bottom duct plate to the ceiling assembly
frame with 4 screws (see Figure 6).Trim any
excess fabric that may extend beyond edge
of bottom duct plate.

 Loading...