STEP 5-ELECTRICAL WIRING
ROUTING 115V AC WIRING
Make sure that all power supply to the unit is disconnected before performing any work on the
unit to avoid the possibility of shock or injury and/or damage to the equipment. When the interior
ceiling assembly frame is properly secured to the roof top air conditioner, the following electrical
connections must be performed.
1.
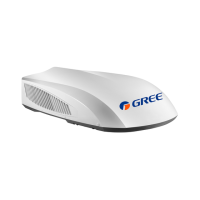
As shown in Figure 7, the outdoor unit has two
sets of outgoing wires, which are power cord
(high current) and the control signal wires
respectively. The former one should be directly
connected to terminal box while the latter one
should be connected to the control signal wire
of the indoor unit.
Route a copper ,with ground, supply wiring
with minimum #14AWG , the wiring from
its power source to the junction box. Do
not attach them at this time.
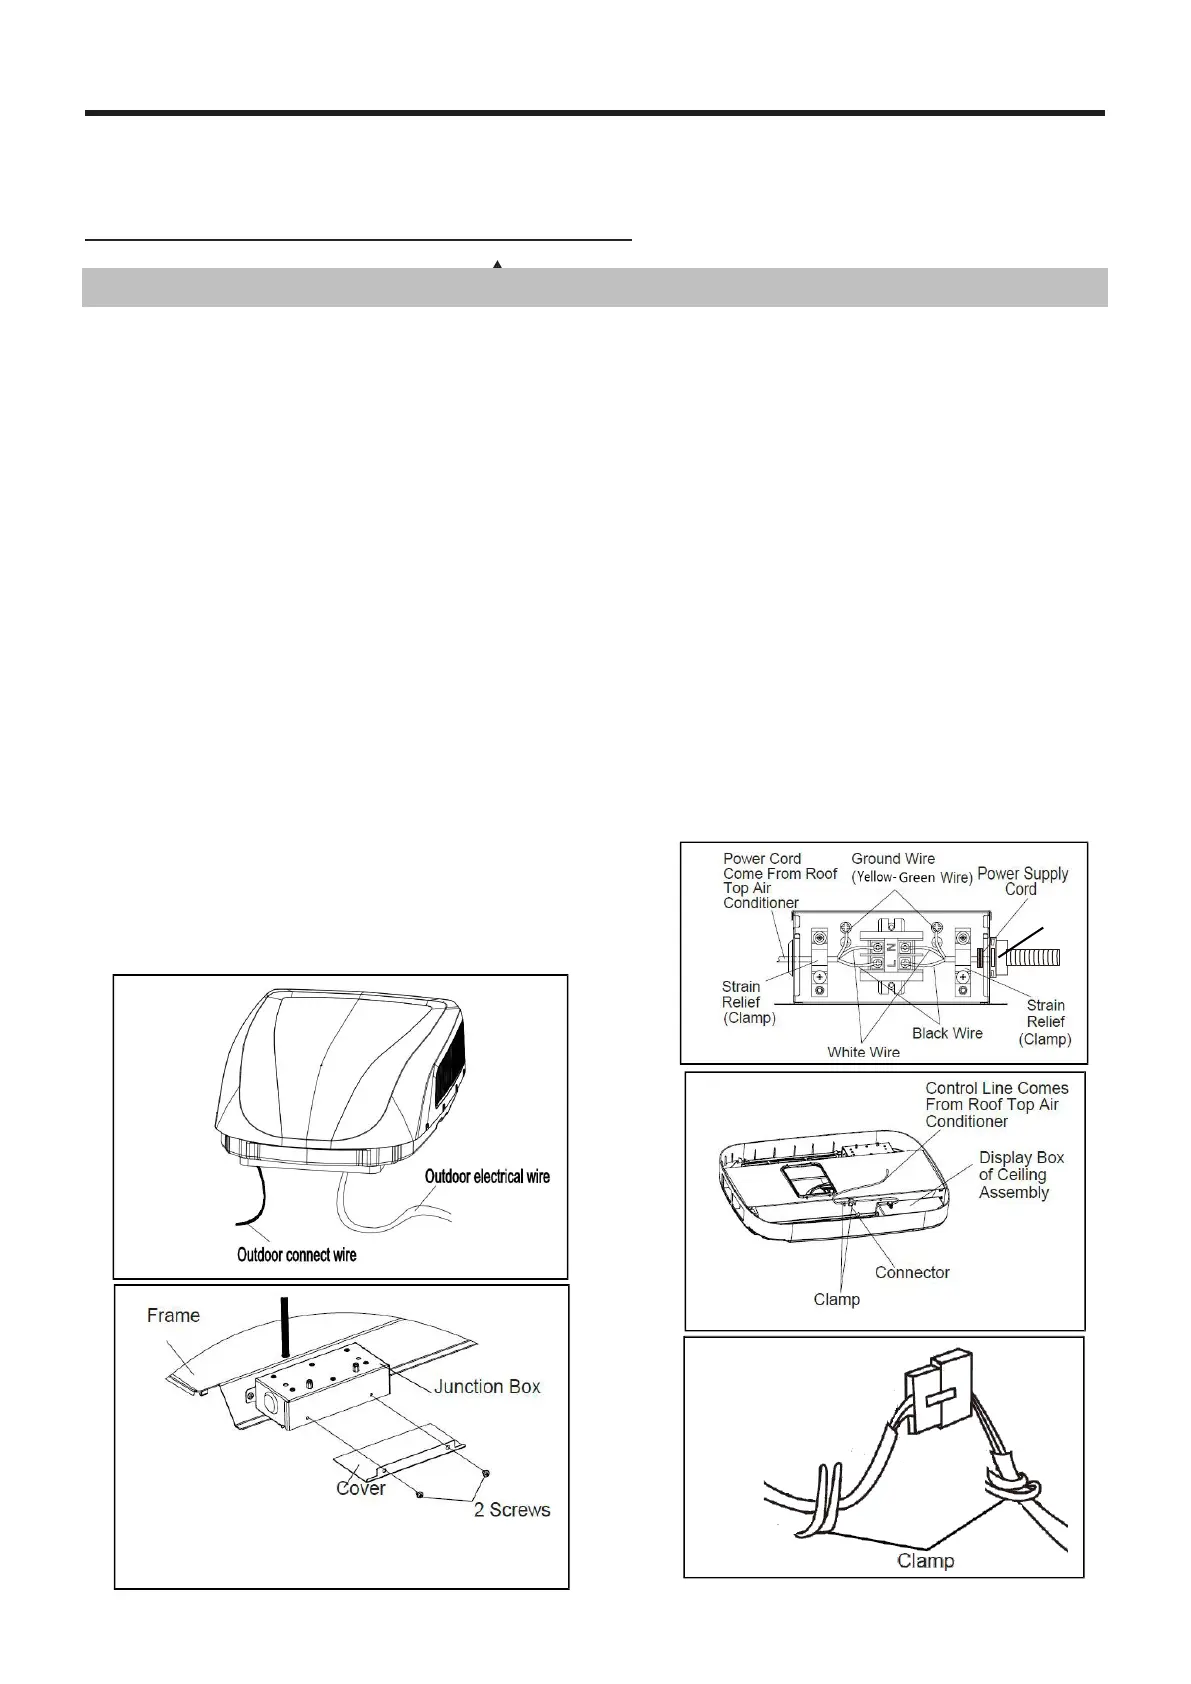
Connect the power cord to the black,
5.
white and ground wires found in the
junction box with a terminal board.
CAUTION Connect black wire to black
wire, white wire to white wireand the
groundwiretoearth.(see Figure 9)
Note:Figure 9,When connecting the power
cord,please use the pipe for preventing
cutting power wire.
6.
Tighten the strain relief clamp to secure the
supply power cord. DO NOT OVERTIGHTEN.
Reinstall the junction box cover.
3.
Take the roof top air conditioner power cord
to connect to the side of the junction box.
Remove the junction box cover (2 screws).Take
the power cord and make it get into the box
through the strain relief that is provided
(see Figure 8).
7.
Connect connector and secure the clamp
(see Figure 10 and Figure 10-1).
 Loading...