Installation Manual
28
NOTE:
All wires between indoor and outdoor units must be connected by the qualied electric contractor.
● Electric wires must be connected correctly. Improper connection may cause malfunction.
● Tighten the terminal screws securely.
● After tightening the screws, pull the wire slightly to conrm whether it's rm or not.
● Make sure that the electric connections are earthed properly to prevent electric shock.
● Make sure that all wiring connections are secure and the cover plates are reinstalled properly. Poor installation may cause re or
electric shock.
7.3.5 Installation of Indoor Unit
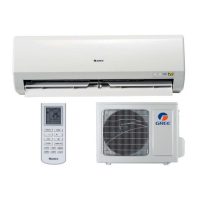
●The piping can be output from right, right rear, left or left rear.
1.When routing the piping and wiring from the left or right side of indoor unit, cut off
the tailings from the chassis when necessary(As shown in Fig.3)
(1)Cut off the tailing 1 when routing the wiring only;
(2)Cut off the tailing 1 and tailing 2 when routing both the wiring and piping.
2.Take out the piping from body case, wrap the piping, power cords, drain hose with
the tape and make them through the piping hole. (As shown in Fig.4)
3.Hang the mounting slots of the indoor unit on the upper hooks of the mounting plate
and check if it is rm enough.(As shown in Fig.5)
4.The installation site should be 250cm or more above the oor.
7.3.6 Installation of Connection Pipe
1.Align the center of the pipe are with the relevant valve.
2.Screw in the flare nut by hand and then tighten the nut with spanner and torque
wrench referring to the following:
NOTE:
Connect the connection pipe to indoor unit at rst and then to outdoor unit. Handle piping bending with care. Do not damage the
connection pipe. Ensure that the joint nut is tightened rmly, otherwise, it may cause leakage.
(N·m)
Ф6
Ф 9.52
Ф 12
3135
1520
5055
Ф 16 6065
Ф 19 7075
Hex nut diameter
Tightening torque
Spanner
Torque
wrench
Piping
Taper nut
Indoor unit piping
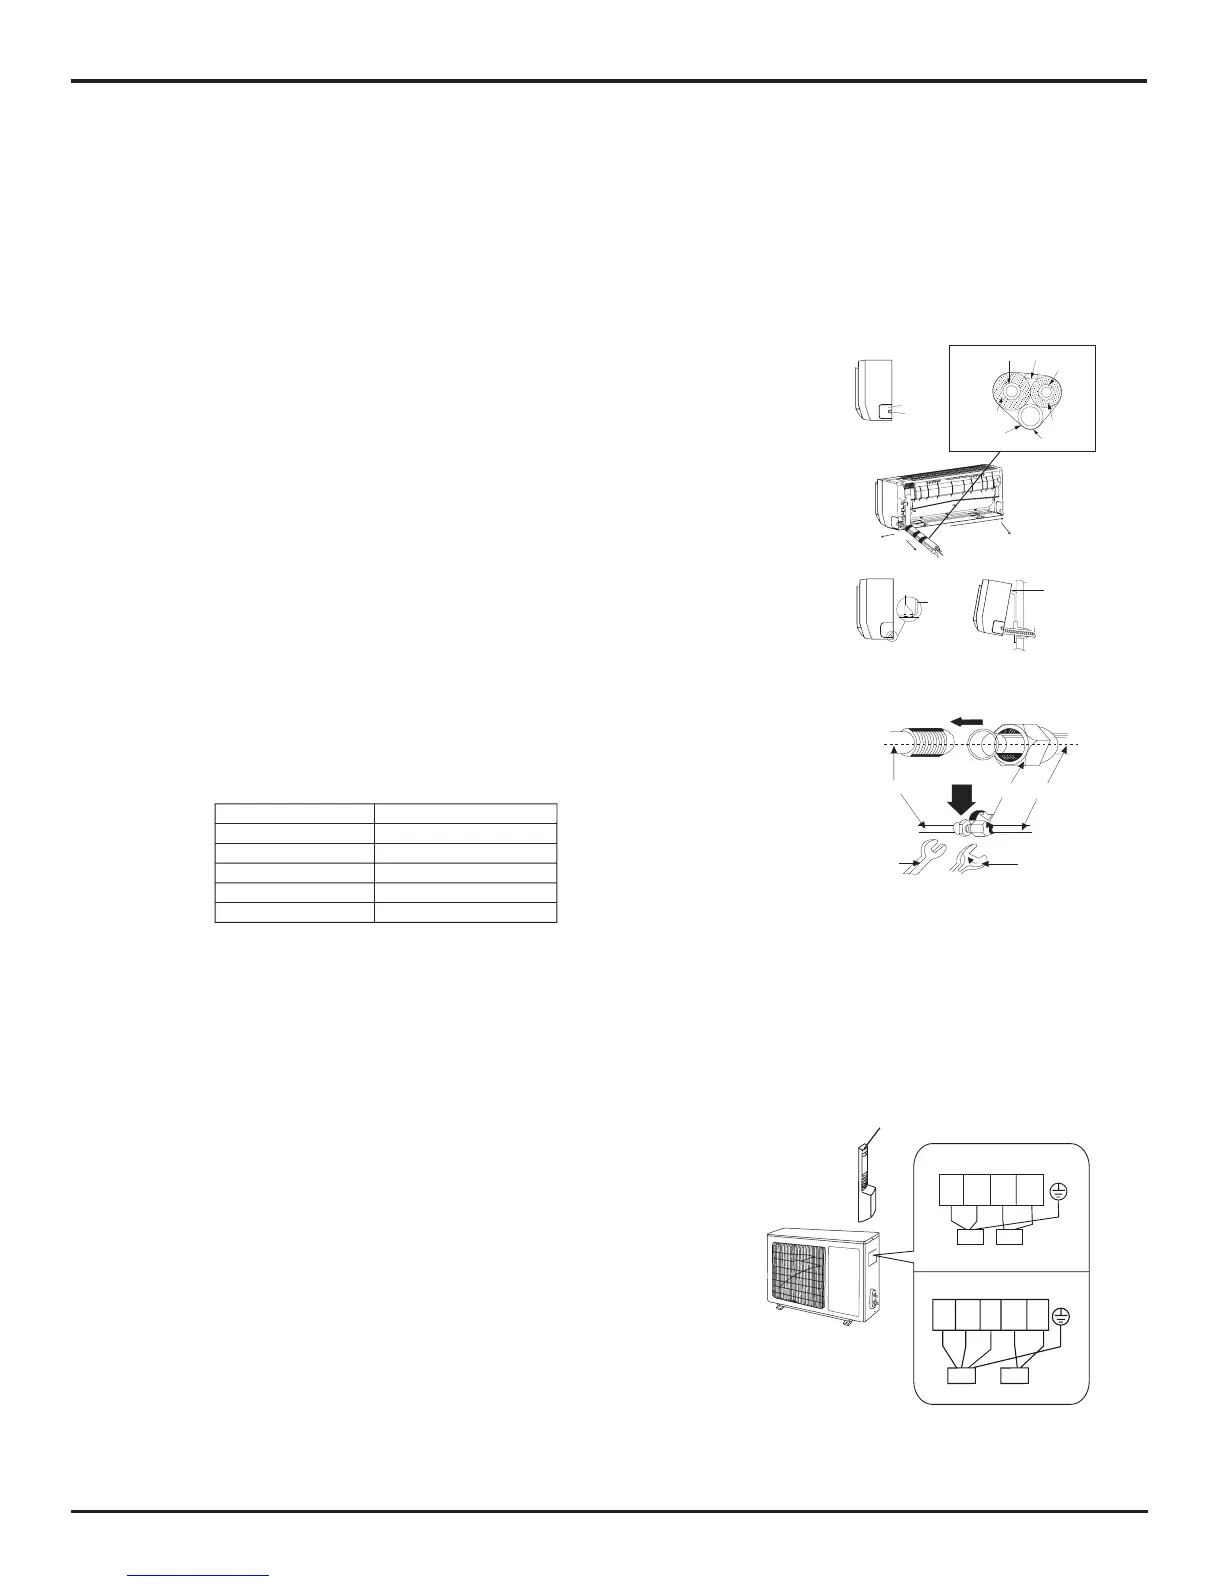
7.4 Installation of Outdoor Unit
7.4.1 Electric Wiring
1. Remove the handle of outdoor unit.
2. Take off wire cord anchorage. Connect and x power
connection cord and signal control wire to the terminal board. Wiring should
t that of indoor unit.
3. Fix the power connection cord and signal control wire with wire clamps and
then connect the corresponding connector.
4. Conrm if the wire has been xed properly.
5. Reinstall the handle .
NOTE:
● Incorrect wiring may cause malfunction of spare part.
● After the wire has been xed, ensure there is frees pace between the connection and xing places on the lead wire.
েৢ
Mounting
plate
Fixing hook
Mounting
plate
Right
Right rear
Left rear
Left
Tailing 1
Tailing 2
Finally wrap it
with tape
Gas side piping
insulation
Water drainage pipe
Liquid side
Piping insulation
Gas side piping
 Loading...