8
Seng limits
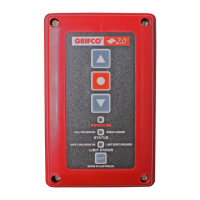
1. While holding STOP, press the SET buon 3 mes.
The LIMIT ERROR indicator will start ashing signifying ‘limit seng mode’
2. Use the DOWN buon to drive the door to the desired CLOSED posion.
The manual hand chain can be used to accurately posion the door before pressing SET
3. Press the SET buon to save this as the CLOSED posion.
The LIMIT ERROR indicator will ash quickly then return ashing slowly
4. Use the UP buon to drive the door to the desired OPENED posion.
The manual hand chain can be used to accurately posion the door before pressing set
5. Press SET again to save this as the OPENED posion. The LIMIT ERROR indicator will ash quickly then will go out
The Closed and Open limits have now been set. If at anyme you need to exit ‘limit seng mode’, just press the STOP buon.
Once set, operate the door between limits 2 – 3 mes to check
they are suitable. If not, return to STEP 1.
To verify limit conrmaon roune, turn power OFF, then back
ON at the open and closed posions, and test proper operaon
accordingly. If required, refer to top of page to reverse the limit
conrmaon direcon.
WARNING
Aer the installaon a nal funcon test of the system
and where present a full funcon test of the safety
devices must be done.
READ CAREFULLY BEFORE SETTING LIMITS!
(not applicable to roller shuers)
The eDrive + 2.0 features a limit conrmaon roune that occurs aer a power outage upon the rst push of any operate buon.
By default, the roune will “jog” slightly downward in order to conrm door posion before proceeding in the intended
direcon.
For doors of rigid construcon (e.g. bi-fold, vercal li, seconal or connuous steel roller doors etc) this roune should be
changed so that the rst “jog” movement is upward. To do so, proceed as follows:
- While holding STOP, press the SET buon 3 mes and CONTINUE to hold STOP for 20 seconds
(or unl the orange light goes solid).
Now proceed to Seng limits, ensuring the upper limit is set NO CLOSER than 50mm from the top stops (or fully open posion)
of the door.
Upon compleon of the installaon, turn power OFF, then back ON at the open and closed posions, and test proper operaon
accordingly.
RKML5051 models (1/2hp roller door openers) will conrm limits by jogging UPWARD rst by default . To reverse the limit
conrmaon direcon, proceed as above.
WARNING
Do not place hands or tools near the opener when power is on or when tesng controls or safety devices.
Always disconnect power before servicing or adjusng the opener.
OPERATION
OPERATION

 Loading...