12
Installation
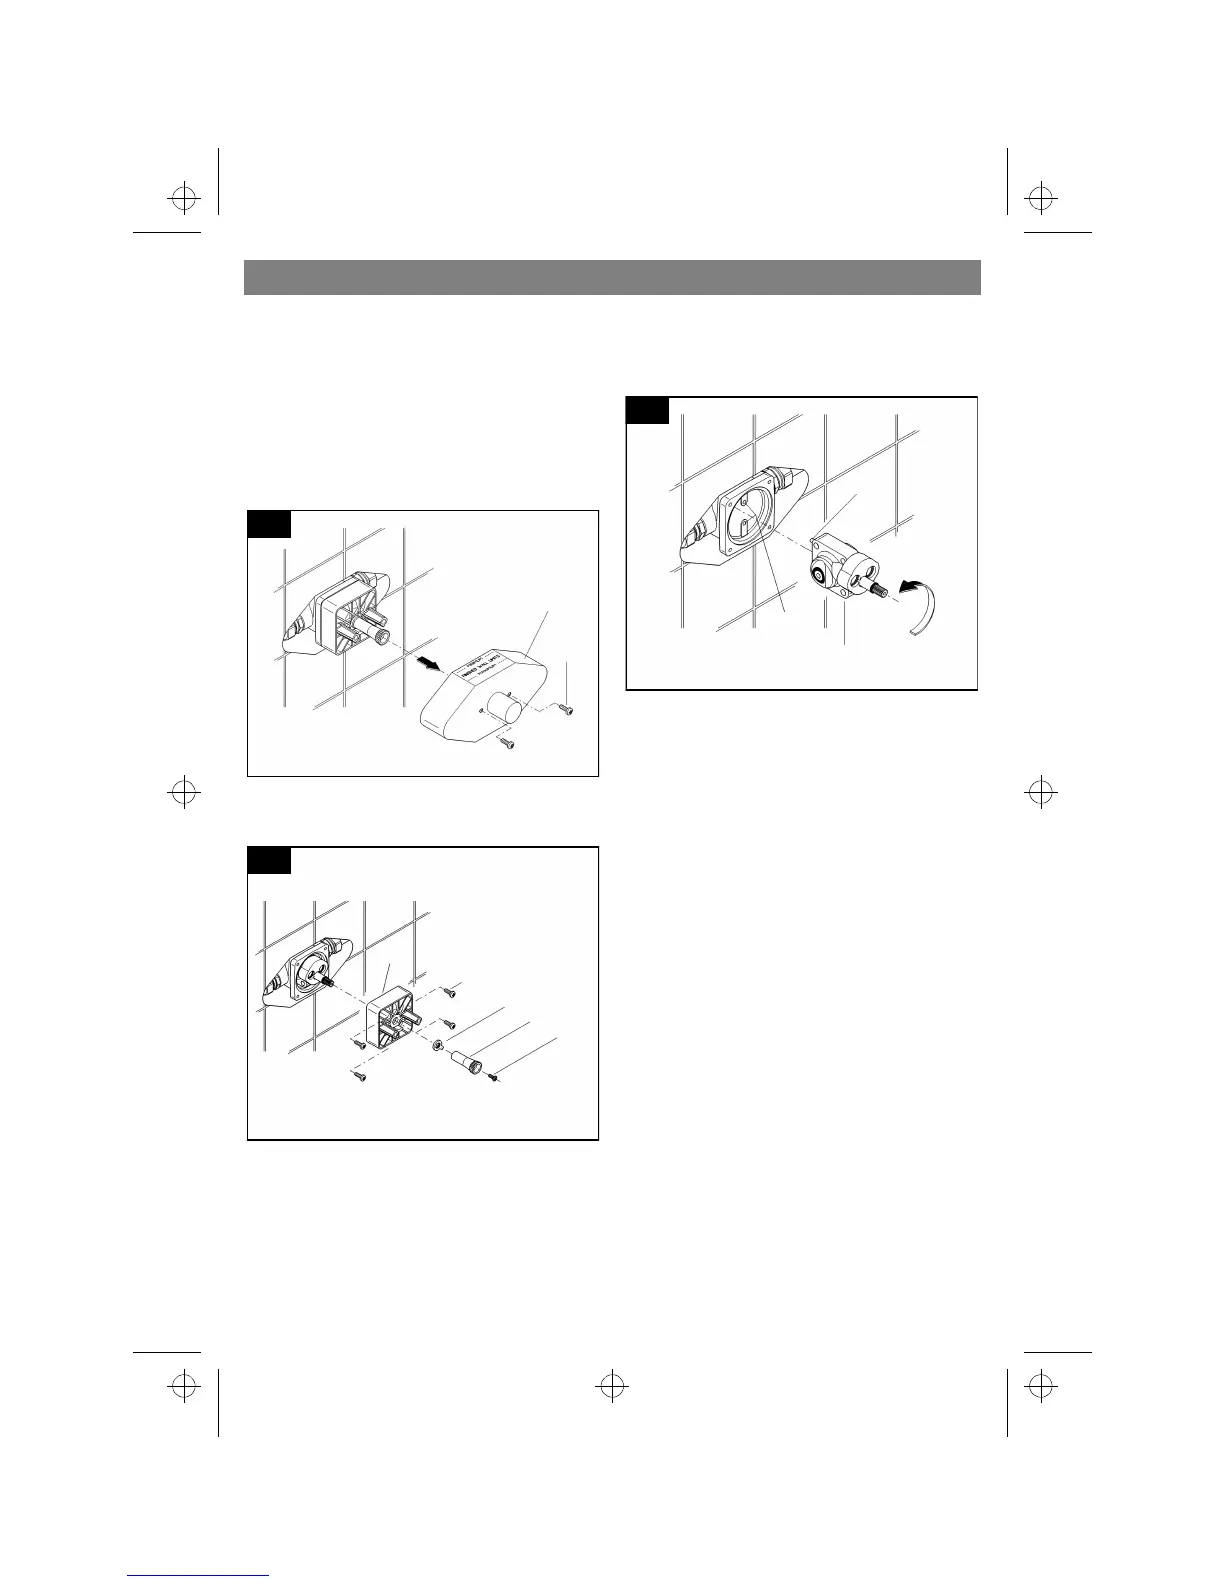
Reversed Supplies Installation
For reversed supplies installation, the
cartridge must be rotated 180° to ensure
proper valve operation.
1.Shut off hot and cold water supply!
2.Remove the two screws (B1) from the
fitting template (B), then remove the
template, see Fig. [17].
3.Loosen screw (G1) and pull off driver (G),
see Fig. [18].
4.Detach stop ring (N) and note position.
5.Loosen the two screws (J1) and remove
valve cover (J).
6.Pull the existing pressure balancing
cartridge (O) out of the valve body. Do not
damage the O-ring seals, see Fig. [19].
7.Reverse the pressure balancing cartridge
180° by turning it upside down. Place it
into the valve body. Ensure the two
alignment pins (O1) on the rear of the
pressure balancing cartridge are properly
seated in the holes (Z) of the valve body.
Notice the position of hot "H" and cold "C"
markings on the cartridge to assure the
correct position in relation to reversed or
back to back installation.
Reassemble in reverse order. Be sure that
the stop ring (N) is in the previously noted
position.
B
B1
17
J1
J
G
N
18
G1
O1
O
Z
19
950632.book : i95063gb.fm Seite 12 Mittwoch, Oktober 4, 2000 7:42 AM
 Loading...