14
Maintenance
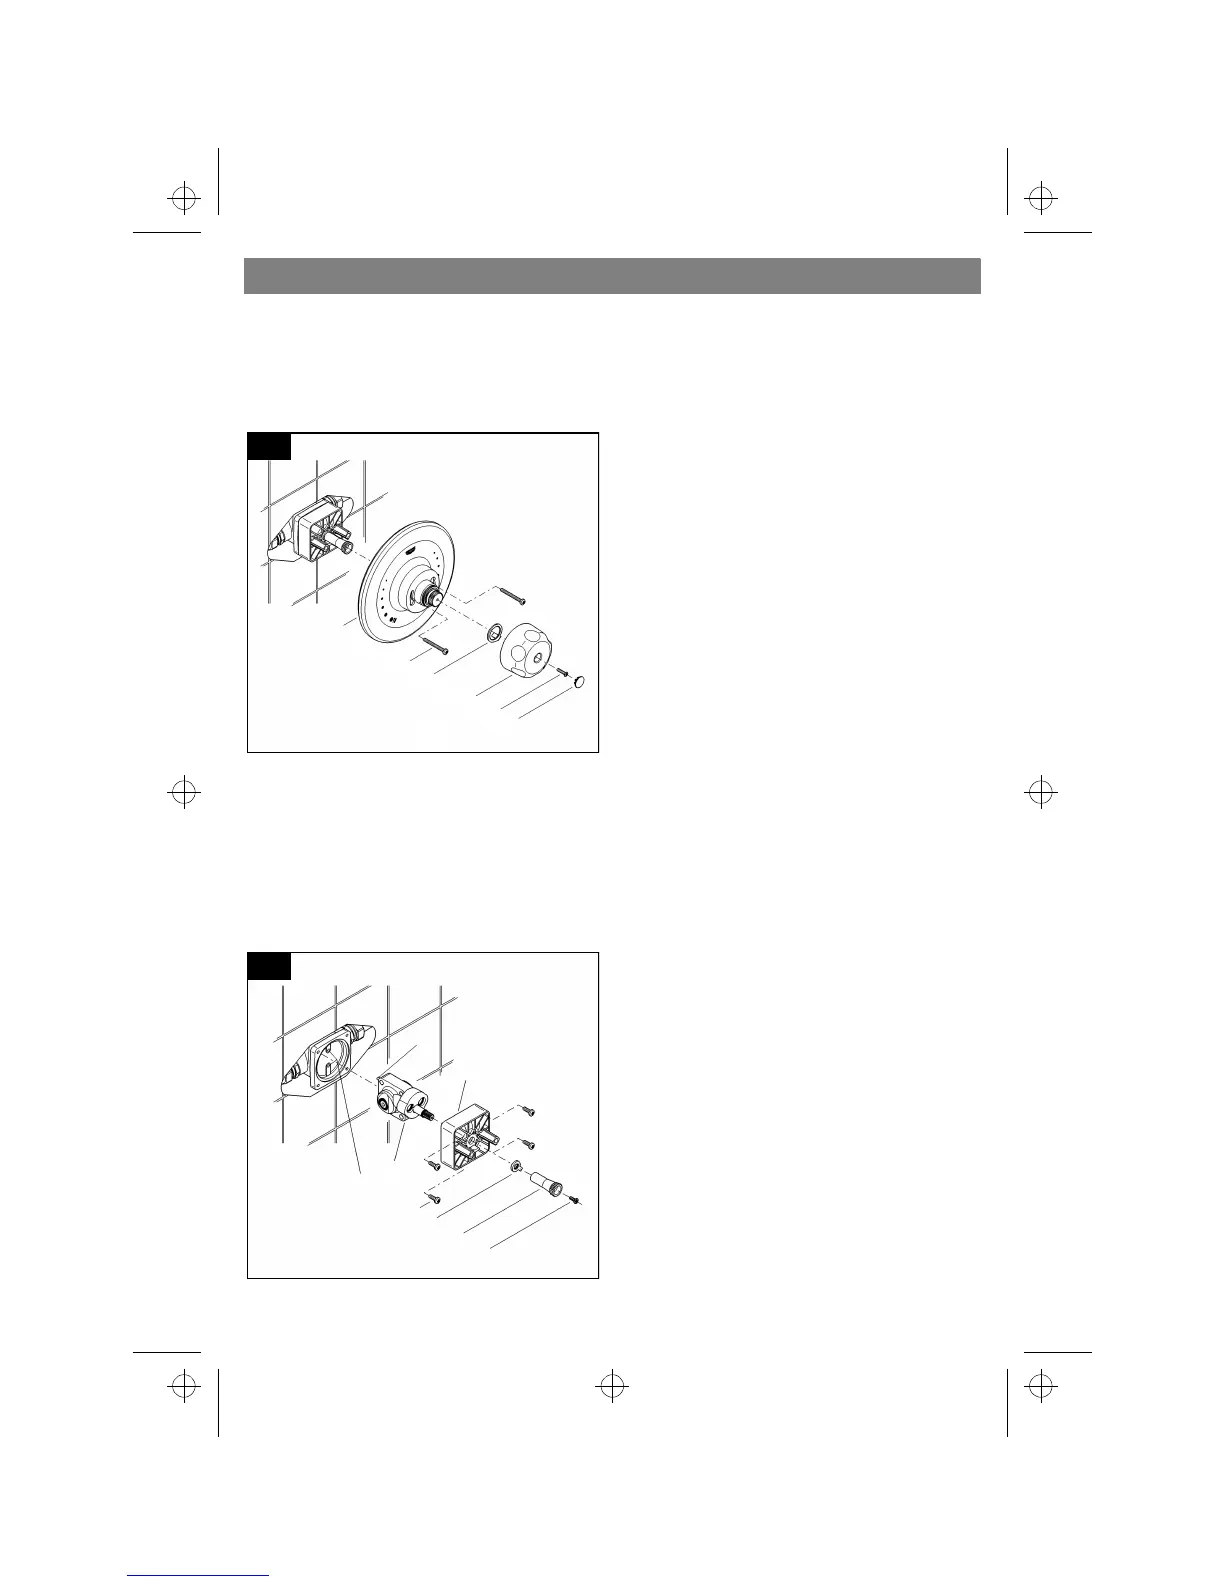
Pressure Balancing Cartridge
1.Shut off hot and cold water supply!
2.Detach handle cap (L2) loosen screw (L1)
and remove handle (L), see Fig. [23].
3.Detach hot water limit stop (K) and note
position.
4.Loosen screws (H1) and remove wall
plate (H).
5.Loosen screw (G1) and pull off driver (G),
see Fig. [24].
6.Detach stop ring (N) and note position.
7.Loosen screws (J1) and detach valve
cover (J) with sleeve.
8.Pull the existing pressure balancing
cartridge (O) out of the valve body noting
the location of "H" and "C" marking near
the cartridge inlets.
The pressure balancing cartridge (O) must
be replaced as a complete unit.
Reassemble in reverse order.
Ensure the two alignment pins (O1) on the
rear of the pressure balancing cartridge are
properly seated in the holes (Z) of the valve
body and that the hot "H" and cold "C"
markings are on the correct side.
Be sure that the stop ring (N) is in the
previously noted position.
Check, clean and if necessary replace parts.
Only genuine GROHE replacement parts
must be used.
23
L
L1
L2
H
H1
K
24
Z
G
G1
N
J
J1
O1
O
950632.book : i95063gb.fm Seite 14 Mittwoch, Oktober 4, 2000 7:42 AM
 Loading...