65
GB
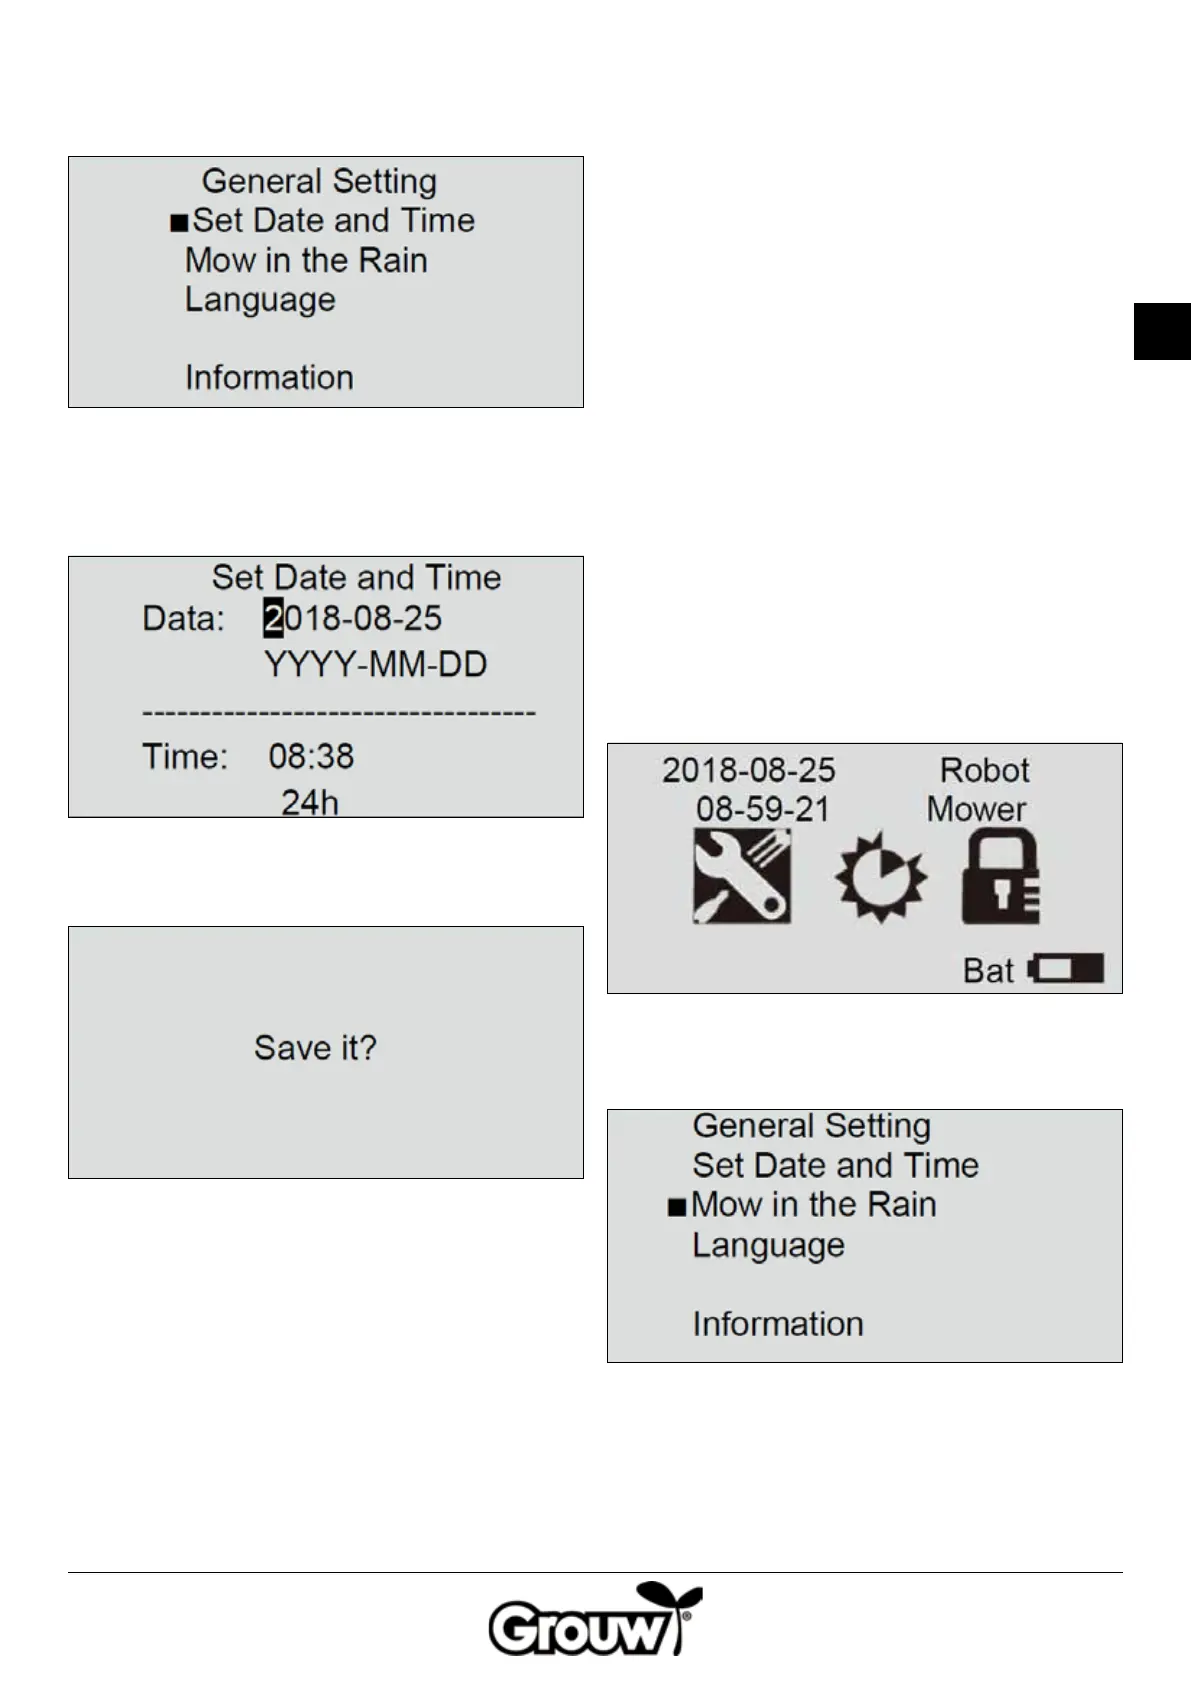
2. Move the cursor to the Set date and time menu
option using the UP/DOWN buttons (f) and press the
OK button (d) to open the menu.
3. Move the cursor to the relevant eld using the UP/
DOWN buttons (f) and enter the correct value using
the number buttons (g). Press the OK button (d) once
all the changes have been made.
4. The display shows the message Save it? (save
settings?). Press the OK button (d) to save the
changes, or press the BACK button (e) to go back.
Note!
If you enter a date or time outside the valid intervals
(e.g. 2018-08-32), the display will show the Invalid data
message for 3 seconds. You can then enter the correct
values again.
Menu option: Cutting grass in the rain
The robot lawnmower is equipped with a rain sensor so
that it can detect when it rains. The robot lawnmower
is programmed at the factory to return to the charging
station when it is raining suciently to activate the rain
sensor. There it will fully charge and then wait until the
rain sensor is dry before automatically starting to cut
the grass again. If this start time is outside of the robot
lawnmower’s daily work time, it will not start again until
the following working day.
Note!
Do not short-circuit the rain sensor!
Note!
The robot lawnmower must return to the charging
station and the charging station must be disconnected
from the mains during a thunderstorm. Damage caused
by lightning strike is not covered by the guarantee.
You can change the robot lawnmower’s settings as
follows:
1. Move the cursor to the General settings menu option
(h) using the UP/DOWN buttons (f) and press the OK
button (d) to open the menu.
2. Move the cursor to the Mow in the rain menu option
using the UP/DOWN buttons (f) and press the OK
button (d) to open the menu.
 Loading...