The controller can be mounted to a panel, to a wall or to a vertical or horizontal pipe. A neoprene
sealing gasket is included and can be used to reduce vibration. The gasket can be used as a
template for panel mounting before the inner gasket component is separated.
Installation
Mounting components and dimensions
C A U T I O N
Personal injury hazard. Only qualified personnel should conduct the tasks described in this section of the manual.
The controller can be installed on a surface, panel or pipe (horizontal or vertical). For mounting
options and instructions, refer to Figure 2, Figure 3 on page 8, Figure 4 on page 9, Figure 5
on page 10 and Figure 6 on page 11.
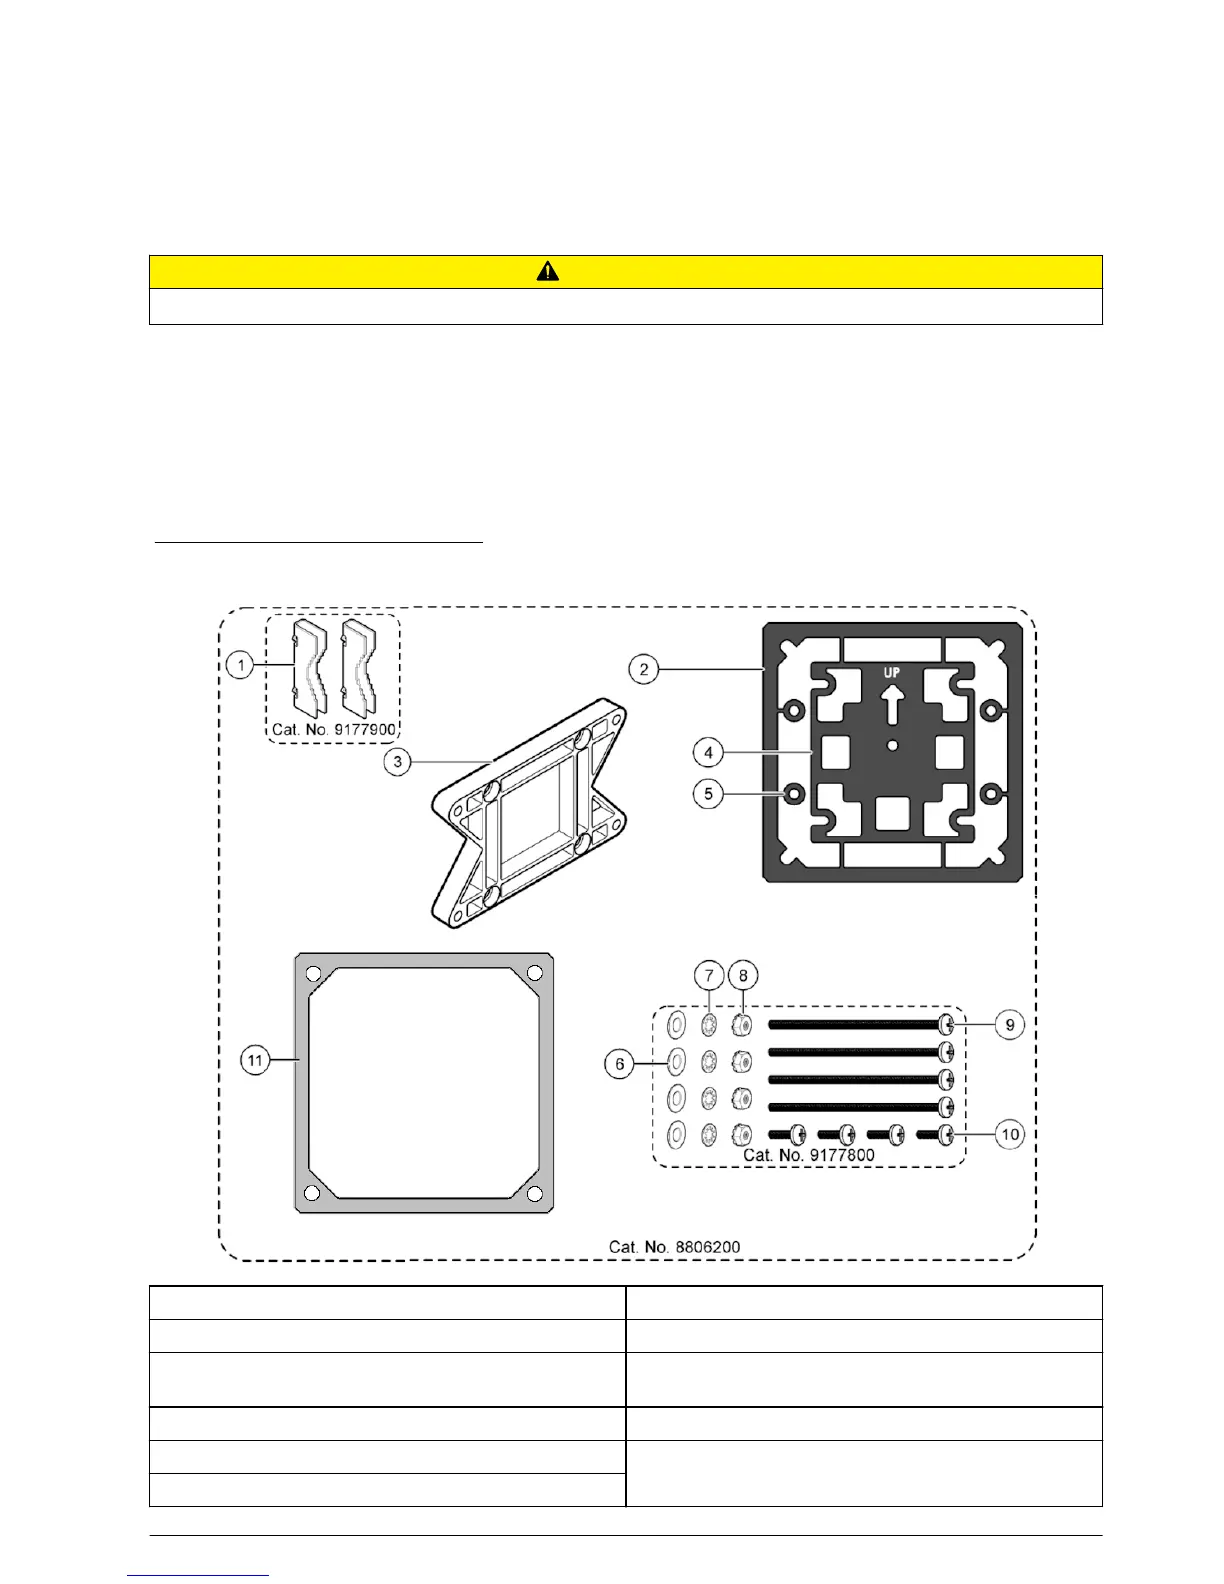
For horizontal pipe mounts, the mounting feet (Figure 2) must be attached to the mounting bracket in
a vertical position.
For both horizontal and vertical pipe mounts, attach the mounting bracket to the controller as shown
in Figure 5 on page 10.
Figure 2 Mounting components
1 Mounting foot (2x) 7 Lock washer, ¼-inch ID (4x)
2 Sealing gasket for panel mount, Neoprene 8 M5 x 0.8 Keps hexnut (4x)
3 Bracket for wall and pipe mounting 9 Pan head screws, M5 x 0.8 x 100mm (4x) (Used for
variable diameter pipe mount installations)
4 Vibration isolation gasket for pipe mount 10 Pan head screws, M5 x 0.8 x 15 mm (4x)
5 Vibration isolation washer for pipe mount (4x) 11 Bracket for panel mounting
6 Flat washer, ¼-inch ID (4x)
English 7

 Loading...