1
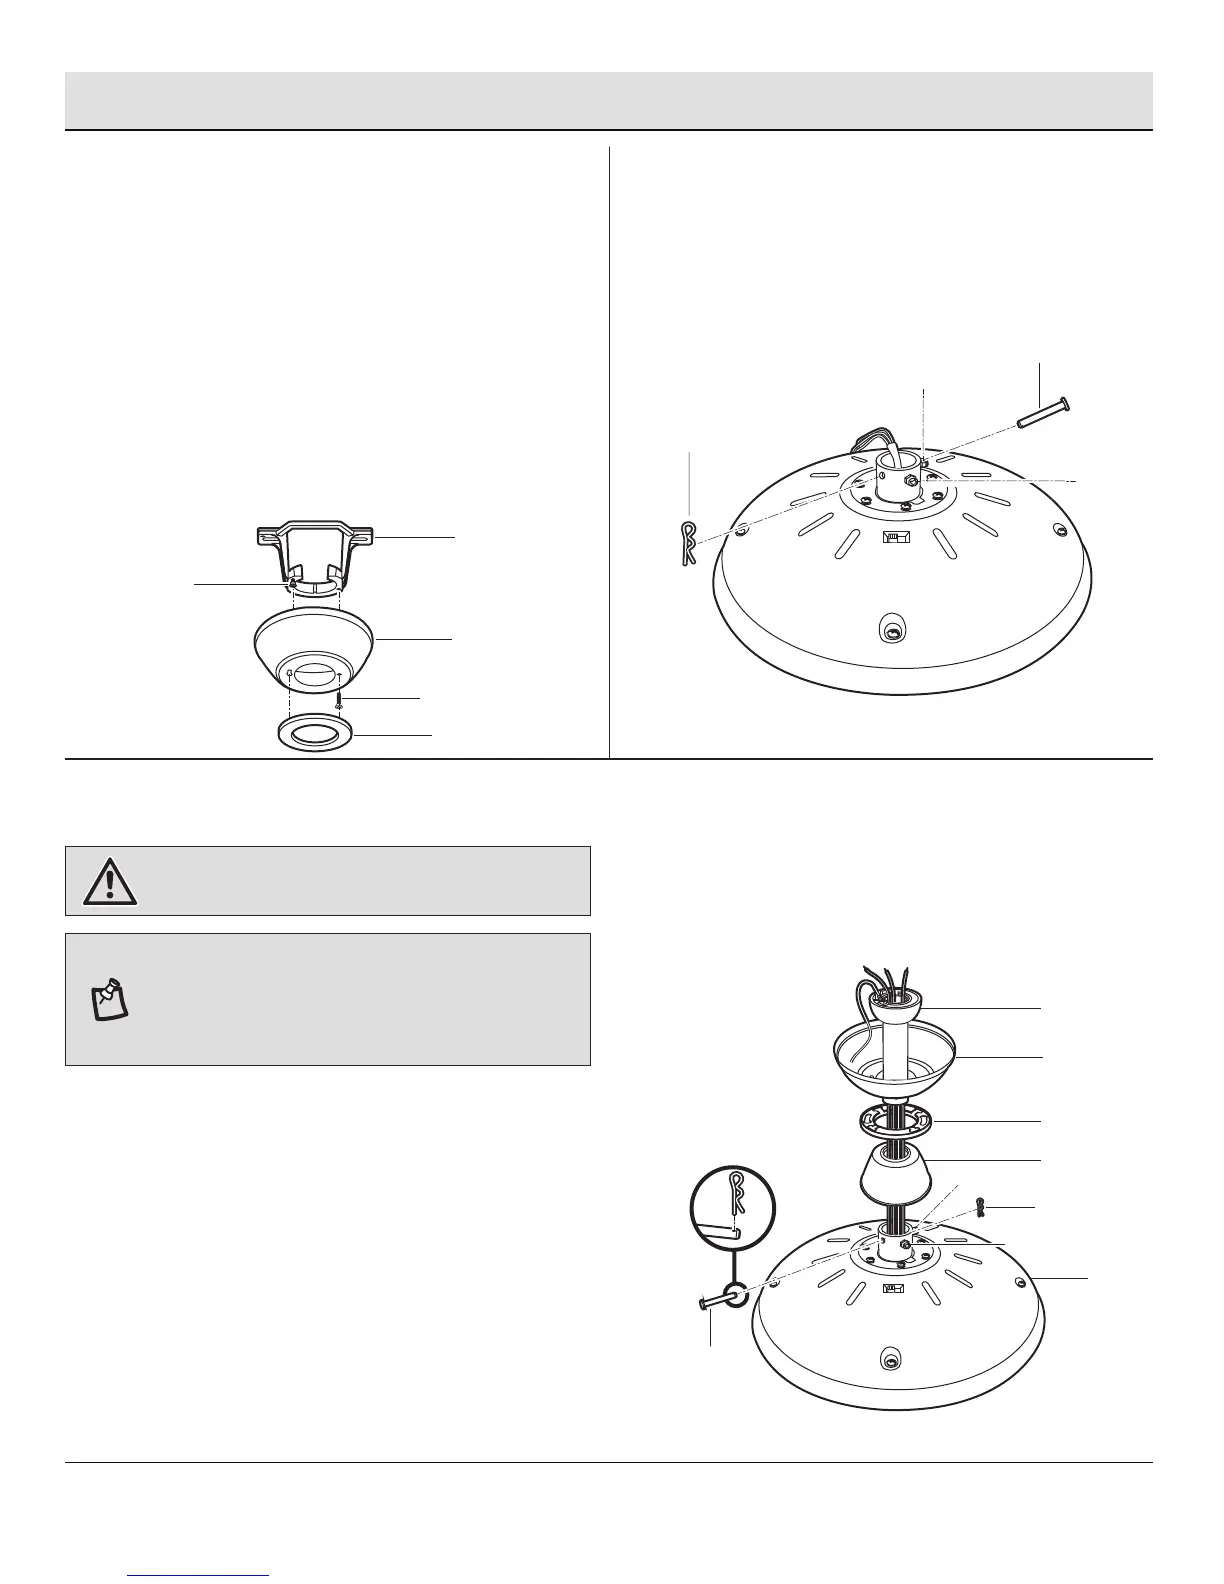
Preparing the canopy
2
Preparing the motor
□ Remove the clevis pin (FF) and cotter pin (GG), and
loosen the two collar setscrews (HH) from the motor
collar.
Assembly - Assembling the Fan Body
8
□ Remove the canopy bottom cover (C) from the canopy
(B) by turning the canopy bottom cover (C) counter-
clockwise.
□ Remove the mounting bracket (A) from the canopy (B)
by removing the non-slotted mounting bracket screw
(BB) from the bottom of the canopy (B) and loosening
the slotted mounting bracket screw (BB) a half turn
from the screw head. Next, turn the canopy (B)
counterclockwise to remove the mounting bracket (A)
from the canopy (B).
3
Assembling the fan
□ Route the wires exiting from the top of the fan motor
assembly (F) through the coupling cover (E) and the
canopy bottom cover (C). Ensure the slot openings
are on top.
□ Route the wires through the canopy (B) and then
through the hanger ball/downrod assembly (D).
□ Align the holes at the bottom of the hanger
ball/downrod assembly (D) with the holes in the collar
on top of the fan motor assembly (F).
□ Carefully insert the clevis pin (FF) through the holes
in the collar and the hanger ball/downrod assembly
(D). Be careful not to jam the clevis pin (GG) against
the wiring inside the hanger ball/downrod assembly
(D).
WARNING: Failure to properly install the cotter pin (GG)
could result in the fan loosening and possibly falling.
NOTE: If a longer downrod (not included) is needed, take
out the screw located in the hanger ball, lower the hanger
ball and remove the pin. Remove all three pieces from the
downrod and assemble them onto the new longer downrod
before proceeding to the downrod installation.
□ Insert the cotter pin (GG) through the hole near the
end of the clevis pin (FF) until it snaps into the locked
position.
□ Tighten the two collar setscrews (HH) on top of the
fan motor assembly (F) firmly.
GG
FF
HH
HH
BB
A
B
C
BB
C
F
E
D
B
HH
HH
FF
GG
 Loading...