11
HARDI NAVIGATOR
HARDI Foam Markers (General Notes)
Ensure the system is clean. Add clean water to the tank
first, then foam concentrate according to concentrate
instructions.
Recommended rate for Hardi Foam concentrate 1:25
(ie. in 100L add 4L Concentrate).
For good quality foam note the following:
• Mix contents after adding foam
• Use clean water, preferably rain water
• Do not use dam water or bore (hard) water
• Do not use water containing salt or minerals
• Flush the system to prevent it gumming up
• Drain residue if more than a week old
• Use water with a temperature above 13° C
• Store concentrate in a frost free area
Cold operating conditions decrease foam quality, leading
to blowouts where the foam spurts out of the generator.
Foam Marker Operation (See your Foam Marker
Operators Manual for more details)
1 Add water (see
Filling of water
(Page 14), then foam
concentrate, to the foam marker tank. Close the lid.
2 Connect the power supply.
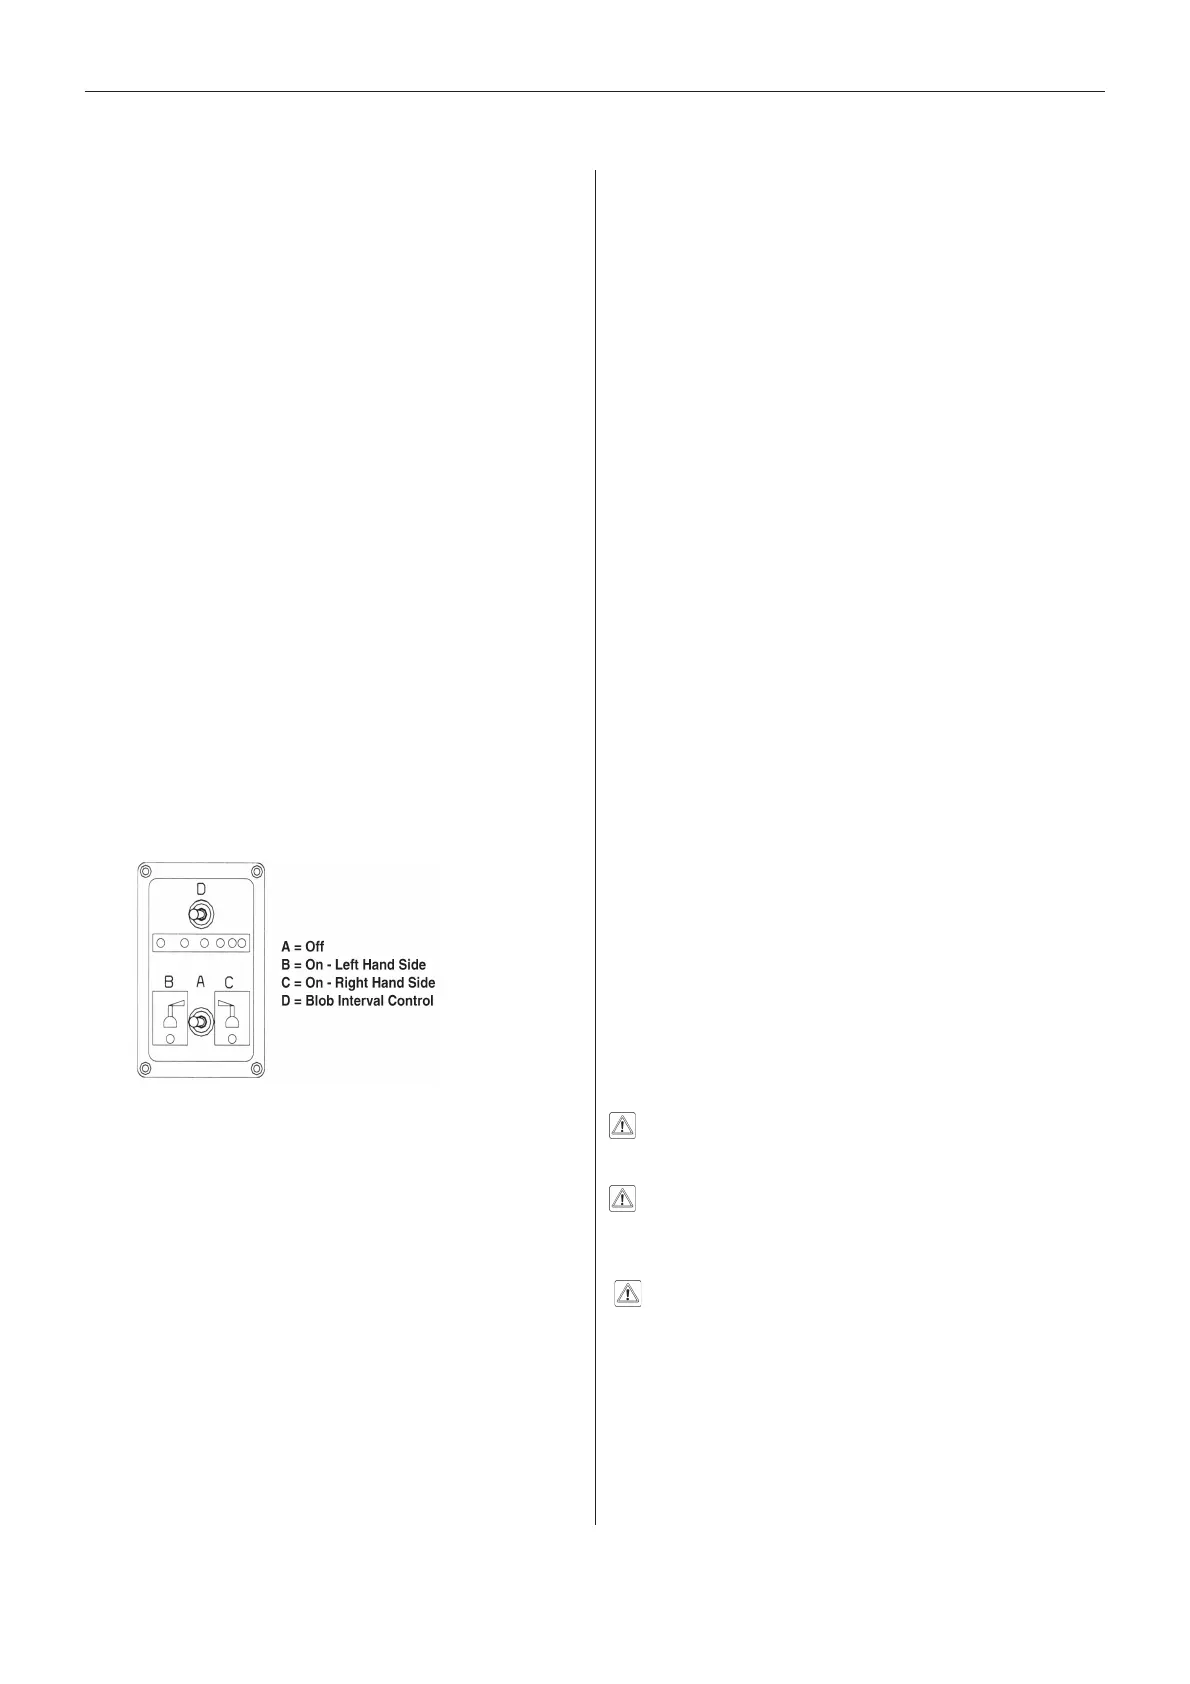
3 Note: Some Hardi Foam Marker units work as stand
alone, ie. controlled with Foam Marker control box (Fig 20).
Fig 20
Turn unit on by moving switch to Left/Right position.
This starts the air compression, starts 12V pump to
charge liquid to lines and operates the valves to
direct compressed air to selected side. Liquid is
mixed with compressed air to produce foam.
Note: Where HC 5500 is fitted, the foam marker is
controlled with the centre R Hand switch. Refer to
Operators Manual to perform the required functions.
4 Blob frequency can be adjusted as required.
The foam marker system must be kept clean to ensure
foam is of good quality. Drain and flush when:
• Quality of foam produced is poor
• Preparing for off-season storage
• Residue is more than a week old
• Impurities are seen in the tanks
Foam Marker System drain and flush
1
Undo 1” Nut and disconnect fill hose below Foam Tank.
2
Allow tank and hose to drain. Flush tank with clean
water.
3 Check the filter is clean.
4 Reconnect hose.
5 Add 7 litres of clean (preferably hot) water.
6 Start the pump and pump liquid through the system.
7 Repeat points 5 and 6 if necessary.
CAUTION! Do not clean the Foam Marker compressor
box with a high pressure cleaner.
Flush tank and flush nozzle
Clean water contents of the incorporated 500L litre flush
tank can be used for diluting and flushing.
Flushing the system without diluting Main Tank contents
can be required when spraying is interrupted or during
Stand-by (See Page 20).
To dispose of unused chemical solution, it will be
necessary to dilute any remaining spray liquid residue in
the spraying circuit at the end of your spraying task. The
dilute liquid is sprayed at a very low application rate into
the same field you have just sprayed. This is done
before cleaning the sprayer and/or using different
chemicals. (See Page 21 for detailed procedure).
At the completion of spraying the entire sprayer must be
cleaned, decontaminated and rinsed (Page 22).
The tank flush nozzles cannot always guarantee a 100%
cleaning of the tank. Always clean manually with a brush
afterwards, especially if crops sensitive to the chemical
you have just used are going to be sprayed next.
Boom
Please refer to the supplied
EAGLE or FALCON PARALIFT
B
OOM Operator’s Manual
regarding entire operation of
the boom.
WARNING! Operate the boom only after reading
the operator’s manual.
DANGER! When folding and unfolding the boom,
be sure that no person or objects are in the operat-
ing area of the boom.
DANGER! When folding and unfolding the boom,
transporting sprayer or working above the unit,
always observe minimum safe clearance from
powerlines. (See Page 12).
Emergency operation
In case of power failure, boom distribution can be control-
led manually by turning the taps on the EVC motors.
Refer to the
Troubleshooting
section in the Boom
Operators Manual supplied with your sprayer for
solutions to boom fold / unfold problems.
Remote control box
(Cyclone)
 Loading...