14
HARDI NAVIGATOR
FILLING TANKS WITH WATER
WARNING! Do not overfill any tank as this may
cause chemical spillage out of the tank.
NOTE! Sight Gauges on sprayers are to be used as a
guide only. Although all possible care is taken to
ensure consistency and accuracy in manufacture,
during the rotomoulding process slight variations in
tank wall thickness and overall shape can occur,
which may result in small variances in sight gauge
calibrations.
To attain maximum accuracy in chemical solution
ratios it is recommended that water and chemical
concentrates are measured with a correctly calibrated
flow meter, or other reliable measuring device.
TANK CAPACITIES
Main Tank 3000, 4000 or 5000 Litres
Foam Marker Tank 140 Litres
Flush Tank 500 Litres
Hand Wash Tank 15 Litres
Water can be filled into the tanks as follows:
1 Filled through tank lids (All tanks).
2 Filled by external pump (e.g. Fire fighter) through the
filtered fill system (All tanks except hand wash tank).
The main tank should normally be filled with 25% of the
required spraying water, before adding the chemicals.
IMPORTANT! Always read the instructions on the
chemical container as mixing procedures can vary.
IMPORTANT! The clean water handwash tank is filled
separately to ensure that there is no risk of chemical solution
moving from the valve system into handwash water.
IMPORTANT! It is recommended to use water as clean
as possible for spraying purposes.
FILLING THROUGH TANK LIDS
Handwash (clean water) tank
Screw open the clean water tank lid and fill with clean
water only.
Fig 24
WARNING! Although the Handwash tank is only
filled with clean water, the water must never be
used for drinking, due to the risk of contamination.
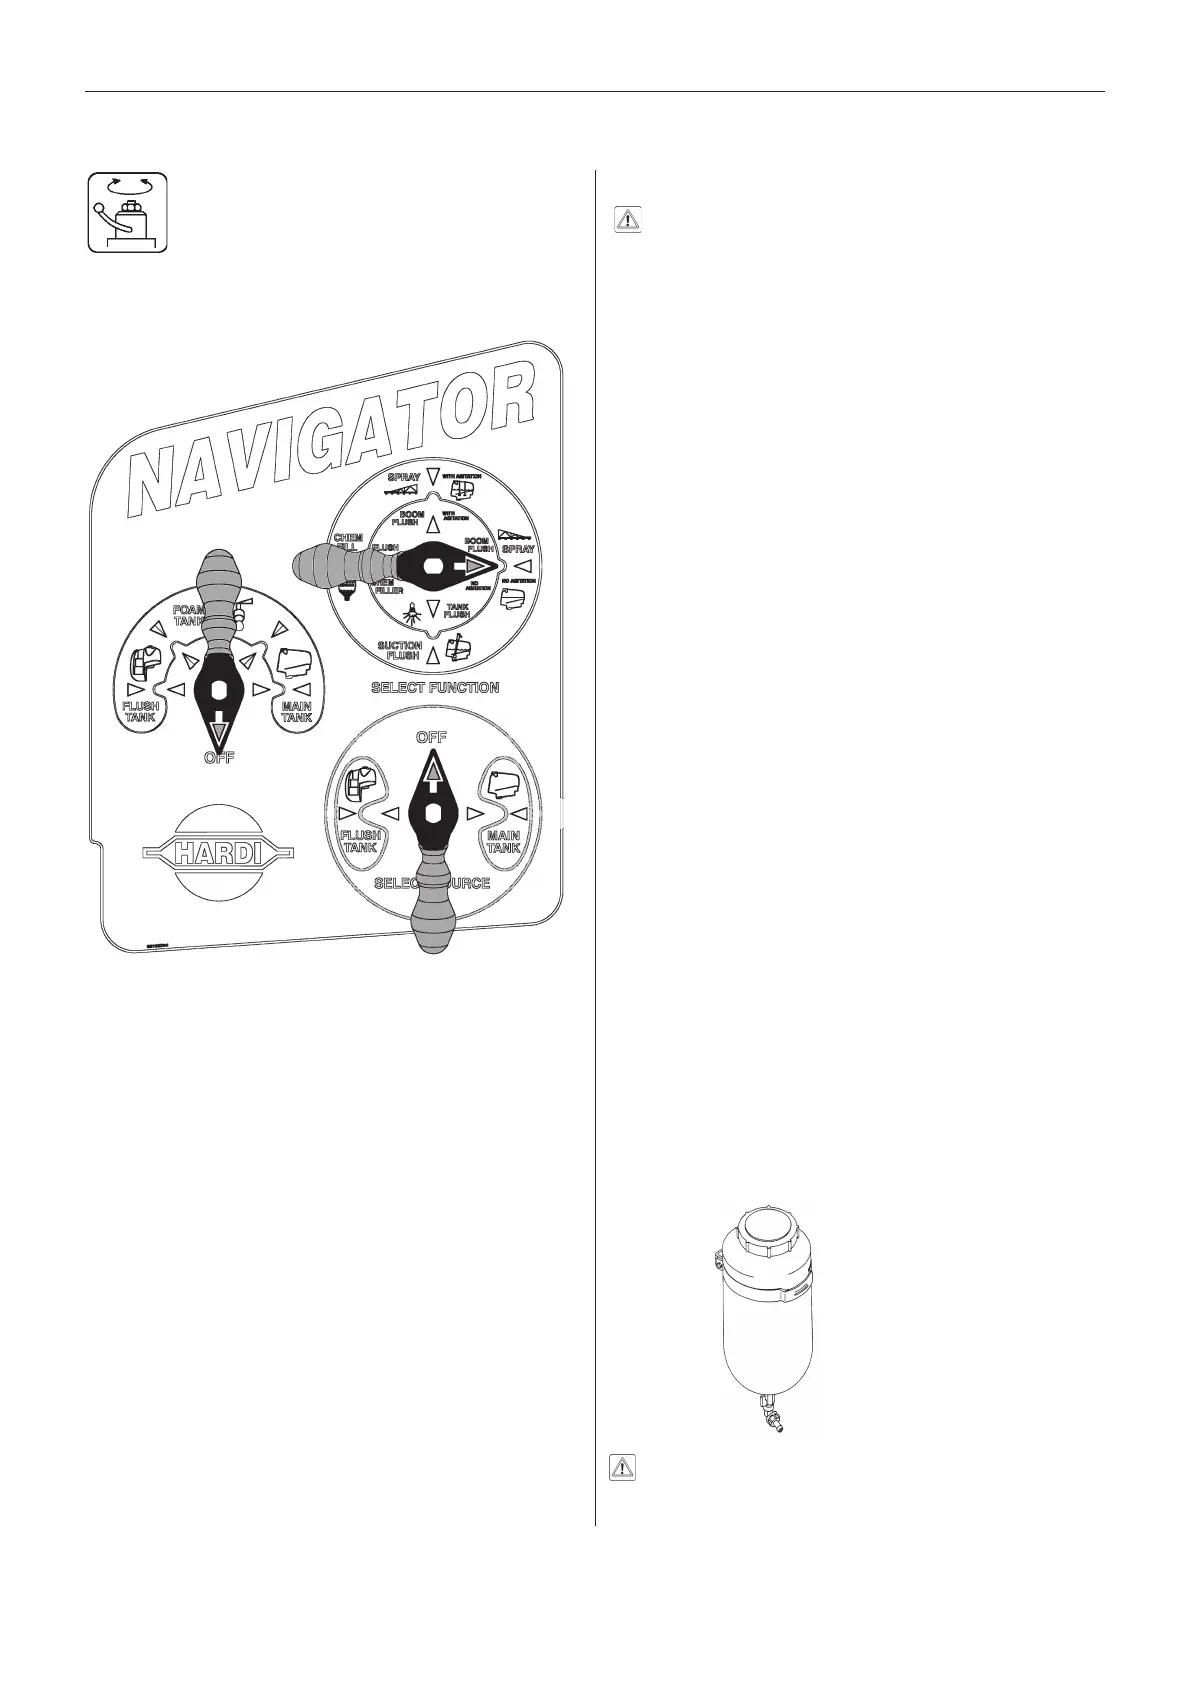
OPERATION
The HARDI SMART VALVE system is located on the
left hand side of the sprayer. This 3-module operating
control system permits easy operation of the HARDI
NAVIGATOR sprayer.
TO OPERATE THE SPRAYER FUNCTIONS:
• To select the tank filling options: Align the arrow
on the FILL handle with the required tank. Filling two
tanks simultaneously can be done by aligning with
the blend arrows. When filling is completed return the
handle to the Off position.
• To select the FUNCTION required: Turn the upper
right handle. Note that a function icon shown within
the green outer ring, eg. Spray without Agitation,
indicates the source of fluid is the Main Tank.
Functions with icons within the blue inner ring have
clean water supplied from the Rinse Tank.
• To set the correct SOURCE of the fluid (clean
water or chemical solution) for the selected
function: Turn the lower right handle to the tank
indicated by the colour-coding.
IMPORTANT! Always ensure the indicator arrows
on the handles are carefully aligned with the the
corresponding arrows on the decal. Misalignment
may result in incorrect fluid movement.
Fig 23
VERY IMPORTANT!
Except while filling two tanks at the same time, Smart
Valve handles must always be carefully placed in a
quadrant position, ie horizontal or vertical.
 Loading...