23
HARDI NAVIGATOR
CLEANING PROCEDURE
WARNING!
It is essential that the water in the Flush Tank
which is used to clean your sprayer is clean
and free of contamination.
Good maintenance and spray operation tech-
nique will prevent accidental recontamination
of the system during the cleaning process.
Back-flow due to poor seals in hose connections,
leaking valves and O-rings, incorrect plumbing
setup or fittings, poor filling technique or
spillages of chemicals may all cause contamin-
ation.
If Flush Tank contamination has occurred, fill
with water containing the appropriate chemical
decontamination agent.
Emptying and refilling Flush Tank several times
with clean rinse water will be needed before
proceeding with general cleaning of the system.
1 As described on Page 20, before cleaning, it is
necessary to dilute the remaining spray liquid in the
main tank with at least 10 parts of water and spray
the liquid out into the field you have just sprayed.
2 Select and use the appropriate protective clothing.
Select a detergent suitable for cleaning (and
suitable deactivating agents if necessary for
decontaminating / neutralising residues).
3 Flush and clean the sprayer and tractor externally.
Use detergent if necessary.
4 Remove nozzles, tank filters, nozzle filters and
suction filters and clean with appropriate solution
(Refer to
Navigator Service Manual
).
Be careful not to damage the mesh. Refit the
suction filter top. Refit the filters when the sprayer
is completely clean.
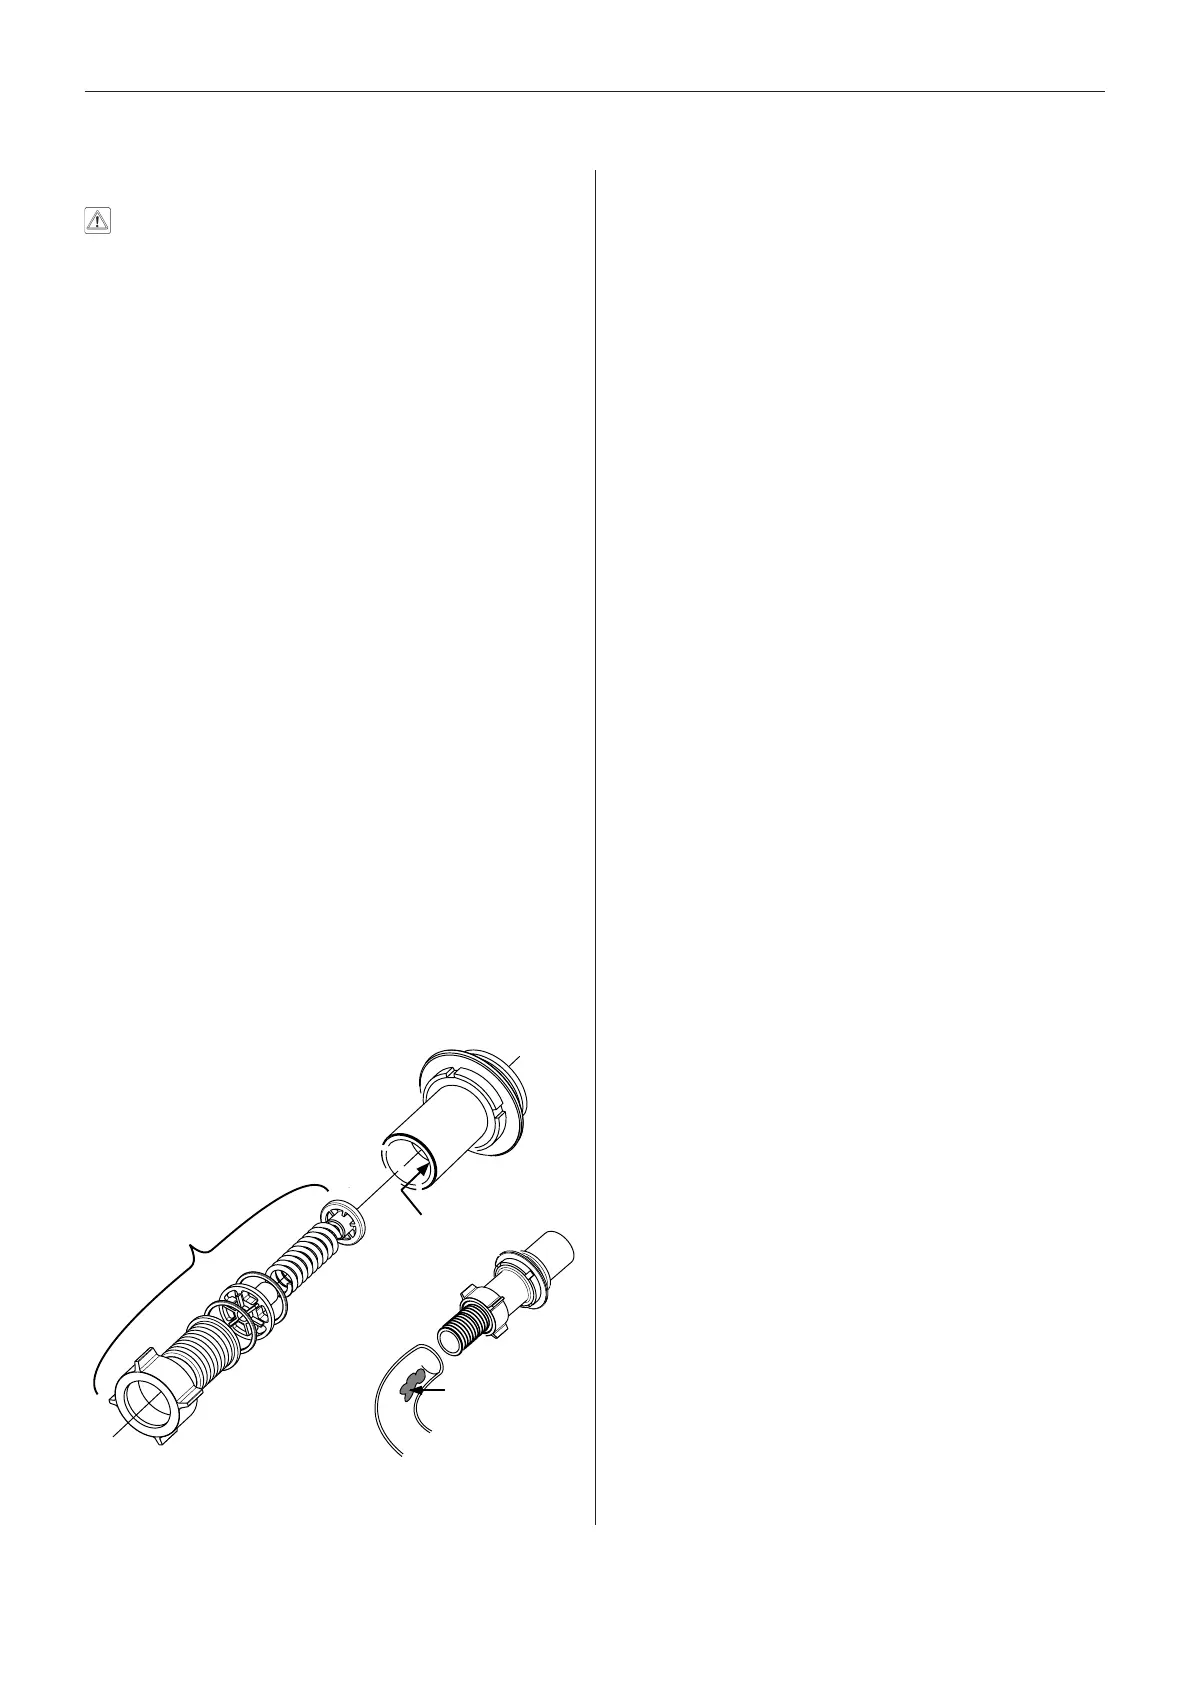
5 Inspect pressure relief valve(Fig 51)(mounted on
the side of the Select Function Valve assembly).
Ensure it is thoroughly cleaned, rinsed and free of
residues. Ensure the bleed hole is clear of debris
and the pressure relief valve is bypassing fluid back
into the main tank during normal spray operations.
6 Inspect delivery hose from the relief valve, clear
away any build-up and ensure the hose and
connections are thoroughly cleaned and rinsed.
7 Remove, clean, drain and flush all hoses.
8 Clean GRANNI POT chemical filler hopper.
Clean, flush and drain delivery hose from filler to
main tank. See Granni Pot Operators Manual.
9 Carefully clean Main Tank lid area, particularly the
basket and underside of lid.
10 With the pump running, thoroughly flush the inside
of the main tank (remember the tank roof and lid
area). If rinse nozzles are not fitted use pressure
cleaner etc to clean internal tank surface with
appropriate cleaning solution.
Flush and operate all components and any equip-
ment that has been in contact with chemicals.
Before opening the distribution valves and spray-
ing the liquid out please identify a suitable method
of disposing of any contaminated tank rinsing solution.
11 Empty the tank as much as possible and minimise
the amount of chemical particles remaining in
the system. For the last stages of emptying, turn the
SELECT FUNCTION handle towards SPRAY NO
AGITATION.
VERY IMPORTANT! Although your
sprayer system has been flushed with
clean water at this stage, it is essential
to follow up by thoroughly decontami-
nating the entire sprayer, all accesso-
ries and chemical handling equipment
before spraying with another chemical,
or storage.
Many agricultural chemicals have
properties which mean that molecules
have a strong attraction to some
surfaces, and flushing with water
alone may not dislodge all traces.
Neutralising the chemical residues
that may have adhered to various
surfaces within any sprayer system
will prevent damage to your next
crop, or unexpected results from the
next chemical used.
Fig 51
Inspect hose
and connections,
clean and rinse
thoroughly
Check
bleed hole
is clear
Clear any
build-up in hose
 Loading...