User Manual of DS-7200/7300/8100-SH Series DVR
29
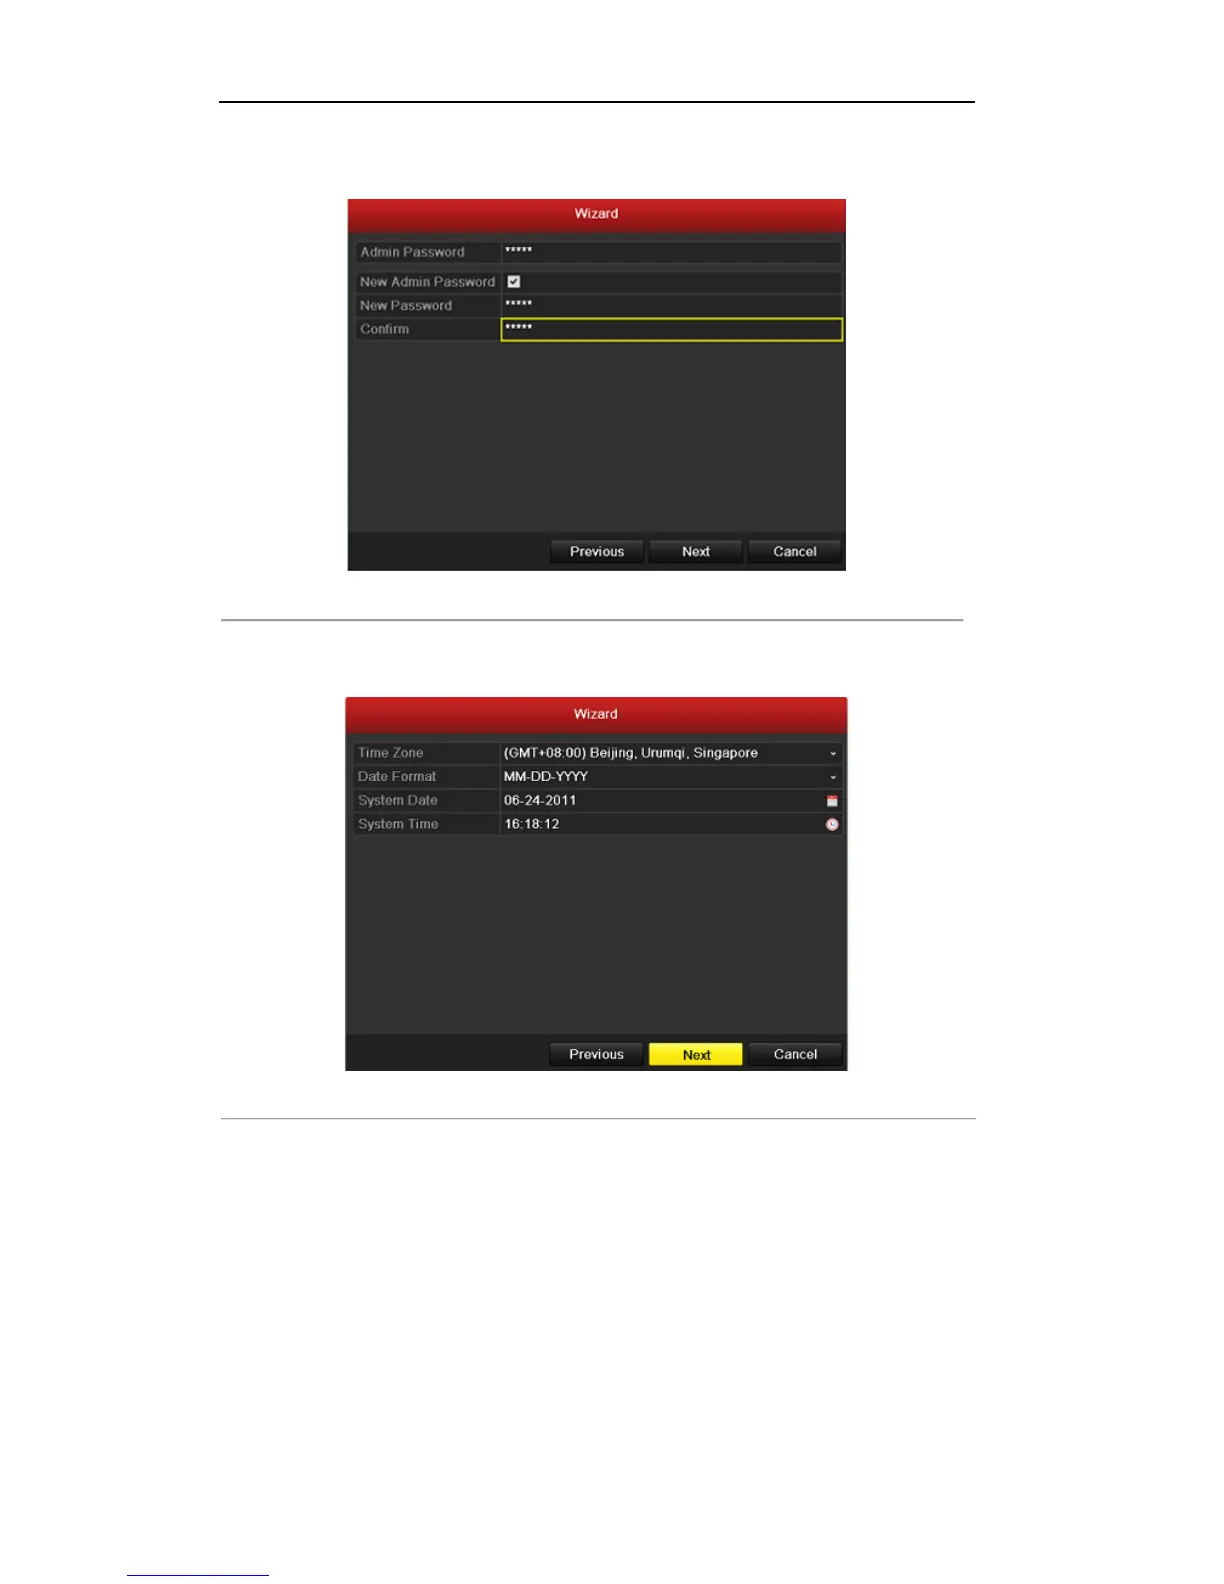
2) To change the admin password, check the New Admin Password checkbox. Enter the new
password and confirm the password in the given fields.
Figure 2.3 Login Window
4. Click the Next button to enter the Date and Time settings window, as shown in Figure 2.4.
Set the time zone, date format, system date and system time.
Figure 2.4 Date and Time Settings
5. Click Next button which takes you back to the Network Setup Wizard window, as shown in Figure 2.5.
Set the network parameters, including the NIC type, IPv4 address, IPv4 subnet mask, default gateway,
etc. You can enable the DHCP to automatically obtain an IP address and other network settings from
that server.
 Loading...