Digital Video Recorder User Manual
141
Step 3 You can also click to overlay all POS items to the first 8 channels in order. And the
is used to clear all POS overlay settings.
Step 4 Click the Apply button to save the settings.
9.3 Configuring POS Alarm
Purpose
Set the POS alarm parameters to trigger certain channels to start recording, or trigger full screen
monitoring, audio warning, notifying the surveillance center, sending email and so on.
Step 1 Go to Menu > Configuration > POS > POS Settings.
Step 2 Follow the steps in Chapter 9.1-9.2 to configure the POS settings.
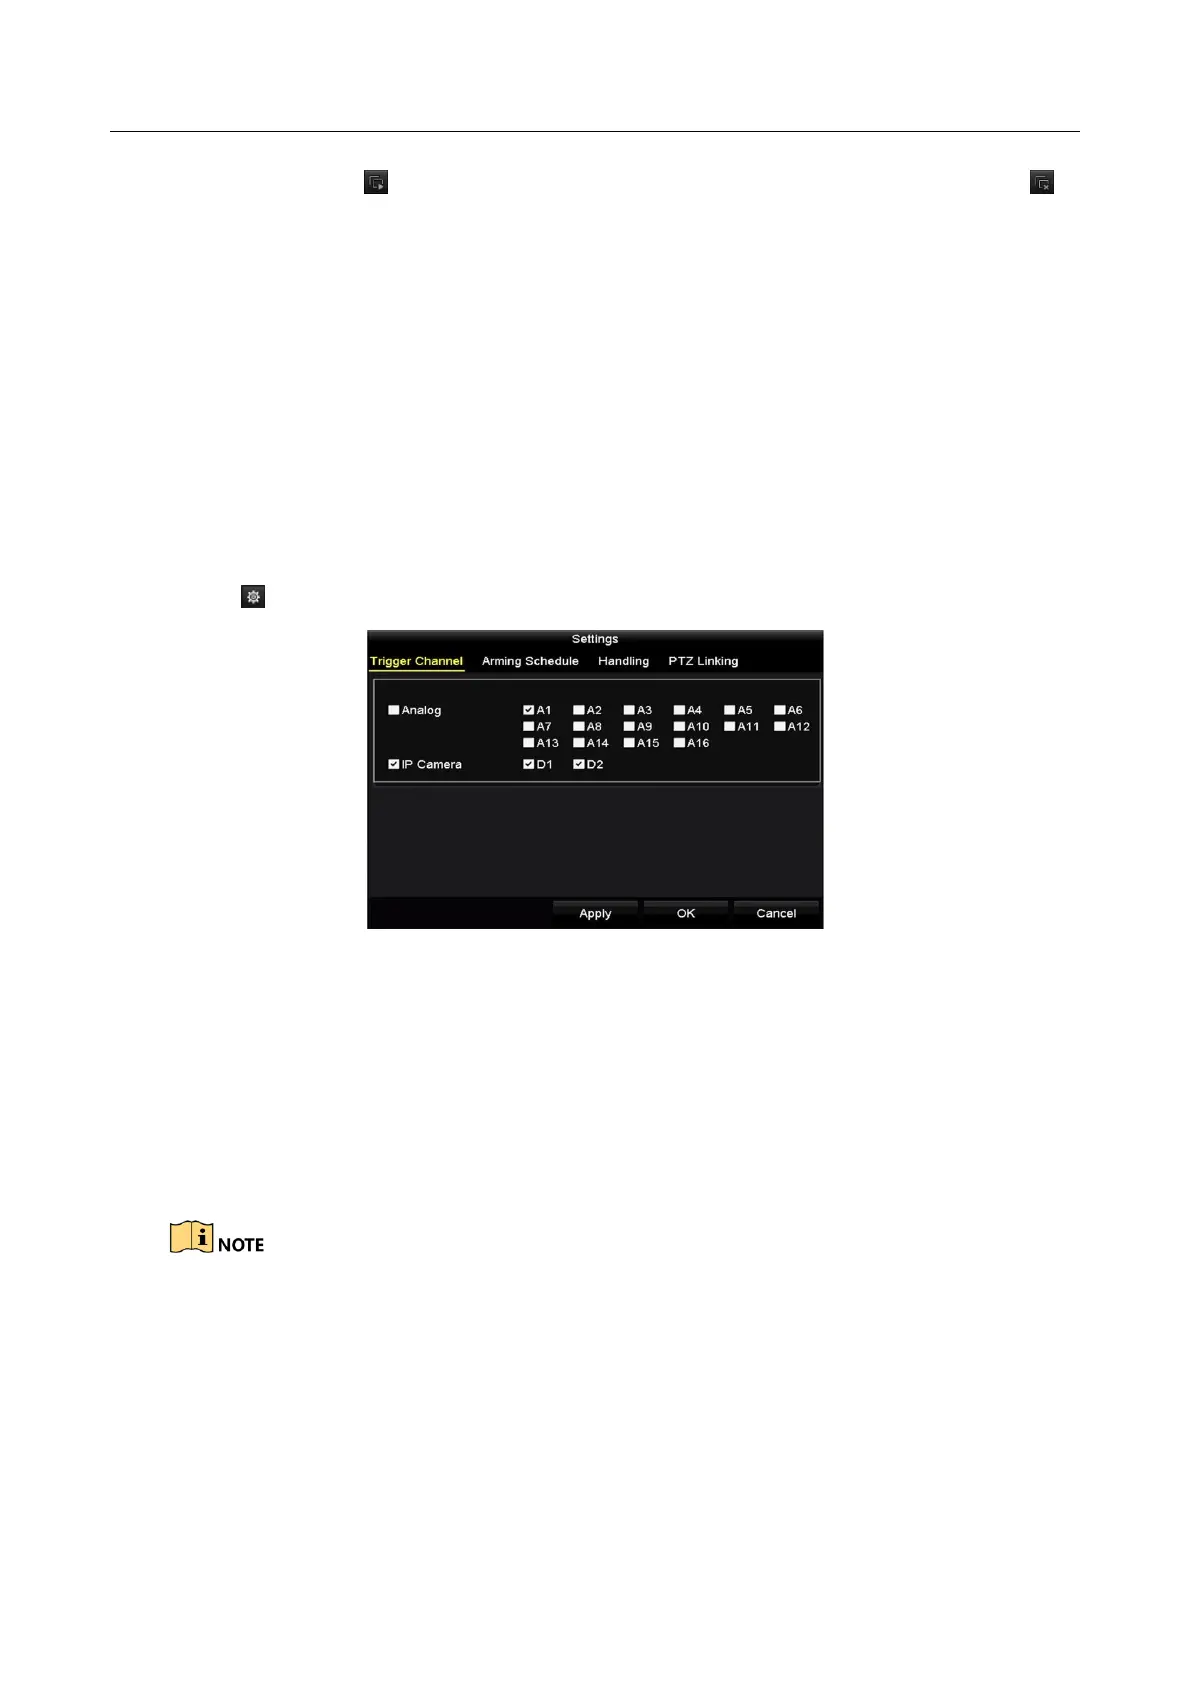
Step 3 Click to enter the alarm settings interface.
Figure 9-15 Set Trigger Cameras of POS
Step 4 Click Trigger Channel tab and select one or more channels to record or become full-screen
monitoring when POS alarm is triggered.
Step 5 Set arming schedule of the channel.
Select Arming Schedule tab to set the channel’s arming schedule.
Choose one day of a week and up to eight time periods can be set within each day. Or you
can click the Copy button to copy the time period settings to other day(s).
Time periods shall not be repeated or overlapped.
 Loading...