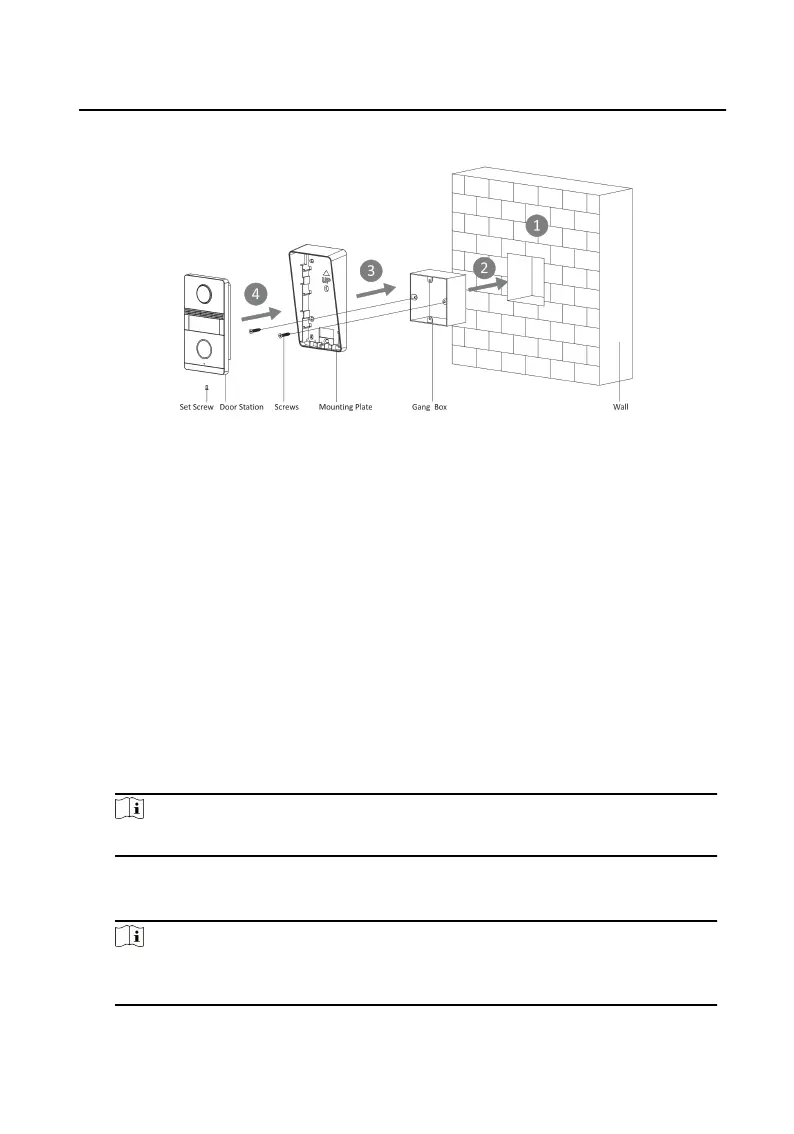
4. Secure the door staon to the mounng plate with the set screw.
Figure 4-6 Flush Mounng with Gang Box (Type I)
4.1.6 Flush Mounng with Gang Box(Type II)
The device supports ush mounng with gang box.
Before You Start
●
Make sure all related equipments are
power-o during the installaon.
●
Accessories that you need to prepare for installaon: Gang box and mounng
plate.
●
Tools that you need to prepare for installaon: Drill (ø2.846) and gradienter.
●
Purchase the
protecve shield before installaon.
Steps
1. Cave the
installaon hole in the wall.
Note
The dimension of the installaon hole should be larger than the gang box.
2. Insert the gang box to the hole chiseled on the wall.
3. Fix the mounng plate to the gang box with 2 screws.
Note
The dimension of the gang box is 55mm(width) × 101 mm(length) × 38.5
mm(depth), the upper and lower holes will be applies.
4. Secure the door staon to the mounng plate with the set screw.
Video Intercom Analog Bundle User Manual
19
 Loading...