English
13
CAUTION
●
When the battery charger has been continuosly
used, the battery charger will be heated, thus
constituting the cause of the failures. Once the
charging has been completed, give 15 minutes rest
until the next charging.
●
If the battery is rechraged when it is warm due to
battery use or exposure to sunlight, the pilot lamp
may light in green.
The battery will not be recharged. In such a case,
let the battery cool before charging.
●
When the pilot lamp flikers rapidly in red (at 0.2–
second intervals), check for and take out any
foreign objects in the charger’s battery installation
hole. If there are no foreign objects, it is probable
that the battery or charger is malfunctioning. Take
it to your authorized Service Center.
PRIOR TO OPERATION
1. Power switch
Ensure that the switch is in the OFF position.
2. Confirming condition of the environment:
Confirm that the work site is placed under
appropriate conditions conforming to prescribed
precautions.
3. Dust produced in operation
The dust produced in normal operation may affect
the operator’s health. Either of following way is
recommended.
a) Wear a dust mask
b) Use external dust collection equipment
When using the external dust collection
equipment, connect the adapter with the hose from
external dust collection equipment. (Fig. 5)
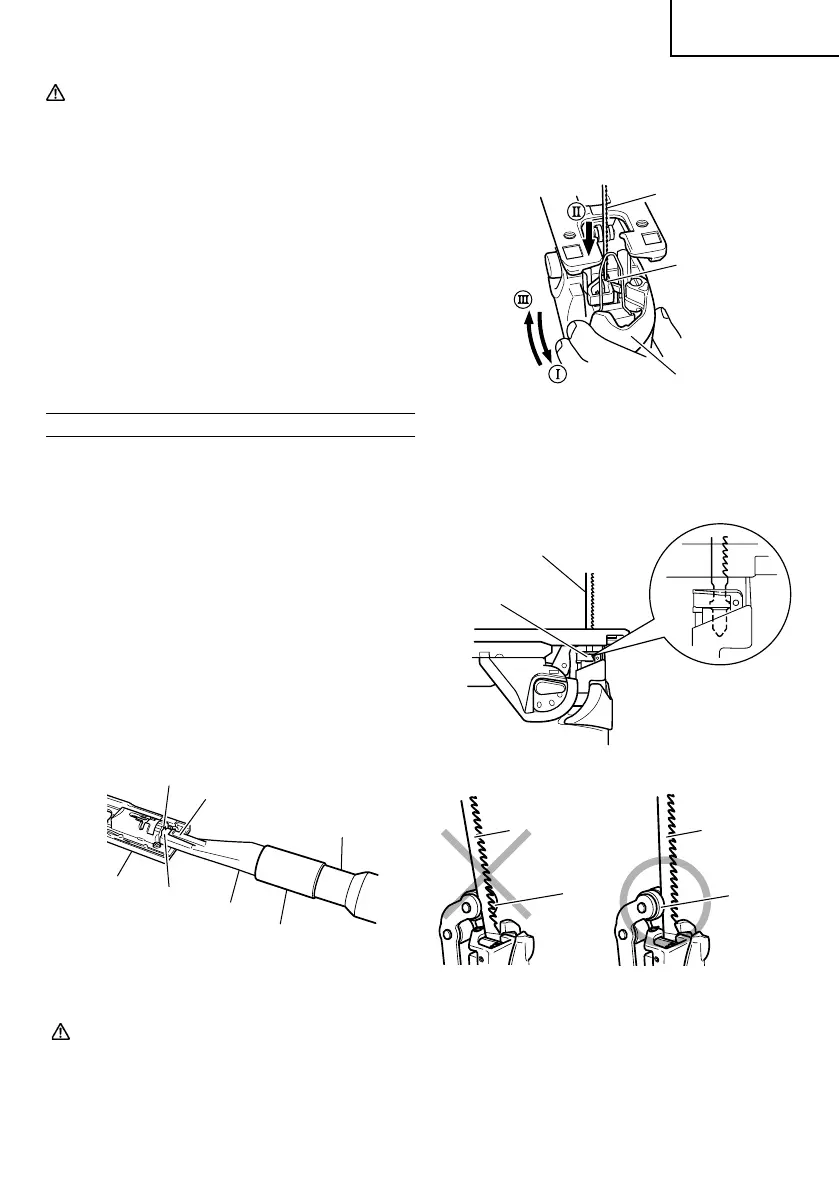
4. Changing blades
CAUTION:
●
Be sure to switch power OFF and disconnect the
battery from the body when changing blades.
●
Do not open the lever when plunger is moving.
Lever
Blade
Blade
holder
Fig. 6
Fig. 7
Blade holder
Blade
Fig. 8
Roller
Blade
Roller
Blade
Fig. 5
Base
Rear
hole
Dust
collector
Adapter
Cleaner
Hook
Notch
(1) Open the lever up to the stop. (Fig. 6-arrow I)
(2) Remove fitted blade.
(3) Insert new blade up to the stop in the blade holder.
(Fig. 6-arrow II)
(4) Close the lever. (Fig. 6-arrow III)
NOTE:
䡬
Confirm the protrusions of blade inserted to the
blade holder surely. (Fig. 7)
䡬
Confirm the blade located between the groove of
roller. (Fig. 8)
01Eng_CJ14DSL_US 08/11/7, 09:3213

 Loading...