4-2 Replacing parts
Hitachi Compute Rack 220H CRU Replacement Guide
Replacing an HDD/SSD
This section describes the procedure for replacing an HDD/SSD.
Location of installing HDD/SSD
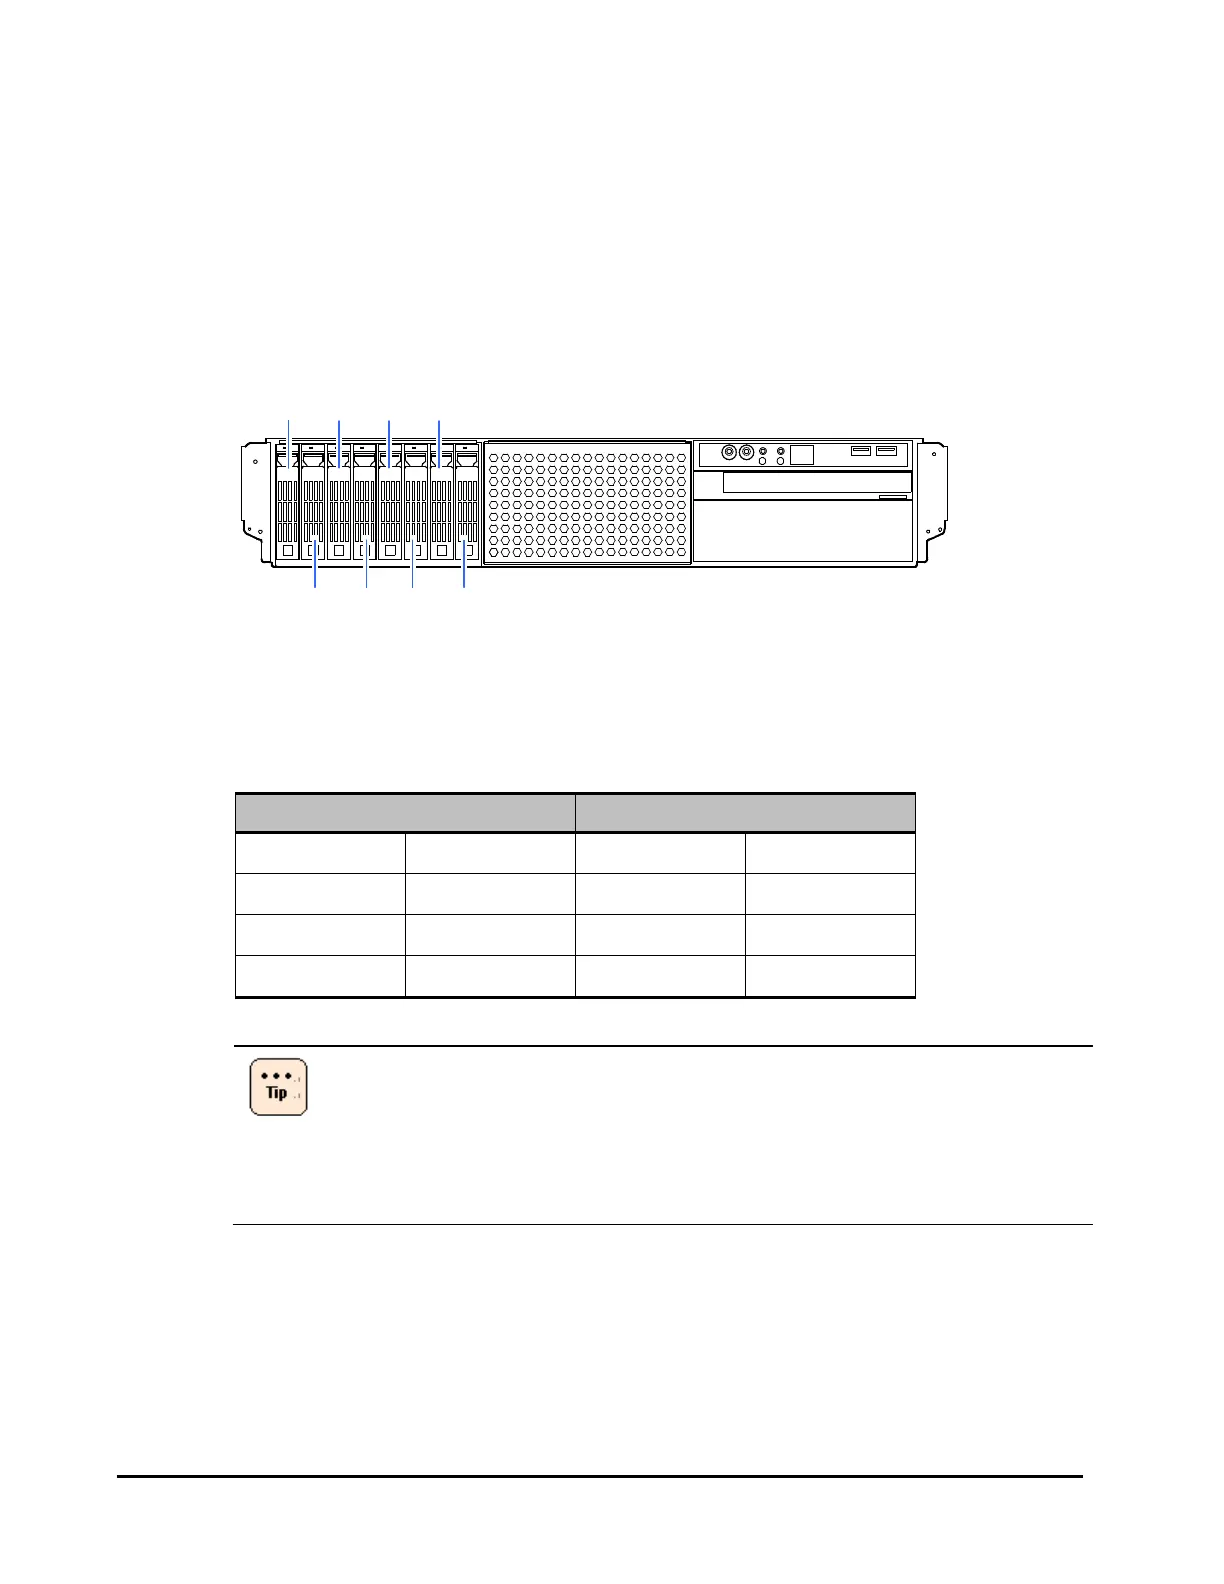
Install an HDD/SSD to extension storage bays. The locations of the extension
storage bays are as follows.
Figure 4-1: Location of extension storage bay
The correspondence between the extension storage bay numbers and the bay
configuration label on the side tab of the system are as follows.
Table 4-1: Extension storage bay and Bay configuration label
Extension storage bay Bay configuration label
1 5 0 4
2 6 1 5
3 7 2 6
4 8 3 7
When replacing a failed HDD/SSD in hot-swap condition, you need the
following conditions.
• Configure a disk array with redundancy (RAID1,5,6, or 10)
• Disk array is operating in degraded mode.
Or disk array is performing or finishing rebuilding data to a reserve
disk with hot spare function.
Removing an HDD/SSD
1. Confirm the failed HDD/SSD.
The HDD status LED on the HDD tray lights solid amber.
2. Push the tab of HDD tray to unlock the HDD/SSD.
3. Pull the lever open, and then pull out the failed HDD/SSD slightly.
Extension storage
Bay1
Bay3
Bay2
Bay5
Bay7
Bay4 Bay6 Bay8
 Loading...