--- 7 ---
Fig. 6
7-2. Reassembly
Reassembly can be accomplished by following the disassembly procedures in reverse. However, special
attention should be given to the following items.
[13]
[14]
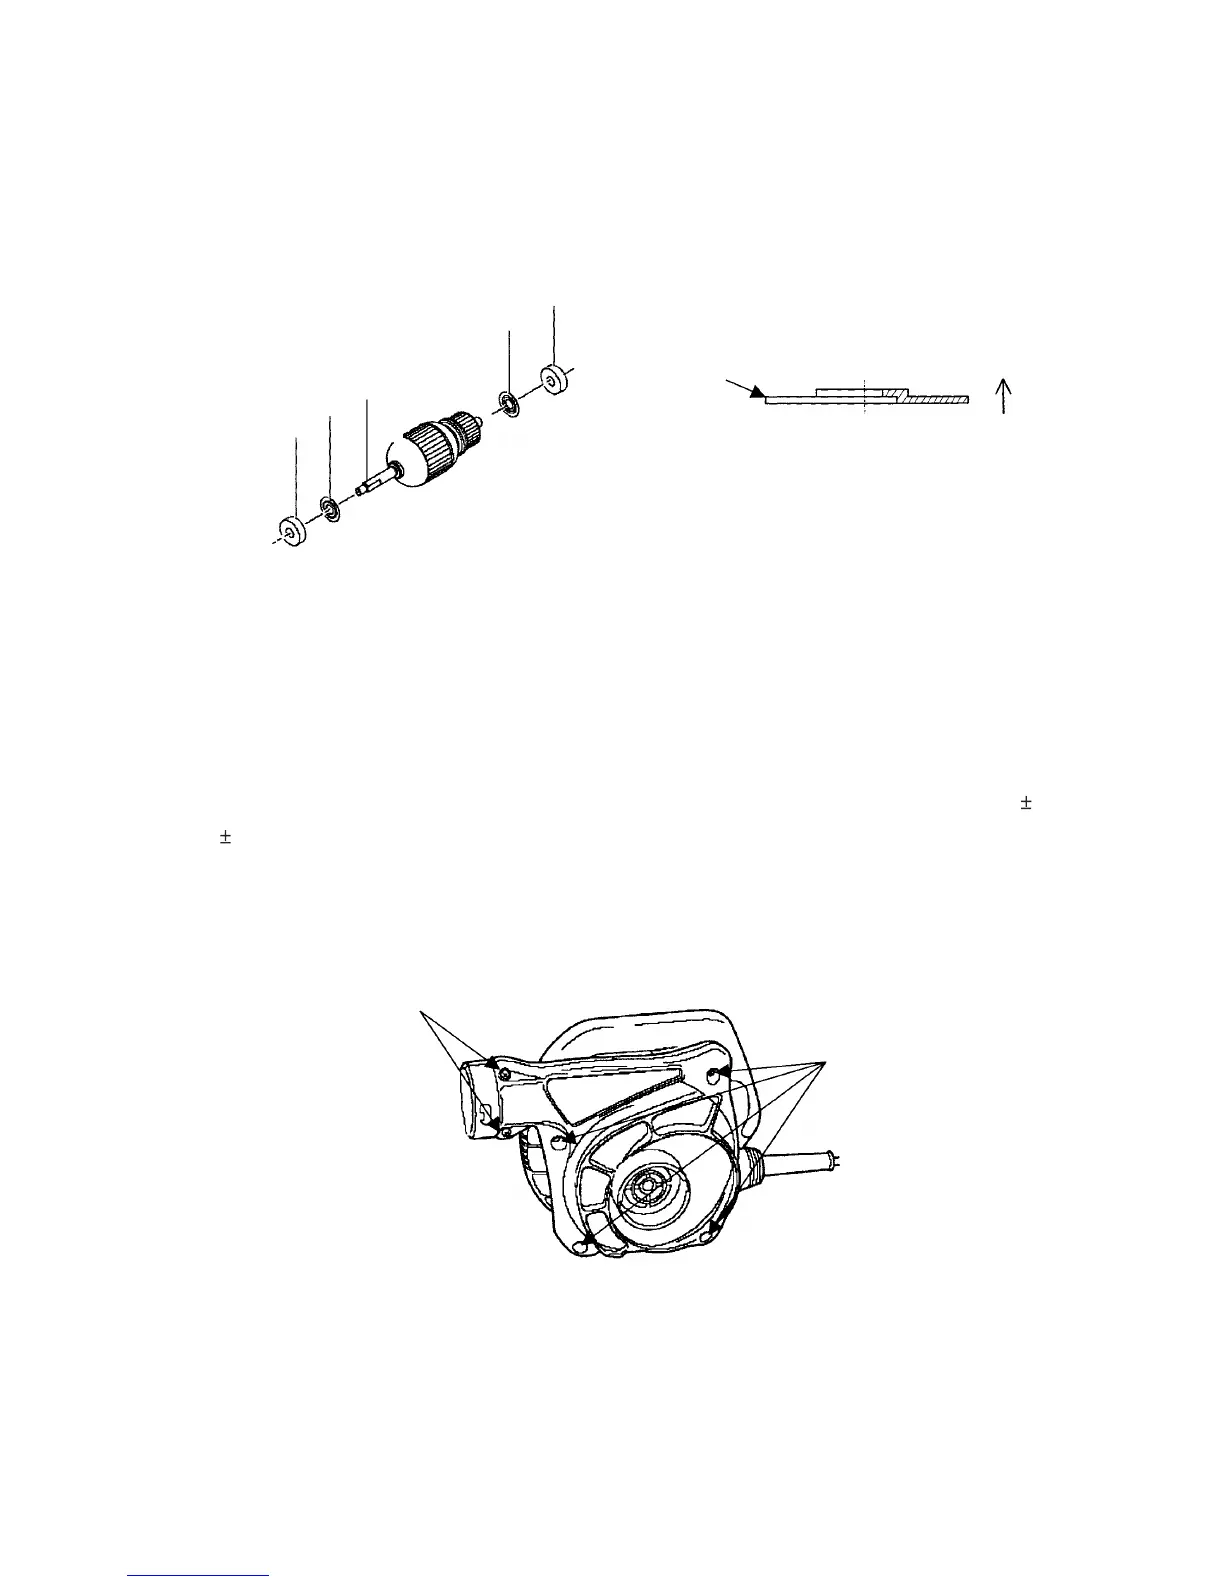
Fig. 8
Fig. 7
[19]
[15]
[14]
(1) Mount Washer (A) [14] to the Armature [15] so that the convex side of Washer (A) [14] faces the ball bearing.
Press-fit the Ball Bearing 608DDW [13] as far as it will go.
(2) Check that the Bearing Lock [12] is mounted to the ball bearing chamber of the Housing Ass'y [20]. Then put
the Armature [15] in the Stator Ass'y [18].
(3) Check that the Bearing Lock [12] is mounted to the Casing [8]. Secure the Casing [8] to the Housing Ass'y
[20] with the Tapping Screws (W/Flange) D5 x 30 [10].
(4) Mount the Washer [11] to the armature shaft. Insert the Fan [7] aligning with the width across flat of the
armature shaft and secure it with the U-Nut M6 [6]. The tightening torque of the U-Nut M6 [6] is 2.9 0.5 N
•
m
(30 5 kgf
•
cm). Be careful not to overtighten the U-Nut M6 [6].
(5) Secure the Casing Cover [5] to the Casing [8] with two Tapping Screws (W/Flange) D4 x 20 (Black) [9] and
four Tapping Screws (W/Flange) D4 x 25 [35]. Be careful not to mistake the screw positions.
Tapping Screws
(W/Flange) D4 x 20 (Black) [9]
Tapping Screws
(W/Flange) D4 x 25 [35]
(6) Mount the Carbon Brushes (1 Pair) [28] to the Housing Ass'y [20].
Ball bearing side
Washer (A) [14]
 Loading...