12
1. Execute umount /mnt
2. Remove the USB stick from the old SMU
3.
The USB stick can now be used to recover the SMU configuration to the Replacement
SMU
Configuring the Replacment SMU
1. On the original SMU, label all the cables.
2. Set up the new SMU in a staging area first.
3. Make a connection to the external SMU.
a. Serial Connection - Connect via Putty Serial (Serial Settings 115200, 8, N, 1, N) to
the serial console port
Note: On newer notebooks, you will need a USB to serial dongle and a 9-pin DB9
null modem cable. This is the preferred method, as it will allow you to capture
the output to a file when using a Putty serial connection.
b. KVM Connection - Connect a monitor, keyboard and mouse to the appropriate
ports on the back of the SMU
4. SMU Installation.
a. Depress the red button on the front of the SMU to power the unit on
b. Verify code level of the replacement SMU
i. Login as Username: root Password: nasadmin
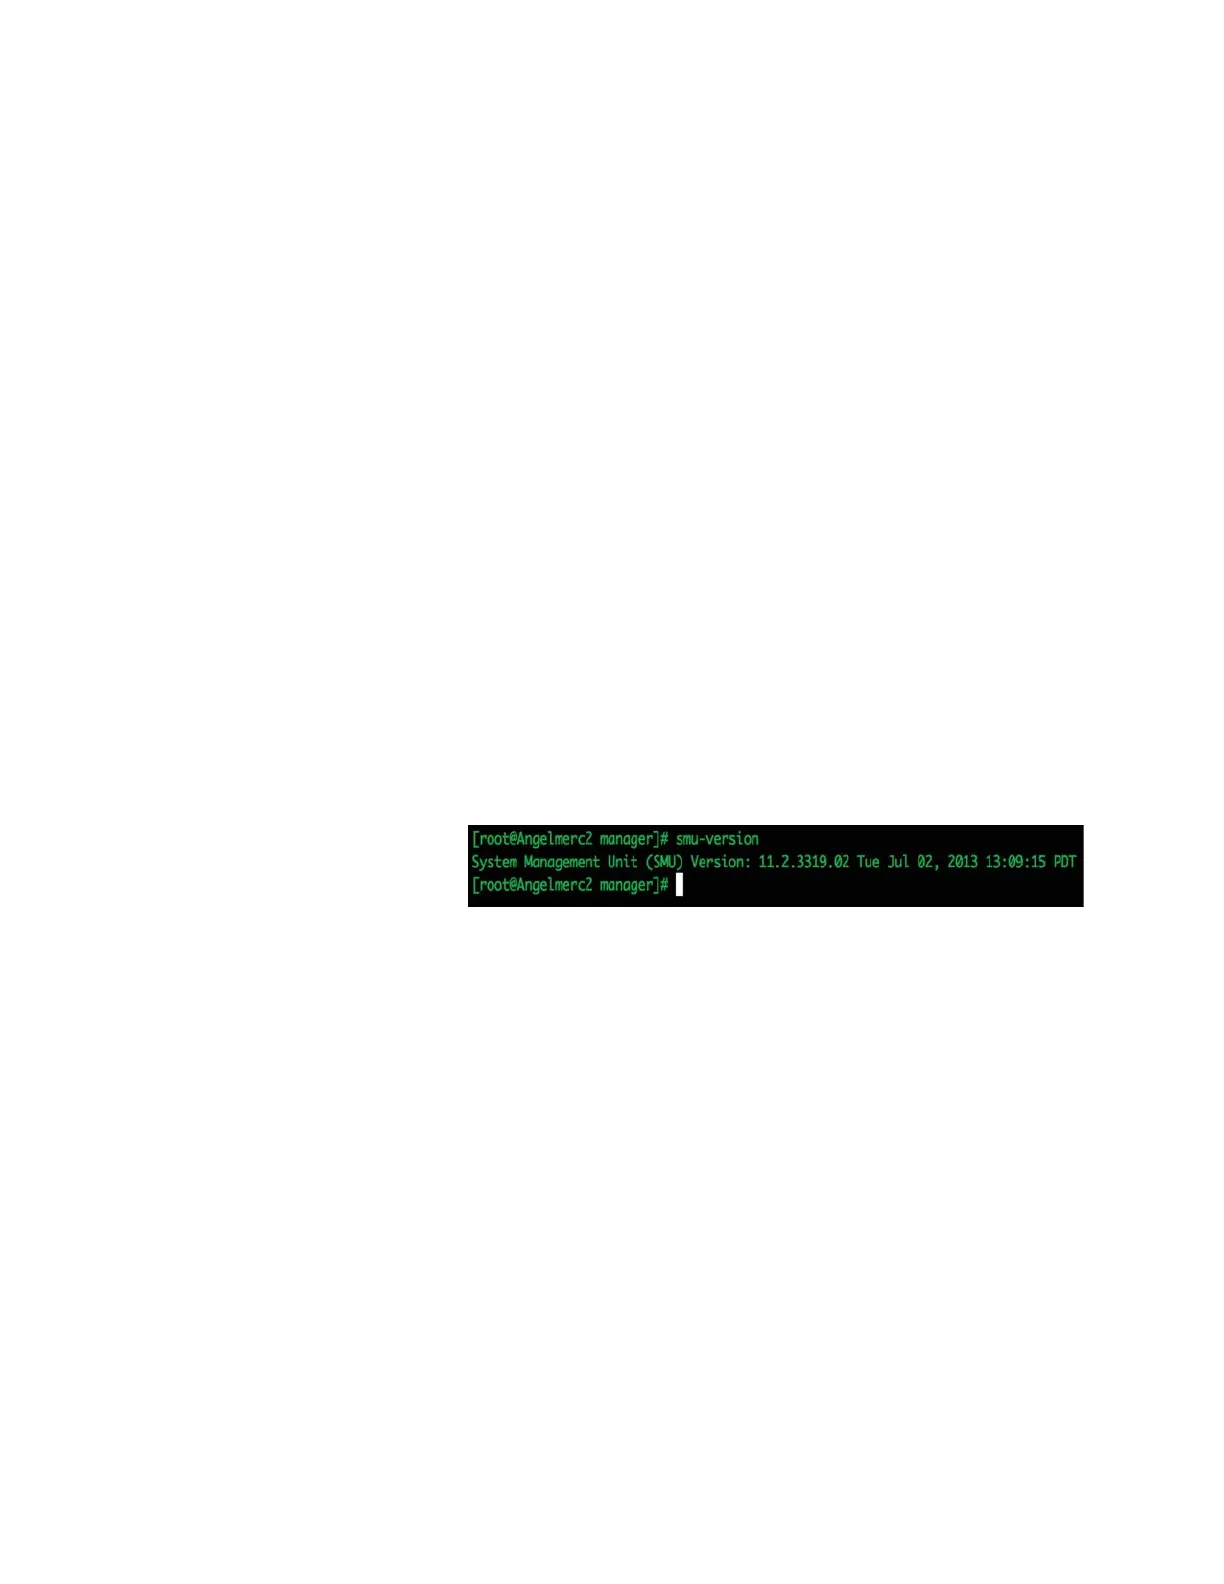
ii. Check the SMU Version.
1. Type
smu-version
Note: SMU should be running the same firmware version or
newer that supports the HNAS node SU. If it is not, then follow
the procedure after configuring the SMU to upgrade to the
latest version.
c. If necessary, load same firmware version or newer that supports the HNAS node
SU to the SMU via CLI.
i. Equipment - USB flash drive
1. Latest SMU firmware iso file (SMUsetup_<filename>_hds.iso)
2. SMU backup file generated in Step 5
ii. Upgrade Procedure
1. It is assumed that the previous console session is still active
2. Connect the USB drive to a USB port on the SMU
3. Create a directory:
mkdir /mnt2
4. Enter
mount /dev/sdb1 /mnt2
5. Enter
cd /mnt2 (change to the /mnt2 directory)
6. Copy the SMUsetup file from the USB to the /tmp directory