SERVICING YOUR HONDATRIMMER
1.
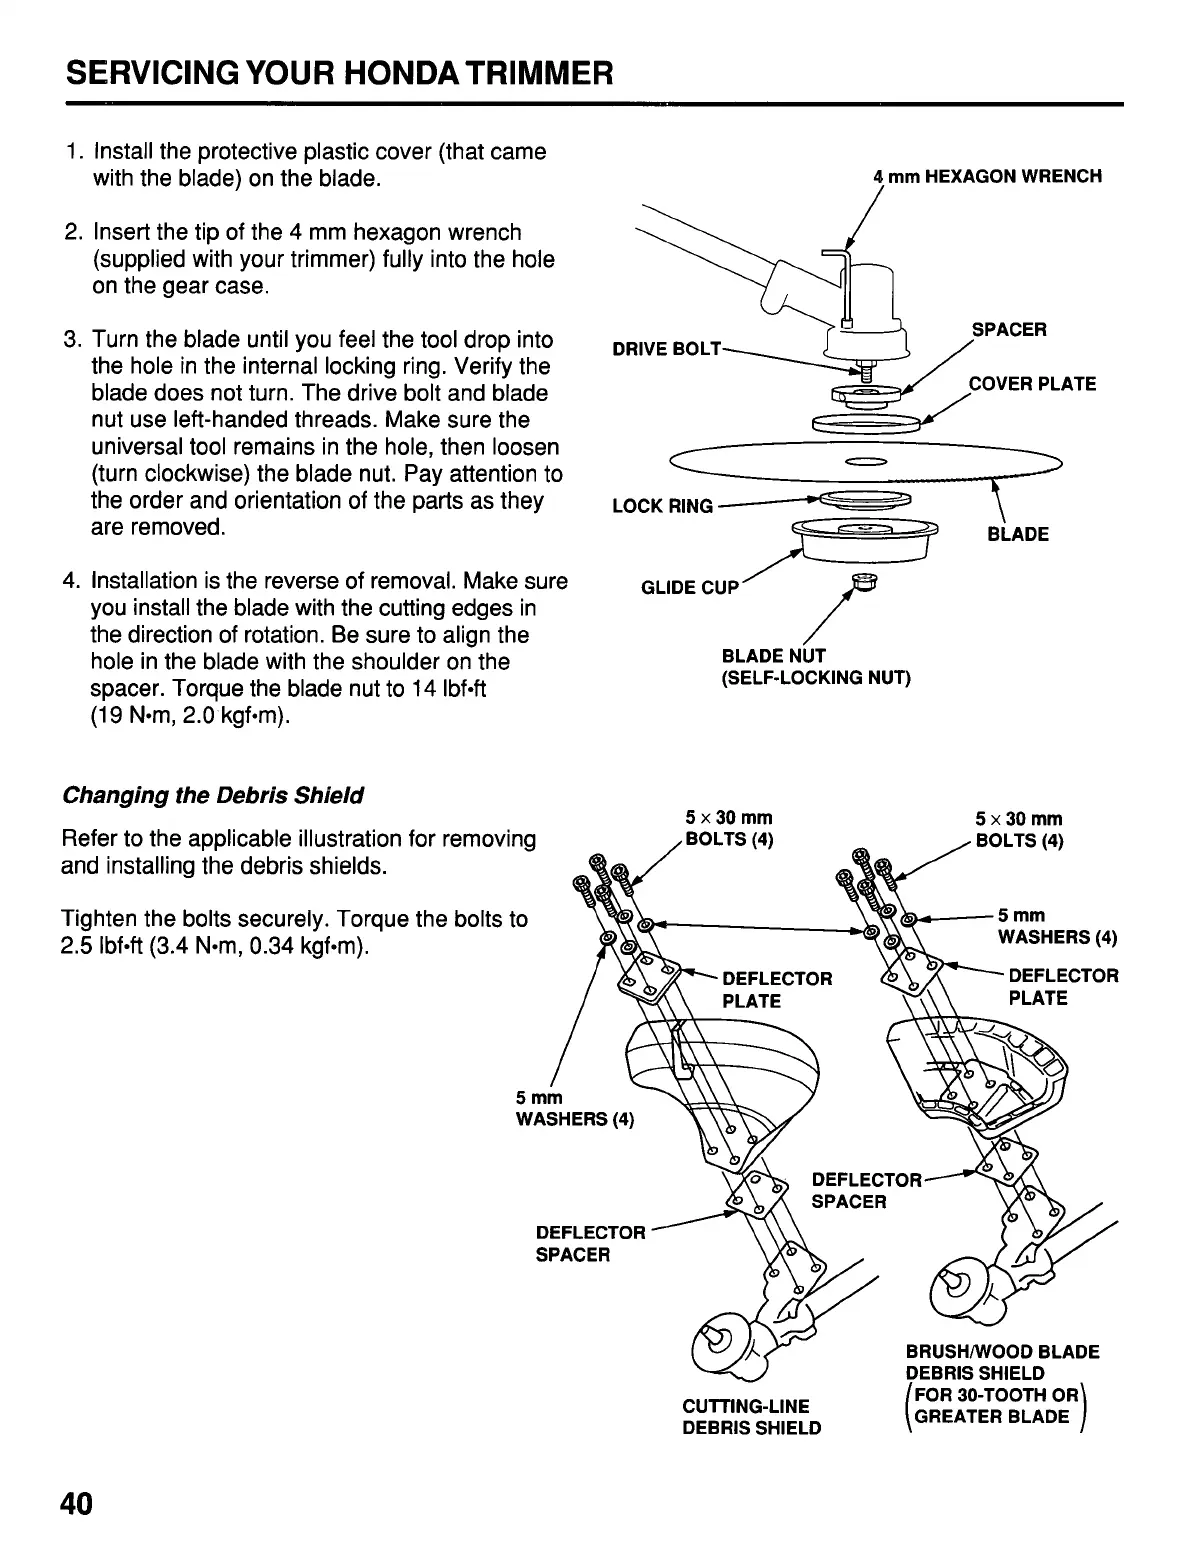
Install the protective plastic cover (that came
with the blade) on the blade.
2.
Insert the tip of the 4 mm hexagon wrench
(supplied with your trimmer) fully into the hole
on the gear case.
3. Turn the blade until you feel the tool drop into
the hole in the internal locking ring. Verify the
blade does not turn. The drive bolt and blade
nut use left-handed threads. Make sure the
universal tool remains in the hole, then loosen
(turn clockwise) the blade nut. Pay attention to
the order and orientation of the parts as they
are removed.
4. Installation is the reverse of removal. Make sure
you install the blade with the cutting edges in
the direction of rotation. Be sure to align the
hole in the blade with the shoulder on the
spacer. Torque the blade nut to
14
Ibf4
(19
Nom,
2.0
kgf-m).
Changing the Debris Shield
Refer to the applicable illustration for removing
and installing the debris shields.
Tighten the bolts securely. Torque the bolts
2.5
Ibf4 (3.4 Nom, 0.34 kgf-m).
4
mm
HEXAGON WRENCH
/
DRIVE
LOCK RING
BLADE
GLIDE CUP
w
BLADE NUT
/”
(SELF-LOCKING NUT)
5x30mm 5x30mm
!n
/
BOLTS
(4)
5 mm
WASHERS
(4)
DEFLECTOR
DEFLECTOR
SPACER
BRUSHNOOD BLADE
w
DEBRIS SHIELD
CUlTlNG-LINE
FOR
30-TOOTH
OR
DEBRIS SHIELD
40

 Loading...