AA-series Audio Amplifiers Manual for DVC-AO Applications — P/N 52526:B 8/13/2019 11
AA-30 Installation Amplifying Audio Messages
For further details and installation instructions about ACT-2, see the ACT-2 Product Installation Document.
3.3 AA-30 Installation
3.3.1 Mounting an AA-30
The AA-30 mounts in a CHS-4L chassis, which can hold two units placed side by side. The following steps apply to the installation of an
Audio Amplifier.
1. Mount the unit(s) into the CHS-4L (see Figure 3.3):
– Put the bottom end of the AA-30 assembly into the slots
in the bottom of the CHS-4L chassis. Swing the
assembly into the chassis.
– Secure the AA-30 to the chassis with the washers and
retaining nuts. Tighten securely.
2. Connect a primary (AC) and a secondary (24 VDC battery)
power source to each unit.
3. Provide an external device (such as the CHG-120) for
charging the batteries.
4. Adjust the Audio Gain Level. See Section 3.7 “Adjusting
the Audio Gain Level”.
3.3.2 Connecting an AA-30
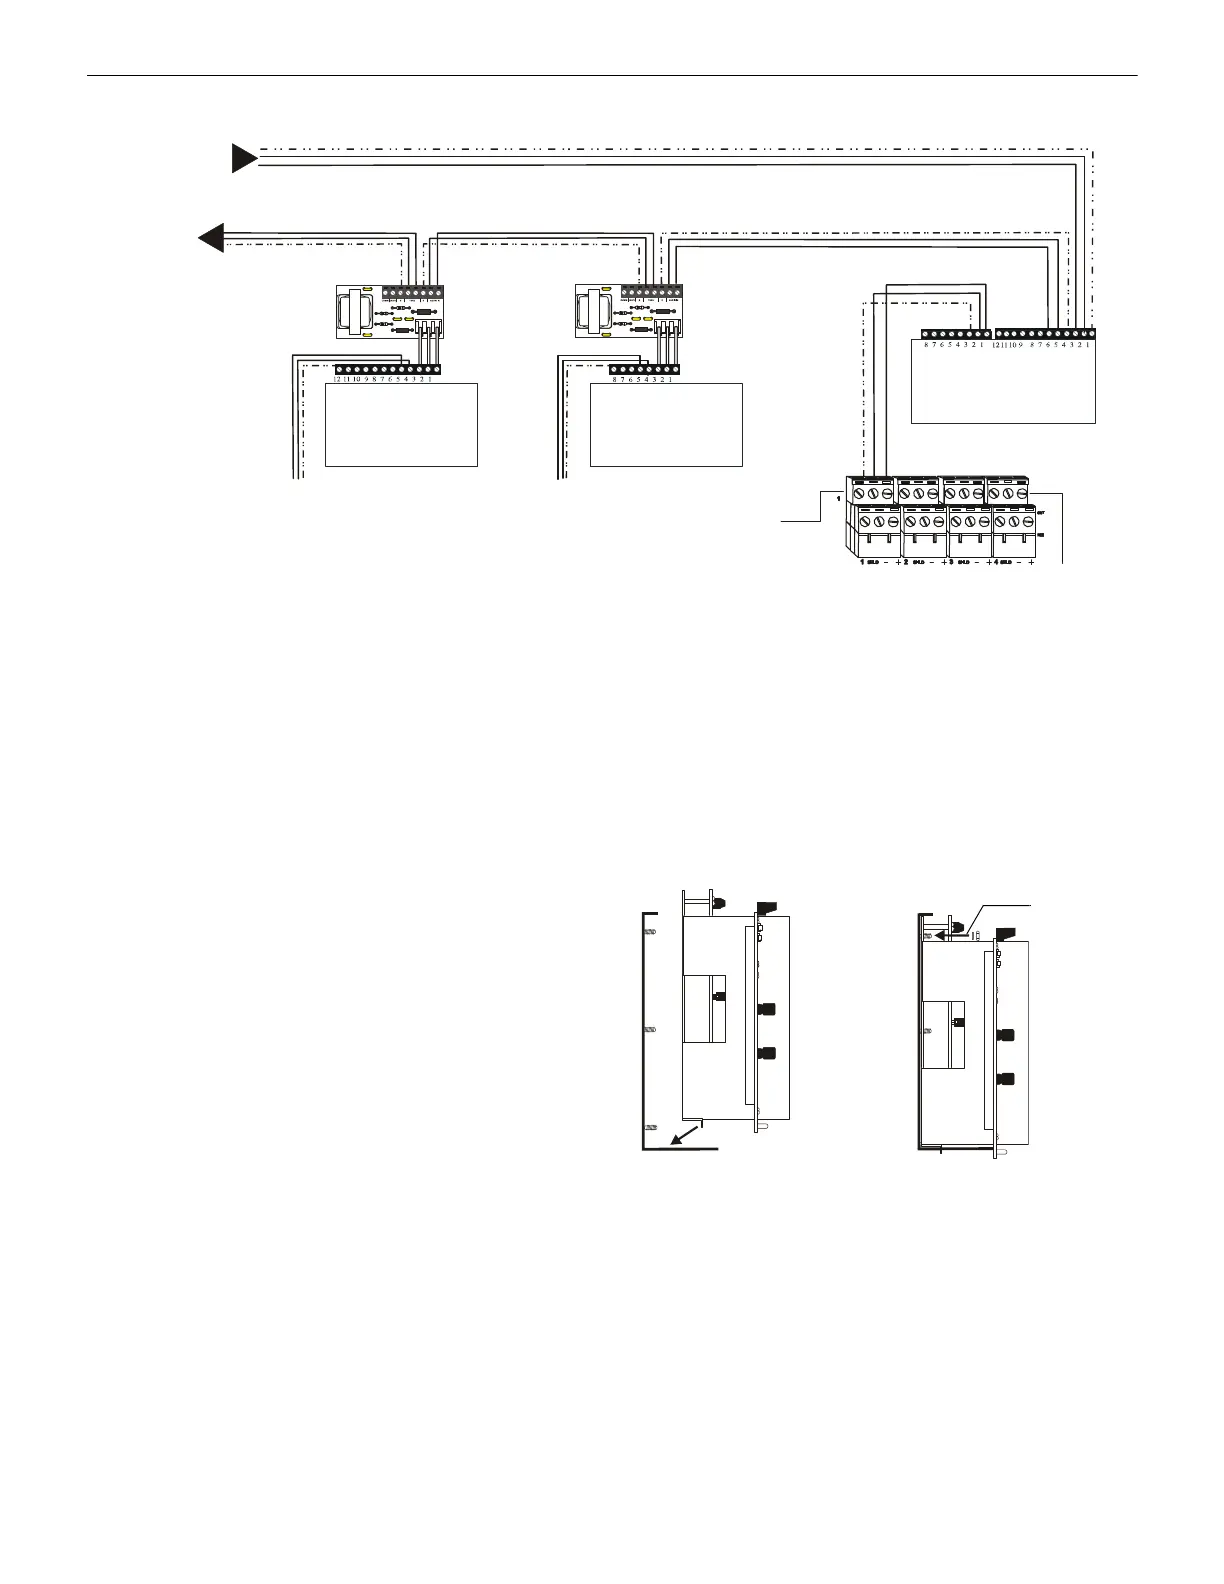
Figure 3.4 and Figure 3.5 show terminal connections to an AA-30. See Section 3.8 “Wiring Multiple Audio Amplifiers” for applications
using more than one amplifier.
• The low-level audio input and high-level audio output “P” connectors are primarily for in-cabinet applications where the wiring to
or from the AA-30 remains in the cabinet. For multiple-cabinet applications, hard-wire the system using terminal blocks P3 and P8.
• To use high-level audio (25 Vrms output) with four-wire supervision:
–Cut resistors R8 and R9 on the AA-30 (Figure 3.5), or
–Cut resistor R100 on the AA-120 or AA-120 (Figure 3.10).
• Some installations require an ACT-1 or ACT-2 Audio Coupling Transformer. See the ACT-1 Installation Document or the ACT-2
Installation Document for further details and installation instructions.
AA-100/AA-100E or
AA-120/AA-120E
AA-30/AA-30E
AA-30/AA-30E
P3
P8
High-level Audio
Low-level analog audio*
Optional 4-wire (high-level) return from last ACT-2
To other ACT-2s
P3
TB1
P1
Low-level Audio
Low-level Audio
TB1
P1
P3
ACT-2
DVC-AO
ACT-2
To other AA-Series
amplifiers in the
cabinet
To other AA-Series
amplifiers in the
cabinet
DVC_AOact2.wmf
Note: For low-level audio’s optional return, see Figure 3.1.
Figure 3.2 Wiring the DVC-AO Board
Aa30chs4.wmf
Washer and
retaining nut
(4 places)
Figure 3.3 Mounting an AA-30 into the CHS-4L Chassis
 Loading...