– 4 –
Program the VAM Device Address
Default VAM device address = 1.
1. Click Setup > System.
2. Click ECP Address.
Using the Up/Dn arrows, choose the device address assigned for VAM in the control panel.
3. Click Apply.
4. VAM automatically reboots after the device address is set.
Set the Time & Date
Set the time and date manually or retrieve the time and date from the control panel (if programmed).
Get Time/Date from the Control Panel
1. Click Setup > System > Time/Date Setup.
2. Click the Get Time button.
The VAM retrieves the time and date programmed in the control panel.
Manually Set the Time/Date
1. Click Setup > System > Time/Date Setup.
2. Select the Month, Year, Hour, and Minutes using the drop-down arrows for each.
3. Select AM or PM (selection toggles by clicking)
4. Select the desired date format using the MMDDYY drop-down arrow. Choose 12-hour (select the 12 Hour checkbox) or 24-
hour format (uncheck the checkbox).
5. If Daylight Saving Time is used in the installation time zone, click DST and set the appropriate start and end DST month,
weekend and hour. VAM will automatically adjust the time when Daylight Saving Time starts and ends.
6. Click Apply to save the settings.
7. Select the Region from the Region drop-down menu and enter the appropriate ZIP or Postal code.
8. A choice (checkmark = Yes; X = No) to copy the time to the control panel may appear. Select Yes or No as desired. “Yes”
sets the control panel to the time entered in VAM.
Set Up Remote Services (Total Connect™)
An AlarmNet Direct account is required to enable Total Connect, and a communication device must be connected to the VISTA
®
control panel.
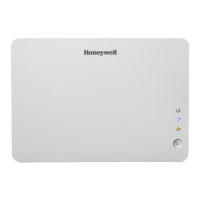
1. Verify that the VAM is connected to the Internet via the network router.
2. Using AlarmNet Direct, enroll the communication device and VAM, and enable Total Connect usage. Select Yes at the
“using VISTA Automation Module” (Yes /No) prompt. You will need the VAM MAC ID and CRC number, which can be
found on a label on the back of the VAM or on its carton.
3. Open a Total Connect account for the user if an account does not already exist.
4. After a Total Connect account has been set up, the VAM must be reset (powered down and powered up).
5. Enable the desired automation devices to be controlled by Total Connect. See “Enabling Devices for Total Connect“
section. After devices have been enabled for Total Connect, follow the Total Connect prompts to synchronize the data with
VAM. Syncing is required before the enabled devices will display in Total Connect.
Enabling Devices for Total Connect
1. Click the Setup > System > TC Server
2. Click the TC Enable button to display the “Z-Wave Device Management For Total Connect” screen.
3. Select the device(s) to be enabled for Total Connect usage.
NOTE: Some devices may need to be re-enabled after a software upgrade.
4. Click Save when done.
5. Follow the Total Connect prompts to synchronize the data with VAM. Syncing is required before the enabled devices will
display in Total Connect.
NOTES: 1. Device IDs for Z-Wave devices could be different on VAM and Total Connect web pages.
2. Total Connect supports the first 40 switches, the first 3 thermostats, and the first 4 door locks enrolled in VAM.
3. The VAM cannot synchronize panel users to the lock.
 Loading...
