XNX Universal Transmitter Quick Start Guide
22
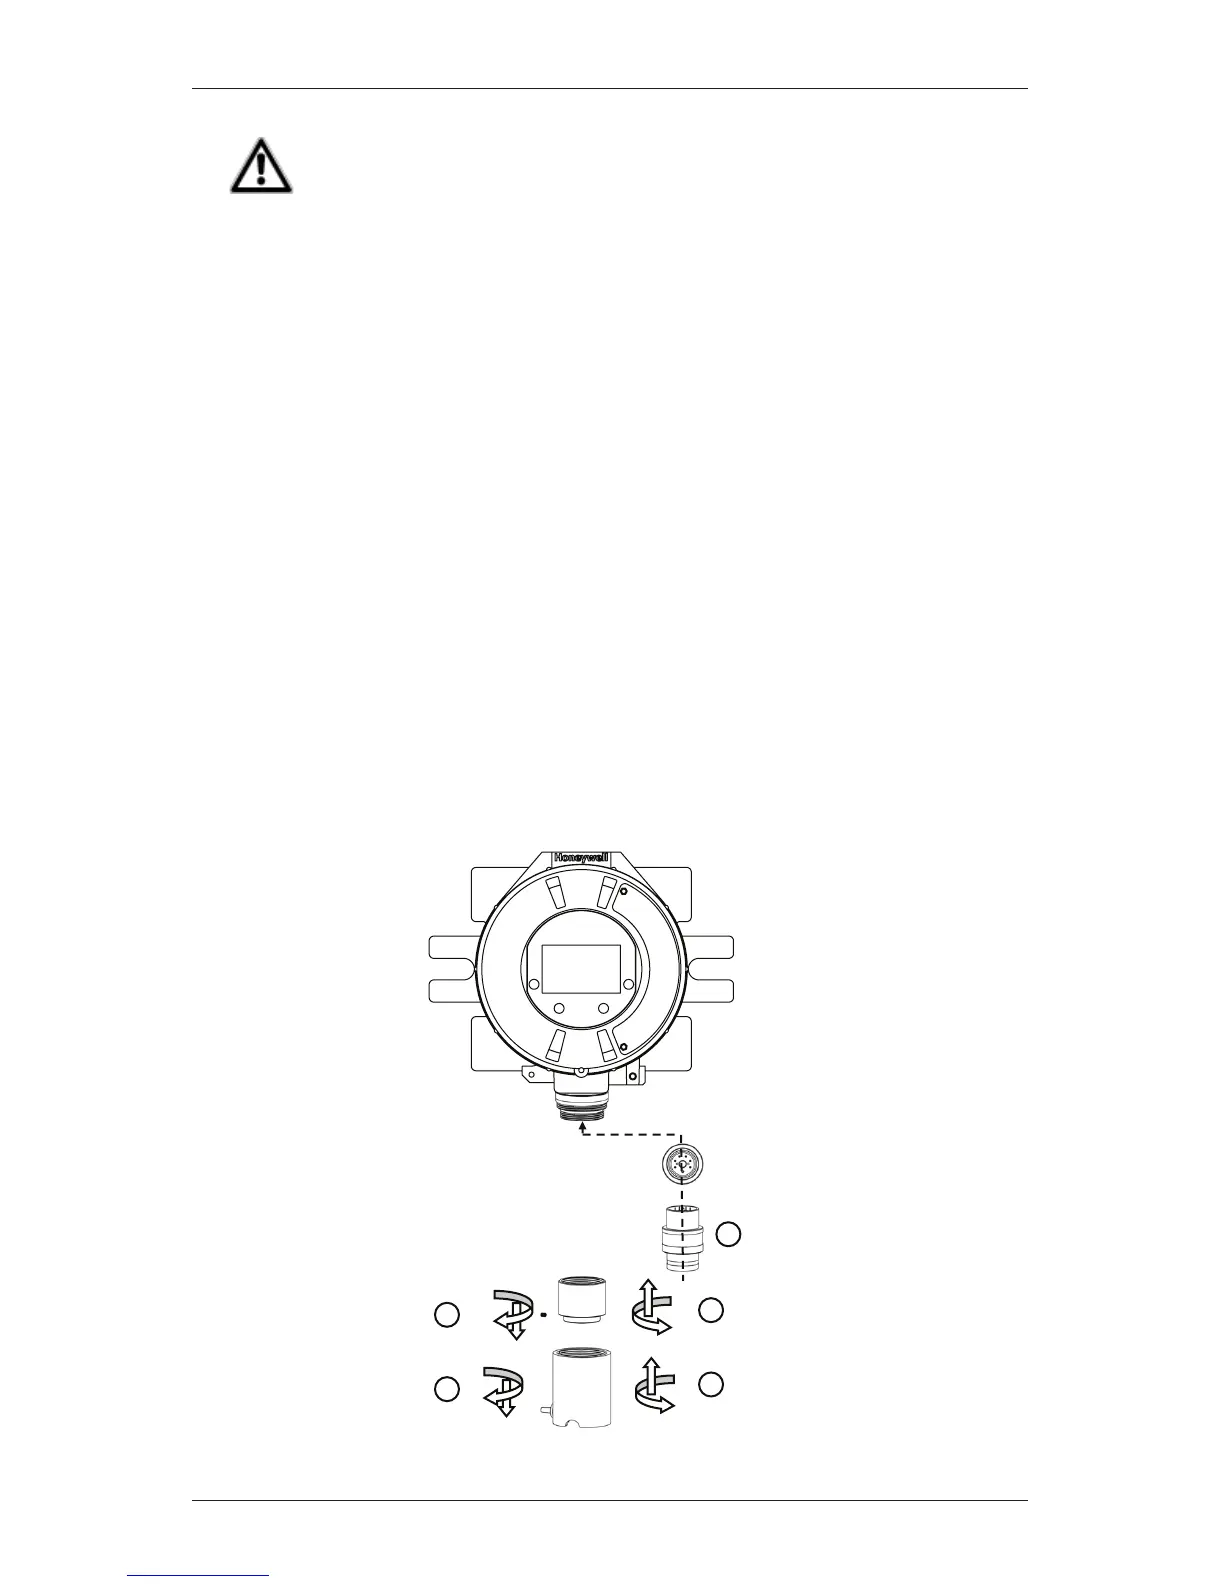
4.6.1 XNX Electrochemical (EC) Sensor Installation
CAUTION
For biased sensors (e.g. Nitrogen Dioxide) remove the sensor stabilizer from the bottom of the
sensor prior to installation.
UsingFigure11asaguide,followtheprocedurebelow:
1. Checkthatthelabelonthenewsensoristhecorrectgastype.
2. Unscrewtheweatherproofcover,loosentheretainerlockingscrew
withthesuppliedhexkeyandunscrewthesensorretainer.
3. Pluginthenewsensortakingcaretoalignthesensorpinswiththe
connector.
4. Retthesensorretainer,tightenthelockingscrewwiththesupplied
hexkeyandrettheweatherproofcover.
5. Countdowntimeofupto180seconds(dependentonsensortype)is
displayed.
6. Acknowledgementofthegastypewillberequiredbefore
proceeding.Formoreinformationonsettinggastype,seetheXNX
TechnicalManualSection2.51GasSelection.
7. Afterthesensorisinstalledandthegastypeisconrmed,the
Range,alarmlevelsandotherimportantsettingsmustbeset;see
appropriatesectioninSection6-PoweringtheXNXfortheFirst
Time.
8. OncetheXNXhasbeencongured,calibratethedetectorfollowing
theproceduresinSection8.1-Calibration.
Transmitter
Sensor Retainer &
Locking Screw
2
1
3
4
5
New Sensor
 Loading...