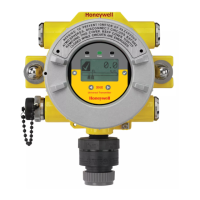
XNX Universal Transmitter Quick Start Guide
45
indicators, the LEDs on the front panel will flash in a pattern based on the
condition:
Condition
LED
Red Green Yellow
Alarm 1 Solid
Alarm 2 Flashing
Warning Solid
Fault Flashing
Health Flashing
7.3 Entering the Menu Structure
Swiping the magnet over the magnetic switch
✓
or
✖
gives the user access
to the XNX to reset faults and/or alarms, display current settings or make
adjustments to the device.
NOTE:
If the Reset option is set to Lock, users will not have access to reset
alarms and faults. For more information on Security Settings for the
XNX, see XNX Universal Transmitter Technical Manual.
Figure 36. Alarm Reset screen
From the General Status menu, if the
✖
or ‘escape’ magnetic switch is swiped, the
Alarm Reset Screen activates. This allows
any user to silence alarms and reset faults
generated by the XNX.
Using the
✓
switch resets all alarms and faults and returns to the General Status
Screen. Choosing ‘X’ will return to the General Status Screen without resetting
the alarms and faults.
Figure 37. Passcode screen
Using the
✖
switch will return the user
to the General Status Menu. If the user
selects
✓
from the General Status menu,
it will activate the passcode screen.
There are two levels that control access based upon the security level
of the user. The passcodes for both levels are set at “0000” from the
factory.
Level 1 Routine Maintenance Level 2 Technician and Password Admin
WARNING
The factory-set passcodes must be reset to prevent unauthorized access to the XNX menus (see the
XNX Universal Transmitter Technical Manual).
Once the Passcode Screen is displayed, the first passcode digit is highlighted.
Use the switches to increment or decrement through the values. Once the
correct value is displayed for the first digit,
✓
accepts the value and moves to the
next digit or
✖
will move to the previous digit of the passcode.

 Loading...


