EasyManuals Logo
Home>HP>Monitor>E27m G4

HP E27m G4 User Manual

HP E27m G4
29 pages
To Next Page IconTo Next Page
To Previous Page IconTo Previous Page
Page #22 background imageLoading...
Page #22 background image
20
• If connector need to replace, please insert new parts carefully because the near pin may cause
short circuit by inappropriate operate.
• DO NOT allow any liquid on the board. Water and moisture may cause short-circuit to the
electronic components and lead to malfunctions.
• The fusion point of Lead-Free solder is requested. Repairing with conventional lead wire may
cause damage.
• Work quickly to avoid overheating the circuit board as soon as you confirm the steady soldering
condition.
• Keep the soldering iron tip clean and well tinned and when replacing parts.
• A close inspection of the circuit board revealed look in good condition.
• After repaired, must connect source to each port to check Main board function is ordinary.
Note: (The requirement of professional repairers’ regulation by ERP lot5)
1) The professional repairer has the technical competence to repair electronic displays and complies
with the applicable regulations for repairers of electrical equipment in the Member States where it
operates. Reference to an official registration system as professional repairer, where such system
exists in the Member States concerned, shall be accepted as proof of compliance with this point.
2) The professional repairer is covered by insurance covering liabilities resulting from its activity,
regardless of whether this is required by the Member State.
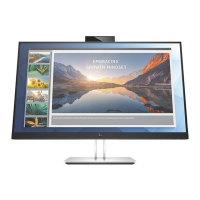
Audio connector CN610
Repair the audio connector:
1) Use a hot air gun to melt the solder on the pins. Pin solder with soldering iron and absorber. You
can gently push down with the soldering iron once everything is molten to move the M1 out of the
through holes.
2) Lift the CN610 connector from the circuit board.
3) Place the new component on the circuit board. Be sure that it matches the footprint.
4) Solder the new component.
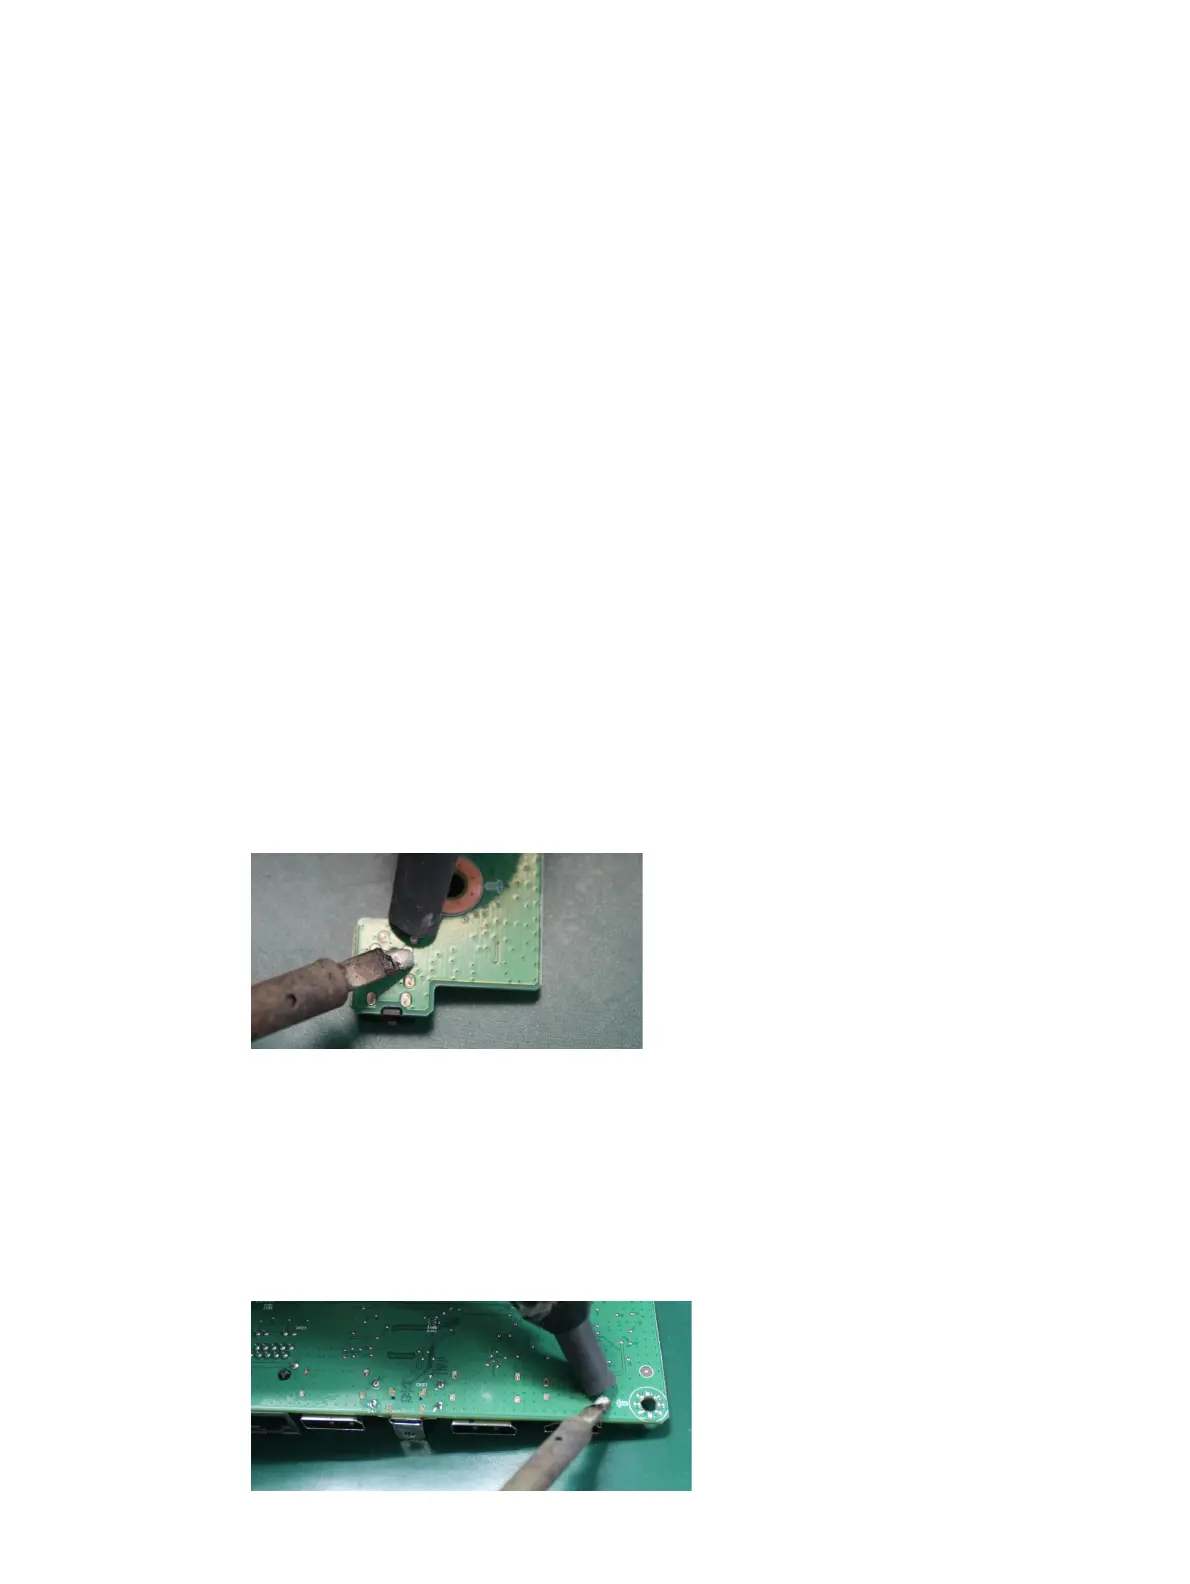
HDMI connector CN501
Repair the HDMI connector:
1) Use a soldering iron and a de-soldering pump to remove as much solder as possible from the pin.

Questions and Answers:

Question and Answer IconNeed help?

Do you have a question about the HP E27m G4 and is the answer not in the manual?

HP E27m G4 Specifications

General IconGeneral
Color gamut99 %
Pixel pitch0.2331 x 0.2331 mm
Screen shapeFlat
Backlight typeEdge LED
Display diagonal27 \
Surface hardness3H
Anti-glare screenYes
Display technologyLCD
Native aspect ratio16:9
Vertical scan range50 - 75 Hz
Maximum refresh rate75 Hz
Contrast ratio (typical)1000:1
Display number of colors16.7 million colors
Display brightness (typical)300 cd/m²
Supported graphics resolutions640 x 480 (VGA), 720 x 400, 800 x 600 (SVGA), 1024 x 768 (XGA), 1280 x 1024 (SXGA), 1280 x 720 (HD 720), 1280 x 800 (WXGA), 1440 x 900 (WXGA+), 1600 x 1200 (UXGA), 1600 x 900, 1680 x 1050 (WSXGA+), 1920 x 1080 (HD 1080), 1920 x 1200 (WUXGA), 2560 x 1440
Product colorBlack, Silver
Market positioningBusiness
Megapixel5 MP
RMS rated power10 W
Number of speakers2
Pivot angle-90 - 90 °
Cable lock slot-
Panel mounting interface100 x 100 mm
AC input voltage100 - 240 V
AC input frequency50 - 60 Hz
Energy efficiency scaleA to G
Power consumption (max)160 W
Power consumption (standby)0.5 W
Power consumption (typical)51 W
Operating temperature (T-T)5 - 35 °C
Operating relative humidity (H-H)20 - 80 %
HDMI version1.4
DisplayPort version1.2
USB upstream port typeUSB Type-C
USB Type-A downstream ports quantity4
Cables includedAC, USB Type-C to USB Type-C
Package depth190 mm
Package width695 mm
Package height483 mm
Package weight11970 g
Harmonized System (HS) code85285210
Weight and Dimensions IconWeight and Dimensions
Depth (with stand)216 mm
Height (with stand)551 mm
Weight (with stand)8520 g
Depth (without stand)47 mm
Width (without stand)612.8 mm
Height (without stand)396.6 mm

Related product manuals