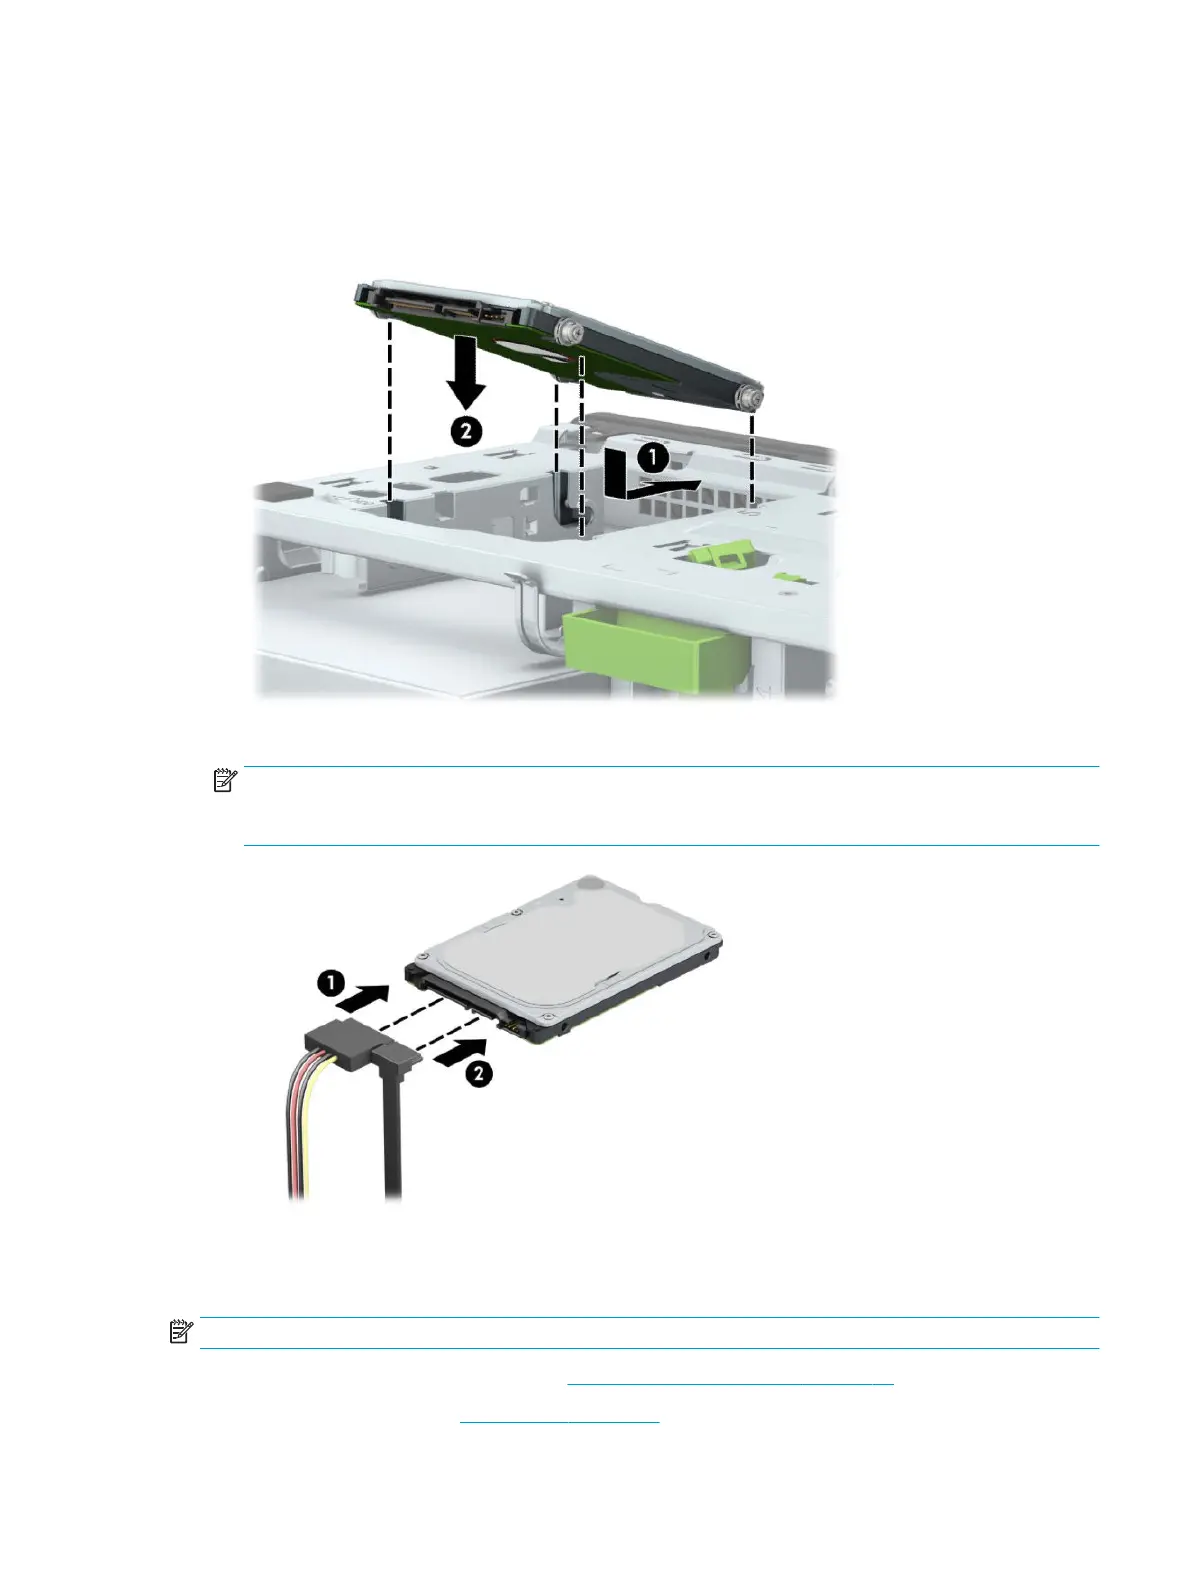
4. Align the front mounting screws on the drive with the J-slots on the sides of the drive bay. Press the
front of the drive into the drive bay, and then slide the drive forward (1). Then press the rear of the drive
down into the drive bay (2) so that the drive is secured in place.
5. Connect the power cable (1) and data cable (2) to the rear of the hard drive.
NOTE: If the 2.5-inch hard drive is the primary drive, connect the other end of the data cable to the
dark-blue SATA connector on the system board labeled SATA0. If it is a secondary hard drive, connect the
other end of the data cable to one of the light-blue SATA connectors on the system board.
6. Reassemble the computer.
Removing and installing an M.2 SSD storage card
NOTE: The computer supports 2230 and 2280 M.2 SSD cards.
1. Prepare the computer for disassembly (Preparation for disassembly on page 17)
2. Remove the access panel (Access panel on page 18)
Drives 45
 Loading...