23
Installing the Modules
Verifying the Module is Installed Correctly
Observe the Module Status LED for the slot in which the module is being
installed, and the Test and Fault LEDs on the switch to verify the module is
installed properly.
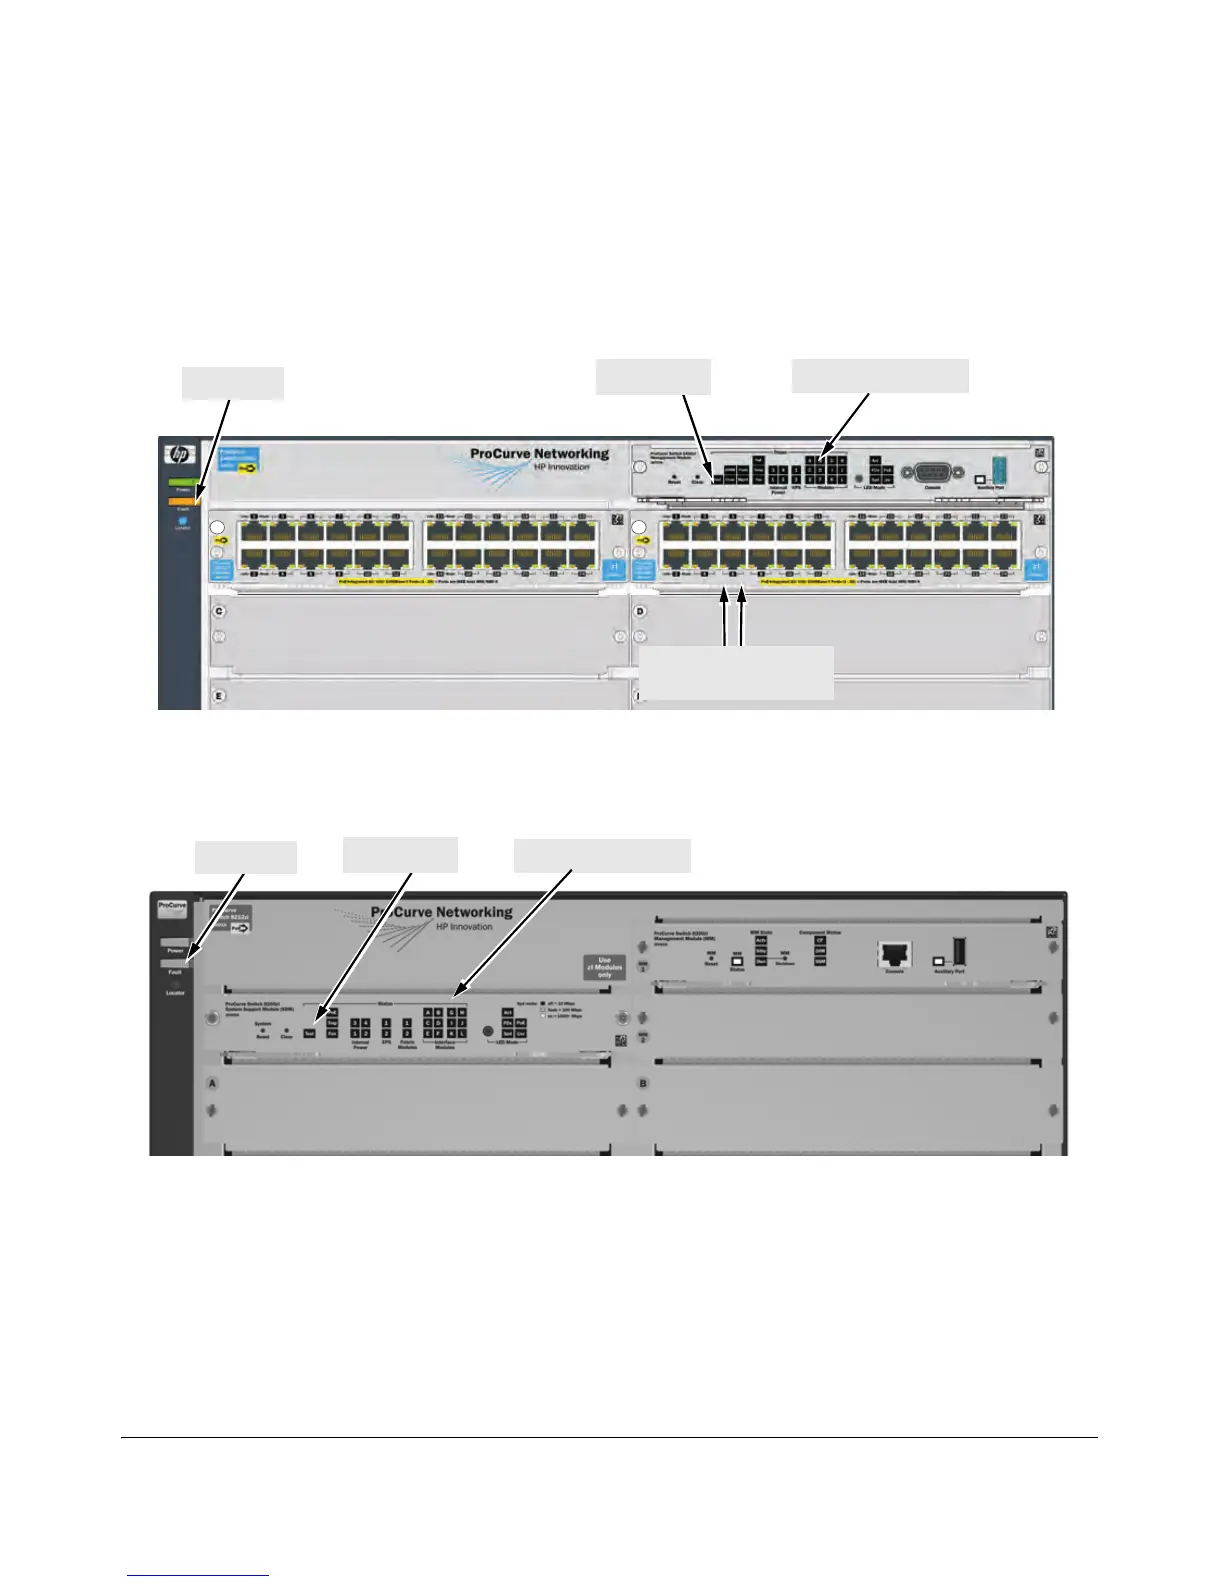
Figure 9. Module Status LEDs on an E5400 zl switch
Figure 10. Module Status LEDs on an E8200 zl switch
When the module is installed properly and the switch is powered on, or
th
e module is installed when the switch already has power, the module
undergoes a self test that takes a few seconds. You can use the LEDs to
determine that the module is installed properly and has passed the self
test, as described in the “LED Behavior” table below.
Module Status LEDs
Test LED
Fault LED
Module Link and Mode
LEDs
Module Status LEDs
Fault LED
Test LED
 Loading...