4. Remove the filler panel from a spare 5¼-inch bay of your server, as described in your server's
documentation. With some servers you must also remove the half-height device divider.
Attach mounting hardware
If your server requires special rails or other hardware to install the tape drive, mount them on the
tape drive now.
If your server does not require special mounting hardware, proceed to Install drive (page 10) now.
NOTE: If mounting hardware is supplied with your tape drive, it may not be exactly the same
as shown in the illustrations.
Different models of server require different mounting methods. The server may also incorporate a
locking mechanism to hold the tape drive in place. See Secure the drive (page 16).
Refer to your server documentation to ascertain the correct method of mounting, and to check
whether mounting hardware is provided with the server.
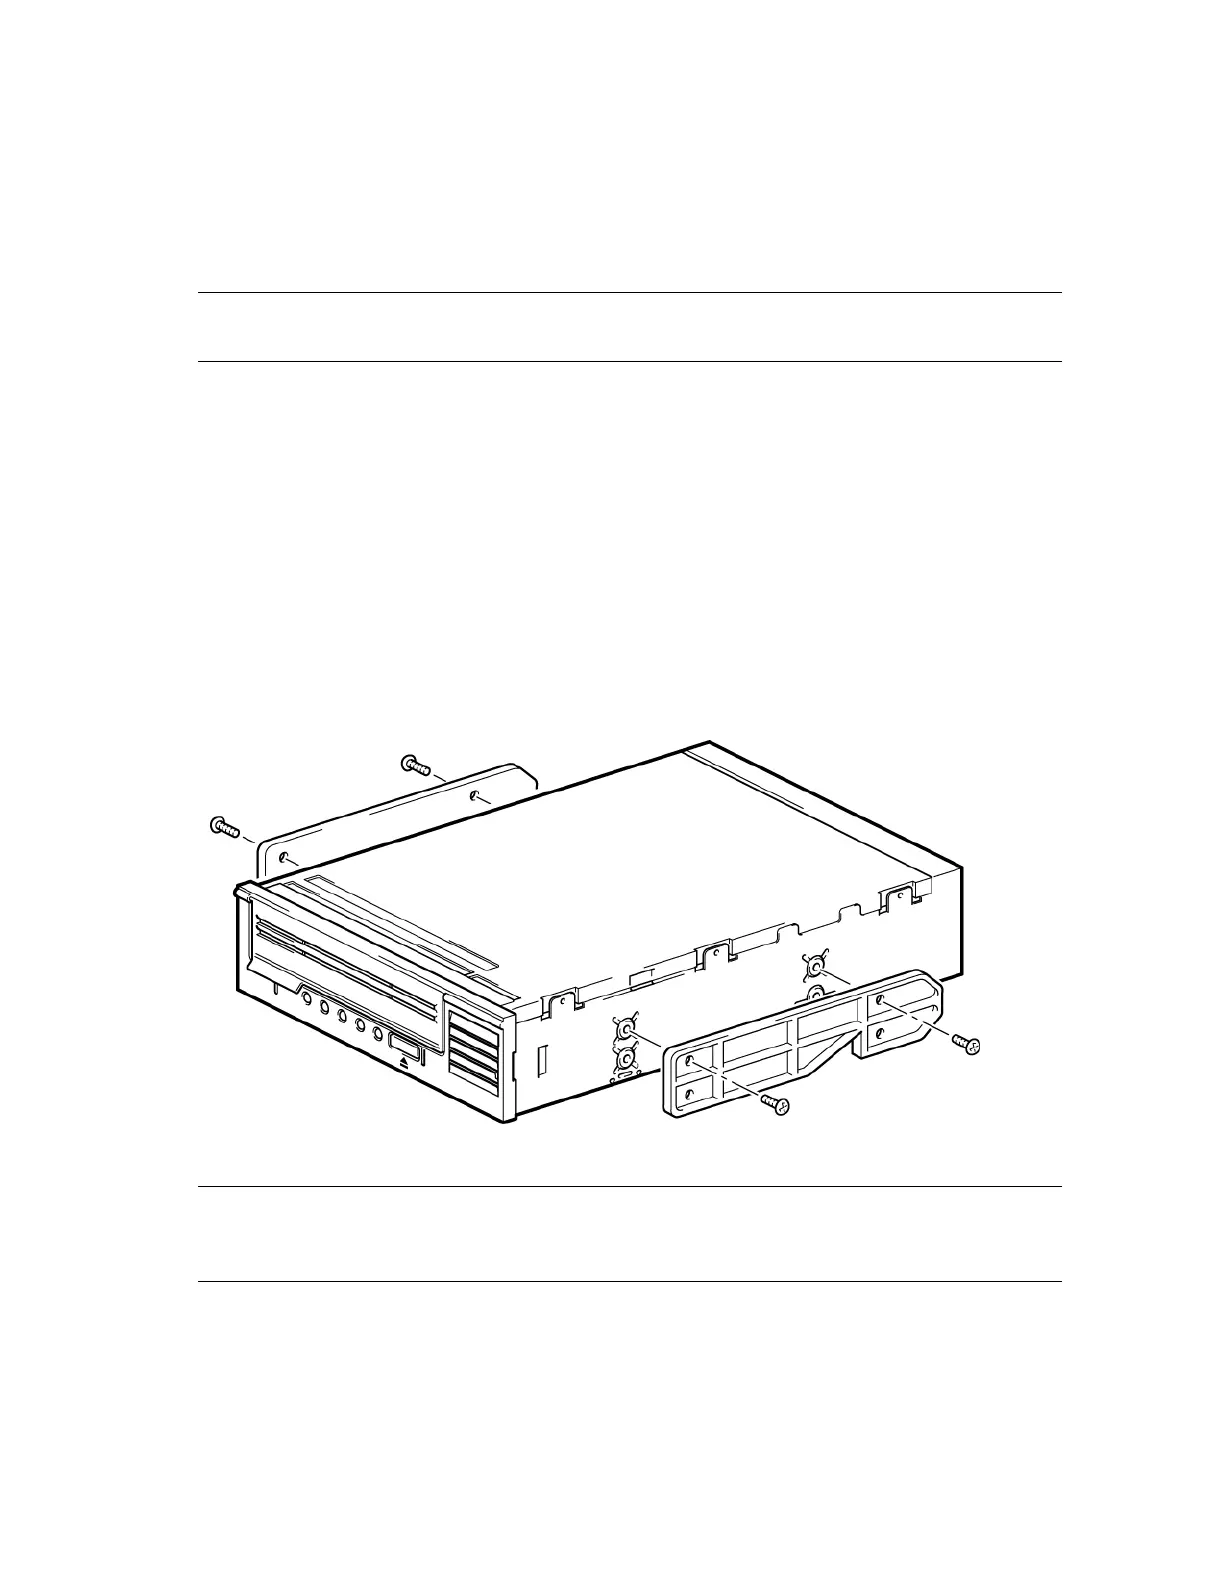
Mounting rails
Some servers require mounting rails. These may be metal or plastic rails attached to the server's
drive bay filler panel. Some servers have snap-on mounting rails attached to the filler panel. These
can be removed and attached to the tape drive with screws.
Use a regular Phillips screwdriver to attach the appropriate rails. Use the 4mm M3 screws provided
with the tape drive, in the screw pack labeled 'General Mounting Screws', as shown below.
If you cannot tighten the screws, use the washers provided in the pack.
Figure 1 Attaching mounting rails
CAUTION: Ensure you use the 4mm M3 screws provided. The rails may be attached to the filler
panel by screws of a different thread/size type and these should not be used. If the screws are too
long, they may penetrate the mechanism and void the warranty.
Mounting screws
Some servers use special locating screws without a mounting rail.
Use a T8 Torx screwdriver to attach the appropriate screws. Locate both screws lightly in position
before tightening, as shown in the following figure.
8 Installing an internal tape drive
 Loading...