Getting Started Guide 31
Chapter 3: Upgrading and routine care
Ä
CAUTION: To prevent information loss or an unresponsive system:
■ Shut down the computer before removing the hard drive from the hard drive bay. Do not
remove the hard drive while the computer is on, in the Sleep state, or in Hibernation.
■ If you are not sure whether the computer is off or in Hibernation, turn the computer on by
sliding the power switch. Then shut down the computer through the operating system.
Removing the hard drive
The computer hard drive is located on the bottom of the computer, beneath the removable
vanity cover. You need to remove the vanity cover to access the memory module slot, hard
drive, regulatory label, and other components.
To remove the hard drive:
1. Save your work and shut down the computer.
2. Disconnect all external devices connected to the computer.
3. Unplug the power cord from the AC outlet.
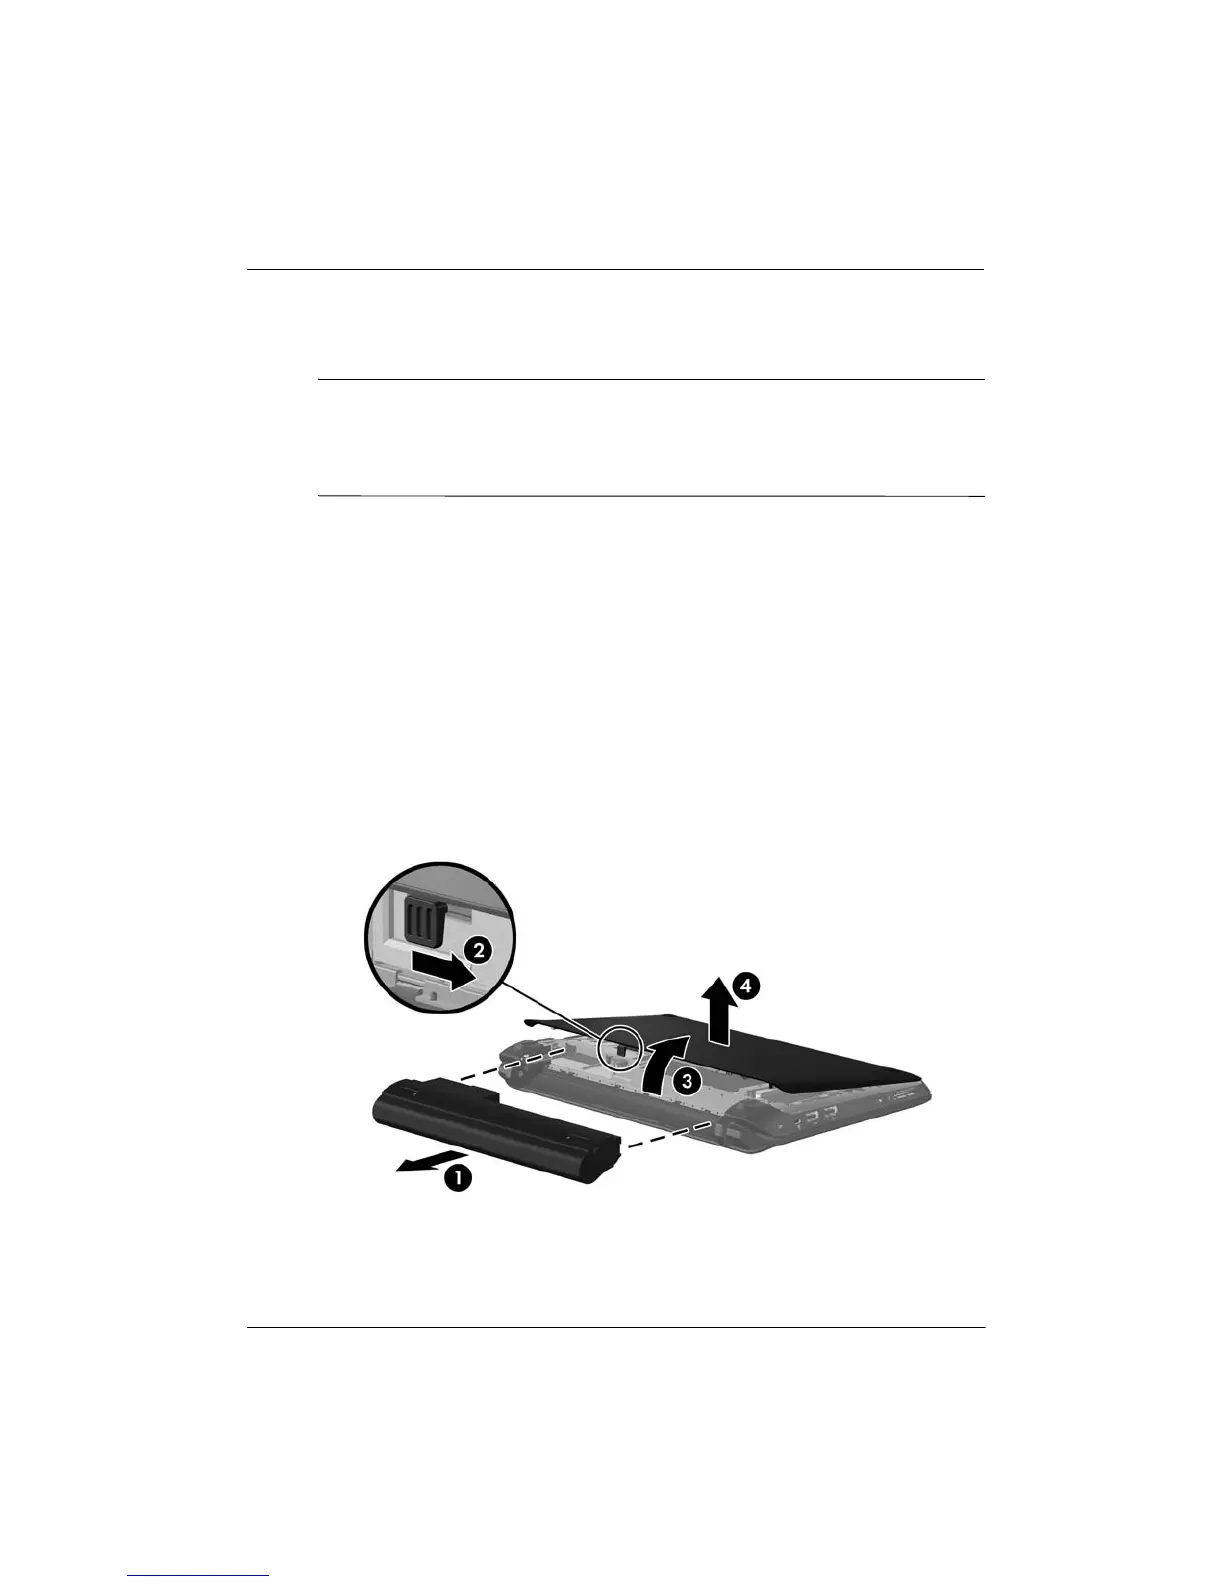
4. Remove the battery 1 from the computer.
5. Remove the vanity cover:
a. Slide the inner release latch 2 to loosen the vanity cover.
b. Lift the back edge 3 of the vanity cover, and then remove it from the computer 4.
6. Grasp the tab on the hard drive cable connector 1 and pull it up to disconnect the hard
drive cable from the system board.
Replacing or upgrading the hard drive
 Loading...