EasyManuals Logo
Home>HP>Laptop>Mini 210-3000

HP Mini 210-3000 User Manual

HP Mini 210-3000
101 pages
To Next Page IconTo Next Page
To Previous Page IconTo Previous Page
Page #68 background imageLoading...
Page #68 background image
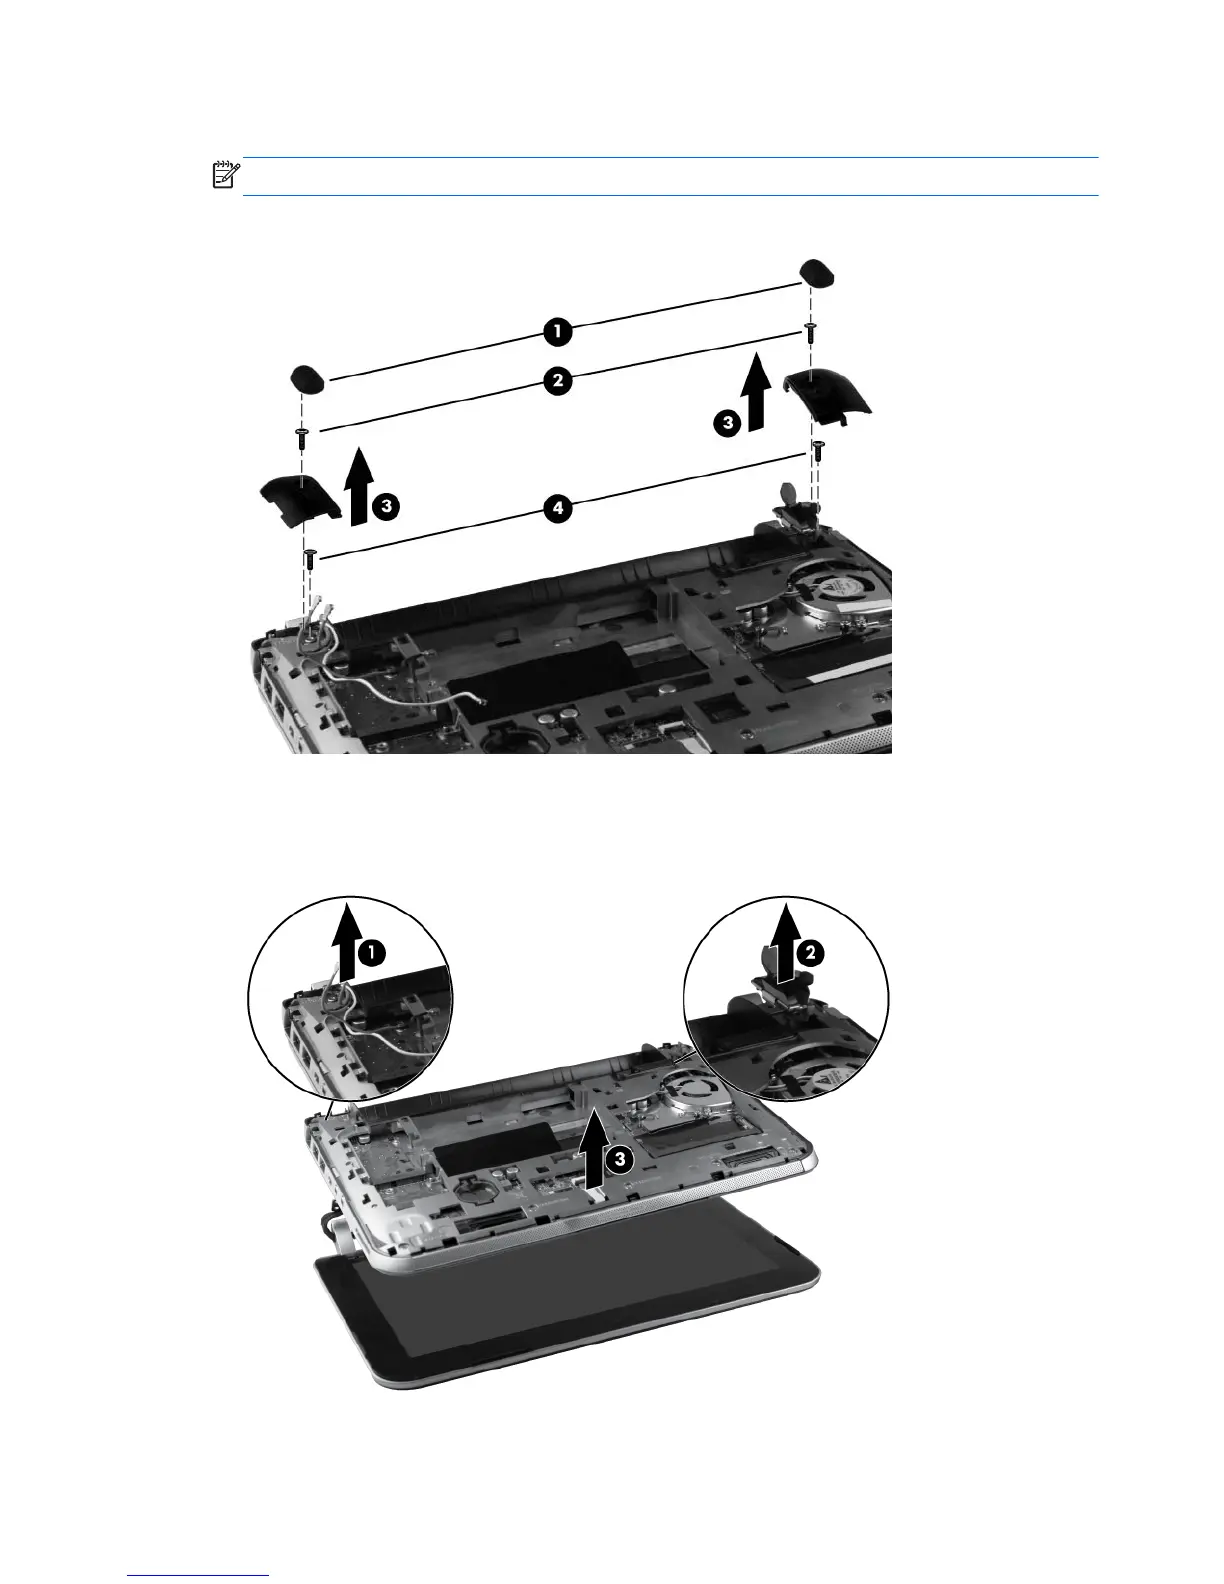
5. Remove the plastic rear corner covers (3).
NOTE: The rear corner covers are included in the Plastics Kit, spare part number 652308-001.
6. Remove the two Phillips PM2.0x5.0 screws (4), one beneath each rear corner cover.
7. Remove the WLAN antenna cables (1) from the routing channel.
8. Disconnect the display panel cable (2) from the system board.
9. Carefully lift the base enclosure away from the display assembly (3).
Reverse this procedure to reassemble and install the display assembly.
60 Chapter 4 Removal and replacement procedures

Table of Contents

Other manuals for HP Mini 210-3000

Questions and Answers:

Question and Answer IconNeed help?

Do you have a question about the HP Mini 210-3000 and is the answer not in the manual?

HP Mini 210-3000 Specifications

General IconGeneral
BrandHP
ModelMini 210-3000
CategoryLaptop
LanguageEnglish

Related product manuals