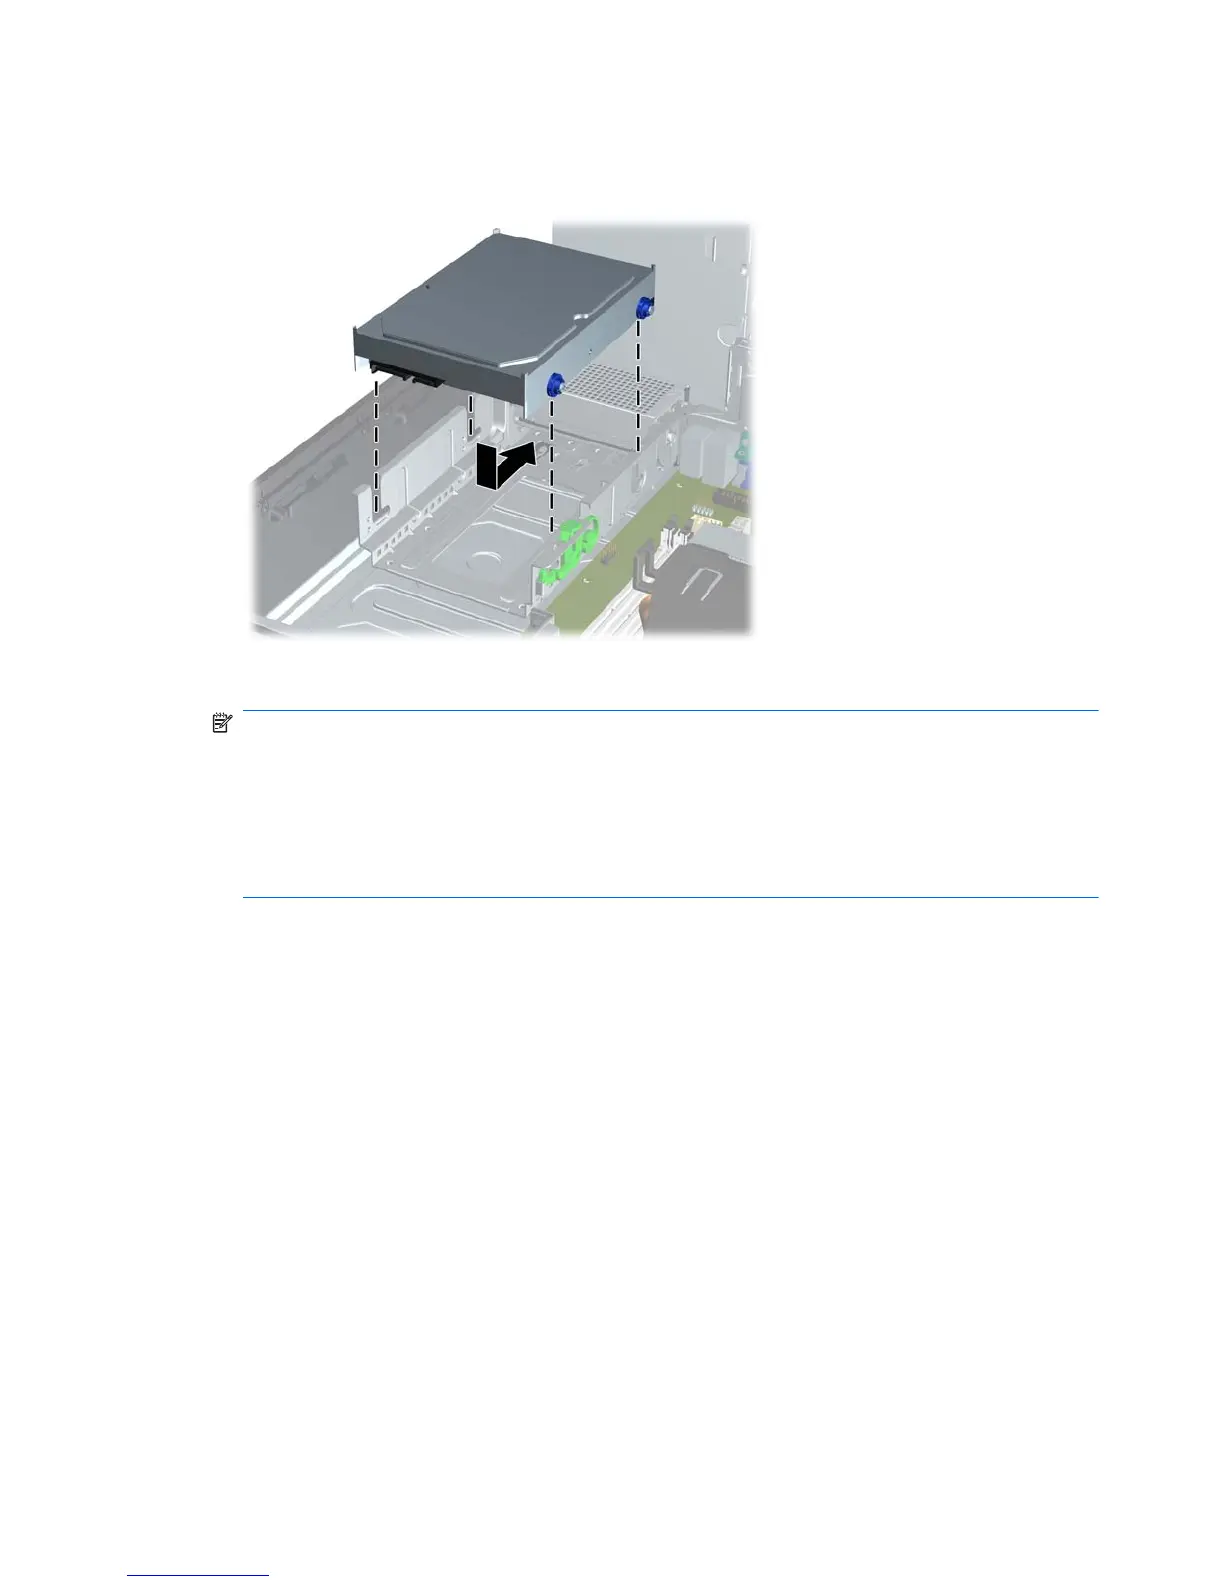
8. Align the guide screws with the slots on the chassis drive cage, press the hard drive down into
the bay, then slide it back until it stops and locks in place.
Figure 5-36 Installing the Hard Drive
9. Connect the power and data cables to the back of the hard drive.
NOTE: When replacing the primary hard drive, be sure to route the SATA and power cables
through the cable guide on the bottom of the chassis frame behind the hard drive.
If the system has only one SATA hard drive, the data cable must be connected to the dark blue
connector labeled SATA0 on the system board to avoid any hard drive performance problems. If
you are adding a second hard drive, connect the other end of the data cable to the next available
(unpopulated) SATA connector on the system board in the following order: SATA0, SATA1,
SATA2, SATA3.
10. Rotate the drive cage for external drives and the power supply down to their normal positions.
62 Chapter 5 Removal and Replacement Procedures
 Loading...