Configuring and Expanding Your Computer
Installing RAM Modules
Reference Guide 87
3. Turn the computer over, loosen the screws in the RAM expansion cover (the cover
retains the screws), and remove the cover.
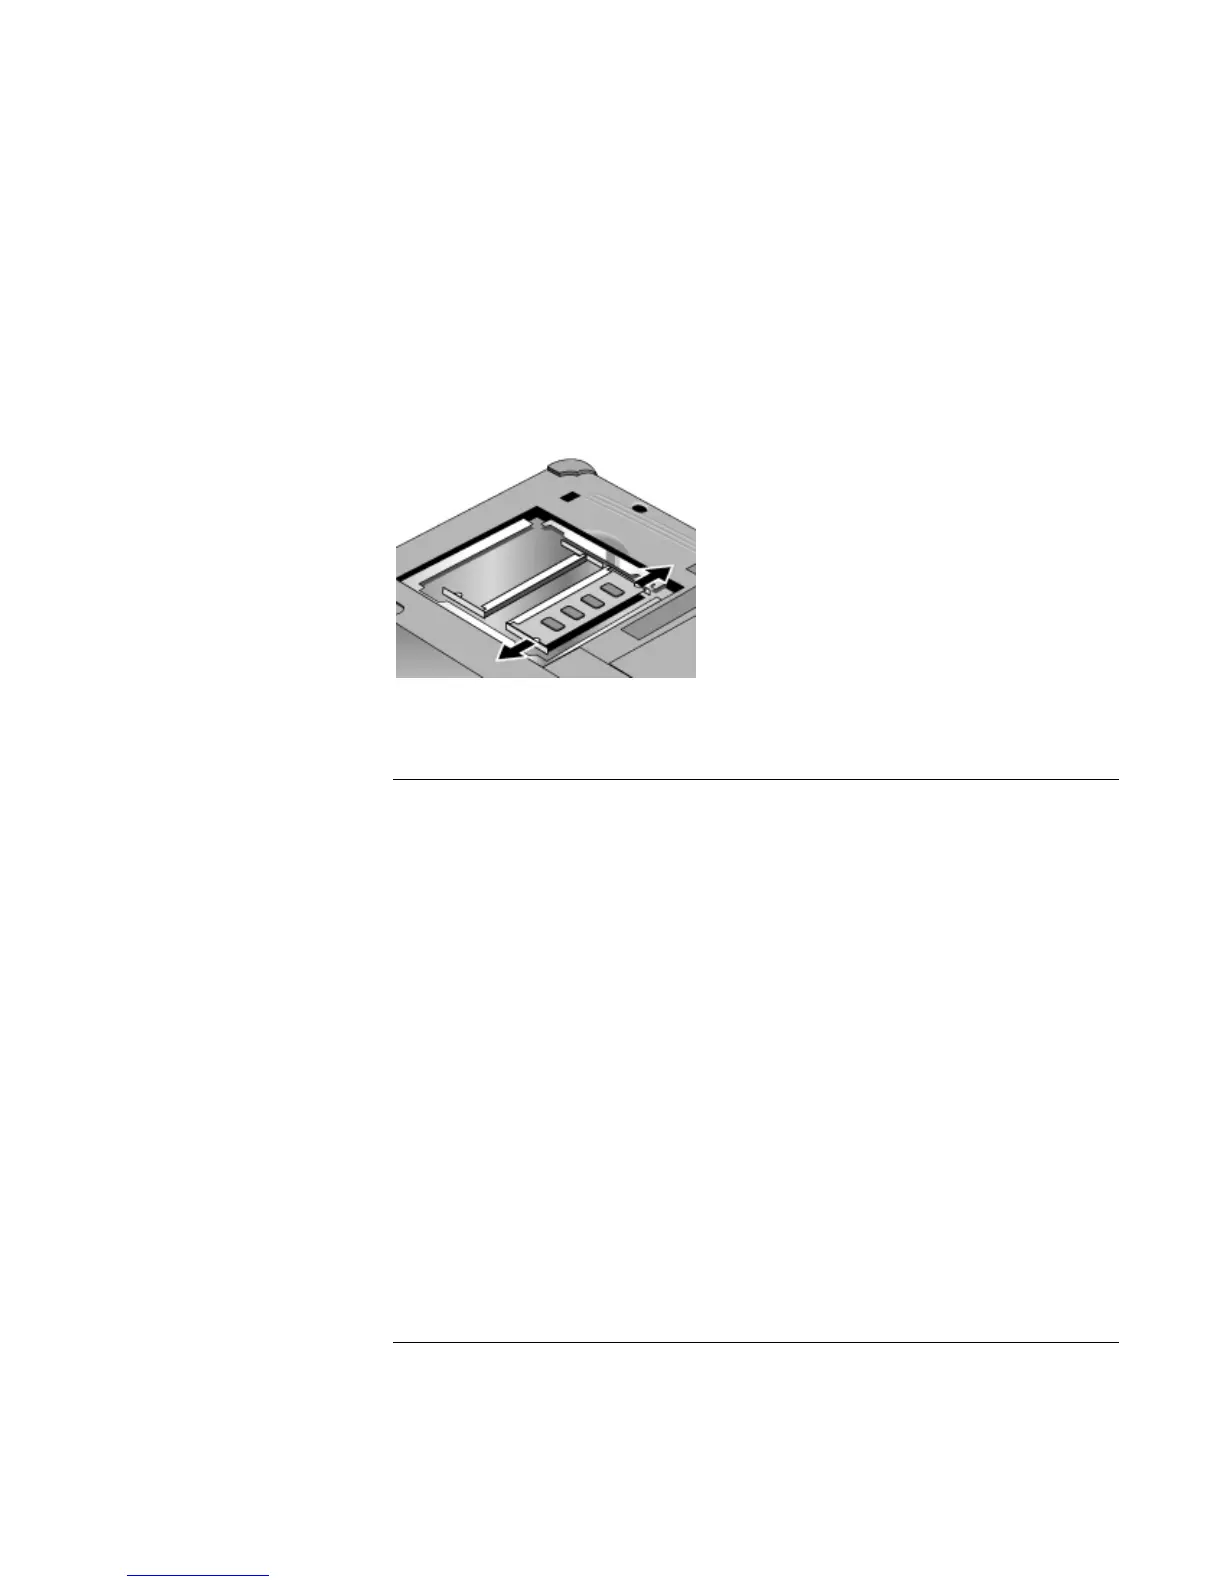
4. Release the two latches at the sides of the RAM expansion module by pushing them
gently outward (away from the sides of the module). When you release the latches,
the free edge of the module pops up.
5. Pull the module out of the connector.
6. Replace the RAM expansion module cover.
To replace the system RAM module
If needed, you can replace your computer’s system RAM module to increase the
computer’s RAM.
1. If your computer is docked, undock it.
2. Click Start, Shut Down, Shut down (Windows 98 or 2000) or Start, Turn Off
Computer, Turn Off (Windows XP).
3. Important: unplug the AC adapter, if present, and remove the battery.
4. Turn the computer over, loosen the screws in the system RAM cover (the cover
retains the screws), and remove the cover.
5. Release the two latches at the sides of the RAM module by pressing them outward, so
that the free edge of the module pops up.
6. Pull the module out of the connector.
7. Carefully insert the edge of the new RAM module into the connector at about a 30°
angle until it is fully seated. Then press down on both sides until the latches snap
closed.
8. Replace the cover.
9. Reinstall the battery.