4-2
Replacing Components
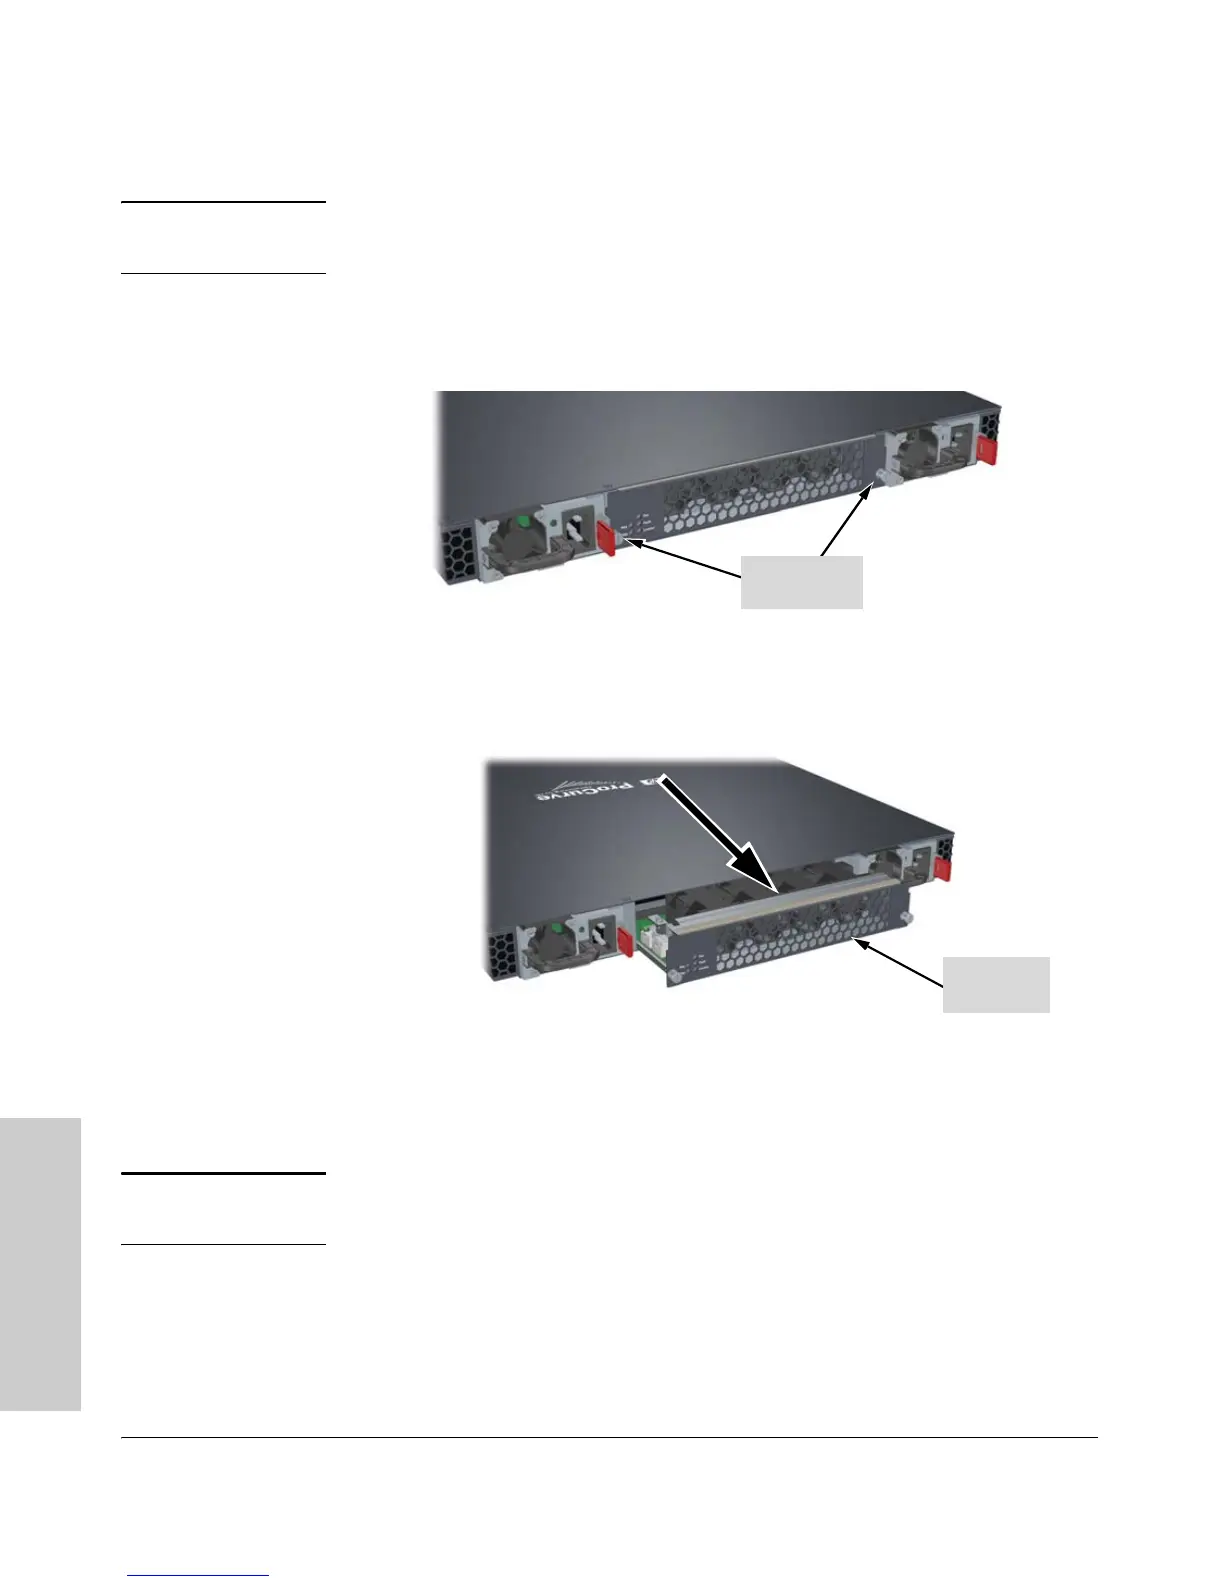
Replacing the fan tray assembly
Replacing Components
Caution If the fan assembly is replaced with the switch powered on, you will have
approximately three minutes before the switch overheats.
To replace a fan tray assembly:
1. Unscrew the retaining screws.
Figure 4-1. Fan tray assembly retaining screws
2. Holding the two retaining screws, pull the fan tray assembly straight out.
Figure 4-2. Removing the fan tray assembly
3. Remove the new fan tray assembly from it’s packaging.
Note Before installing the new fan tray assembly be sure the air flow direction is
the same as the fan tray assembly being replaced.
4. Holding the new fan tray assembly by the two retaining screws insert the
new fan tray assembly fully. The face plate of the fan tray will be flush
with the back face of the switch.
5. Engage the retaining screws and tighten. Be sure to not over tighten the
screws.
Retaining
screw
Fan tray
assembly
 Loading...