Front I/O assembly
1. Prepare the computer for disassembly (Preparation for disassembly on page 19).
2. Remove the access panel (Access panel on page 20).
3. Remove the front bezel (Front bezel on page 21).
4. Rotate the drive cage to its upright position (Rotating the drive cage on page 32).
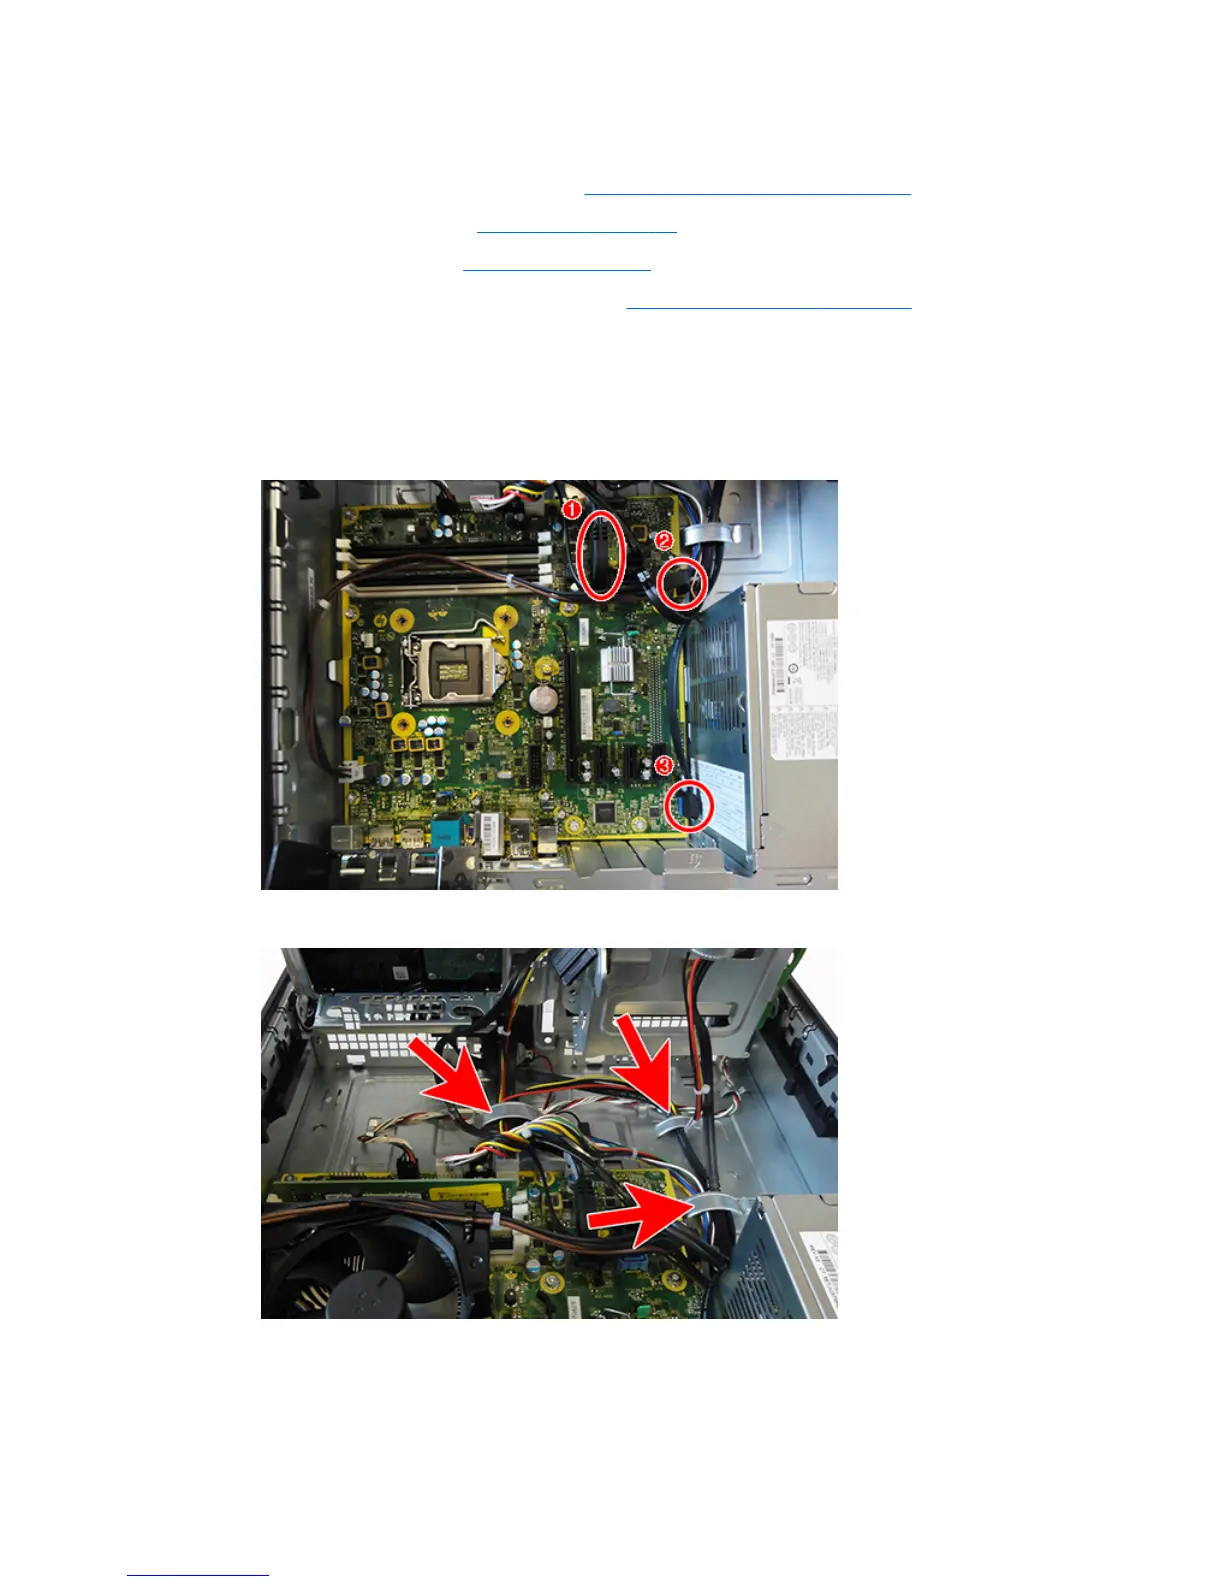
5. Disconnect the cables from the system board as follows:
(1): Blue connector labeled FRONT USB 3.0
(2): Yellow connector labeled FRONT USB
(3): Blue connector labeled FRONT AUD
6. Remove the cables from the cable clips under the drive cage.
7. Remove the Torx T15 screw (1) that secures the assembly to the front of the chassis.
Front I/O assembly 51
 Loading...